Toolbar and Shortcuts
Toolbar
Lens Studio's toolbar is made of up of a collection of tools that allow you to configure your project's info, publish your Lens, edit objects in your scene, control the Scene panel's camera and preview your Lens from within Snapchat.
![]()
Publish Lens Tool
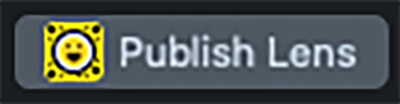
The Publish Lens button lets you publish your Lens to Snapchat. The dropdown next to the Publish Lens button also gives you access to the My Lenses portal where you can manage your already published Lenses. For more information on submitting your Lens, follow the Submitting Your Lens guide.
Project Info Tool
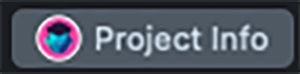
The Project Info button allows you to configure project info associated with the Lens like the icon, Lens name and the main hint. For more information on project info, please refer to the Configuring Project Info Guide.
Lens Size Tool
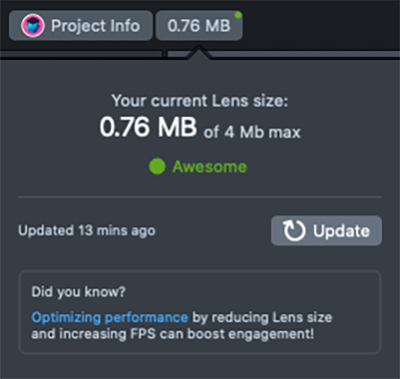
The Lens Size tools shows you the current size of your project. Check out the Performance and Optimization guide for more information on reducing your Lens size.
Camera Panning Tool

When enabled, clicking and dragging with the Left Mouse button will pan the camera in the Scene panel. For more information on moving the camera, refer to the below camera movement shortcuts.
Selection Tool (Q)

The selection tool allows you to select any object in the scene. Selecting an object will highlight it in the Scene panel and list out the components of the object in the Inspector panel.
Move Tool (W)

The move tool allows you to select an object in the scene and move it. Selecting an object will highlight it in the Scene panel with a movement widget. Dragging the arrows will move the object along the X, Y or Z axis. Dragging the center blue cube will move the object freely along all axes. The coordinate space of movement can be selected using the Coordinate Space dropdown.
Rotate Tool (R)

The rotate tool allows you to select an object in the scene and rotate it. Selecting an object will highlight it in the Scene panel with a rotate widget. Dragging the inner rings will rotate the object along the X, Y or Z axis. Dragging the outer blue ring will rotate the object freely along all axes. The coordinate space of rotation can be selected using the Coordinate Space dropdown.
Scale Tool (E)

The scale tool allows you to select an object in the scene and scale it. Selecting an object will highlight it in the Scene panel with a scale widget. Dragging the outer boxes will scale the object along the X, Y or Z axis. Dragging the inner blue box will scale the object freely along all axes.
Frame Tool (T)

The frame tool allows you to select an object in the scene and scale it using a rectangular frame. Selecting an object will highlight it in the Scene panel with a frame widget. Dragging the corners of the frame will scale the object to the size of the frame. To change the axis of scaling, move the camera and the frame will automatically adjust.
Unified Tool (Y)

The unified tool gives you move, rotate and scale controls all in one widget in the 3D Scene panel. The controls work in the same way as the above Move Tool, Rotate Tool and Scale Tool but are unified together.
Coordinate Space Tool

This dropdown allows you to select which coordinate space you are moving or rotating objects in. The widgets for the move and rotate tool will update when the coordinate space is changed (World, Parent and Local). Note that the selectable Coordinate Space dropdown only applies to the Move and Rotate tool.
Camera Zoom to Selected (F)

Zooms the camera in or out on the selected object.
Camera Zoom to All (A)

Repositions the camera to include all objects in the scene.
Isolate Selection Tool (⌥ + Q / Alt + Q)

The isolate selection tool will isolate the selected object(s) in the Scene panel so that it is the only objects that you see.
2D Scene - Show / Hide Snapchat

Shows and hides a representation of the Snapchat UI in the 2D Scene. This tool only appears when the 2D Scene is active.
2D Scene - Show / Hide Candide

When using a face tool in the 2D scene, this will toggle on and off the face wireframe for reference. This tool only appears when the 2D Scene is active.
2D Scene - Enable / Disable Snapping

When enabled, the 2D element will Snap to elements in the 2D scene. For face tools, this includes the eyes and the mouth. For Screen Image, it includes the edges of the screen. This tool only appears when the 2D Scene is active.
2D Scene - Reset View

This will reset the 2D Scene's view to its default. This tool only appears when the 2D Scene is active.
Night Mode

This will makes the Lens Studio UI darker.
Add New Panel
Using this window you can add a panel or change the layout to reset to default layout.
My Lenses
Using this will open the My Lenses window.
Pair Your Device

The Pair Your Device button allows you to sync your Lens to Snapchat for previewing. For more information on how to preview Lenses, please refer to the Pairing to Snapchat guide.
Camera Movement
| Mac Short Cut | Windows Short Cut | |
| Camera Pan | ⌥ + Middle Click | Alt + Middle Click |
| Camera Rotate | ⌥ + Middle Click | Alt + Left Click |
| Camera Zoom | ⌥ + Middle Click + Drag or Scroll Wheel | Alt + Right Click + Drag or Scroll Wheel |
| Camera Zoom to Selected | F | F |
| Camera Zoom to All | A | A |
Short Cuts
| Mac Short Cut | Windows Short Cut | |
| Selection Tool | Q | Q |
| Move Tool | W | W |
| Rotation Tool | E | E |
| Scale Tool | R | R |
| Frame Tool | T | T |
| Unified Tool | Y | Y |
| Isolate Selection Tool | ⌥ + Q | Alt + Q |
| New Project | ⌘N | Ctrl + N |
| Open Project | ⌘O | Ctrl + O |
| Close to Home | ⌘W | Ctrl + W |
| Save Project | ⌘S | Ctrl + S |
| Save Project As | ⇧⌘S | Ctrl + Shift + S |
| Import | ⇧⌘I | Ctrl + Shift + I |
| Undo | ⌘Z | Ctrl + Z |
| Redo | �⇧⌘Z | Ctrl + Shift + Z |
| Duplicate | ⌘D | Ctrl + D |
| Minimize | ⌘M | Ctrl + M |