Digital Goods Carousel Template
Digital Goods for Lenses are no longer supported, as Tokens are being discontinued. Please see this help article for more details.
The carousel example project demonstrates an end-to-end user flow with a carousel storefront model. You can replace your own digital goods content in the carousel and Lens without doing any scripting.
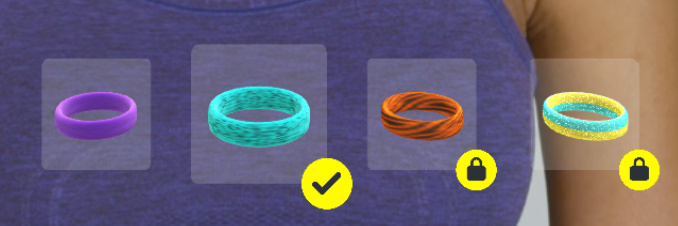
In this example Lens, Snapchatters can swipe through a carousel to choose a sweatband.
The Lens includes one default sweatband and four locked sweatbands, which are durable digital goods.
This example Lens does not include consumables. For a consumable good example, refer to the Digital Goods Blueprint template.
Add Durable Goods to the Carousel
To update the carousel with your own durable digital goods with no coding required, follow these steps:
Add digital goods to the Digital Goods Configurator
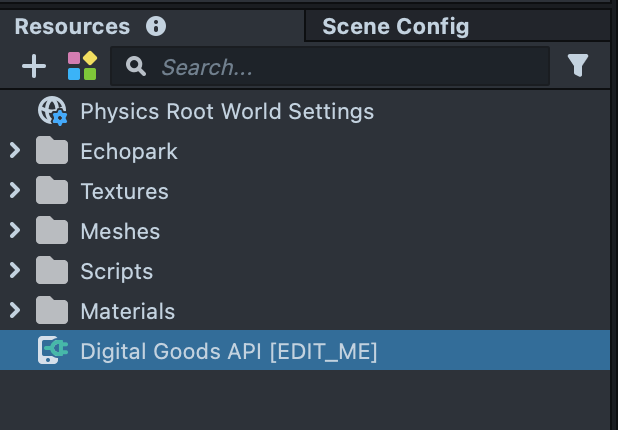
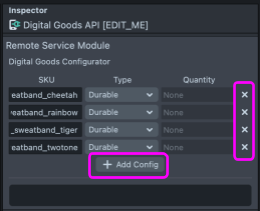
In the Resources Panel, click on the Digital Goods API [EDIT_ME] resource. In the Inspector panel, delete the existing items in the Digital Goods Configurator by clicking the “x” for each row. Click + Add Config to add a row for each of your digital goods. Enter the SKU and Type (durable) for each of your digital goods. Save your project.
Add digital goods content to the Scene
In this example Lens, the content for each digital good is the sweatband worn by the Snapchatter. This is the content that the user unlocks from the carousel.
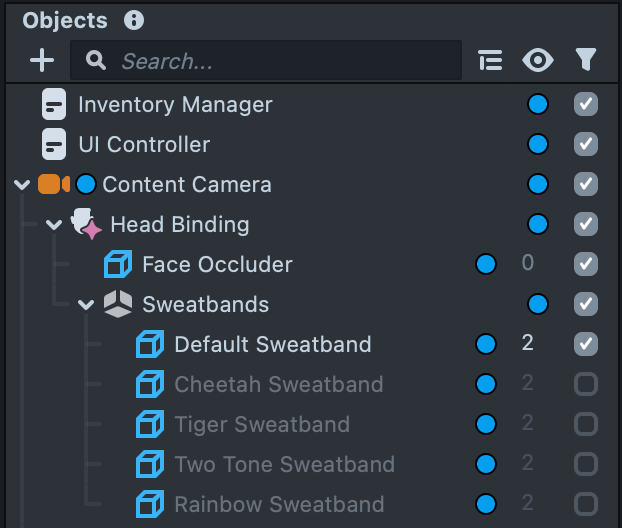
The sweatband scene objects can be found under the Content Camera, which is a perspective camera. To add your own content, first delete the Sweatbands and Head Binding objects if you don’t need them.
Next, add your content that is associated with your digital goods to the scene (e.g,. accessories, effects, etc.) under the Content Camera. Depending on the type of content you are using, you may need to change the camera type on the Content Camera, i.e., perspective for 3D content, orthographic for 2D content.
Enable the scene object for the default (free) item(s) and disable the others. In the carousel example project, there is one default purple sweatband and four locked sweatbands.
Make sure all content scene objects are on the same render layer as the Content Camera render layer (Default). Do not change the Content Camera Render Target and Render Order. This configuration is needed to render the Live and Capture Mode UI.

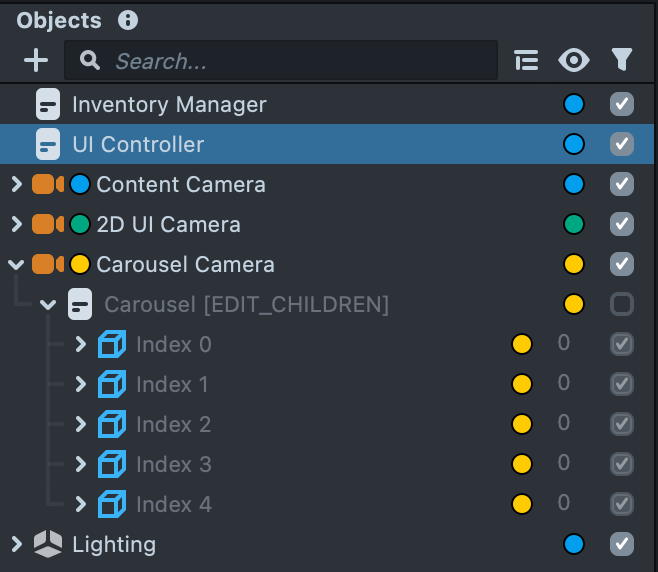
Add digital goods to the Carousel
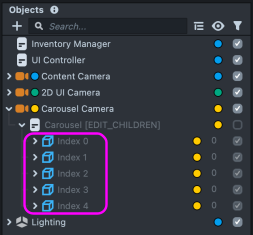
Under the Carousel Camera > Carousel scene object, check that that number of Index child scene objects matches the digital goods content (both default and locked) in your Lens. Delete any excess Index objects, or copy and paste an Index object to create additional Indices.
To let Snapchatter unlock all Lens content at once, use the same SKU for every locked carousel index.
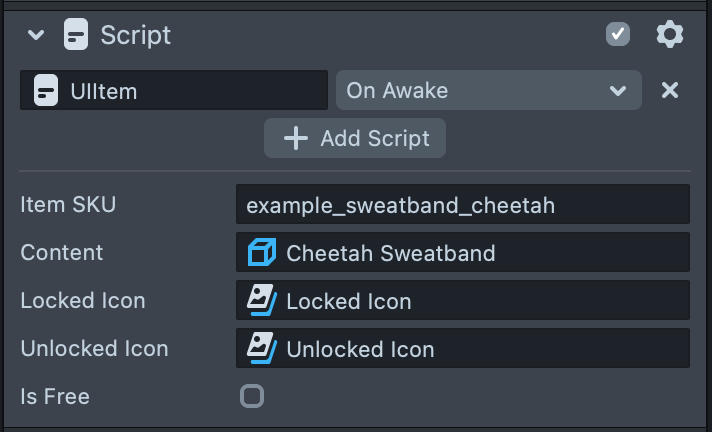
Each Index object includes a UIItem script component. The UIItem links a digital good’s SKU, carousel index, and content. On each Index object, populate the UIItem script inputs in the Inspector panel:
- Item SKU: Enter the SKU associated with the carousel index.
- For locked items, the SKU must match a SKU entered in the Digital Goods Configurator. For default (free) items, put any unique string.
- Content: Add the Lens content scene object associated with the carousel index.
- Locked Icon (required): Add the Locked Icon object from under the Index object.
- Unlocked Icon (optional): Add the Unlocked Icon from under the Index object.
- Is Free: Check off if the item is unlocked by default.
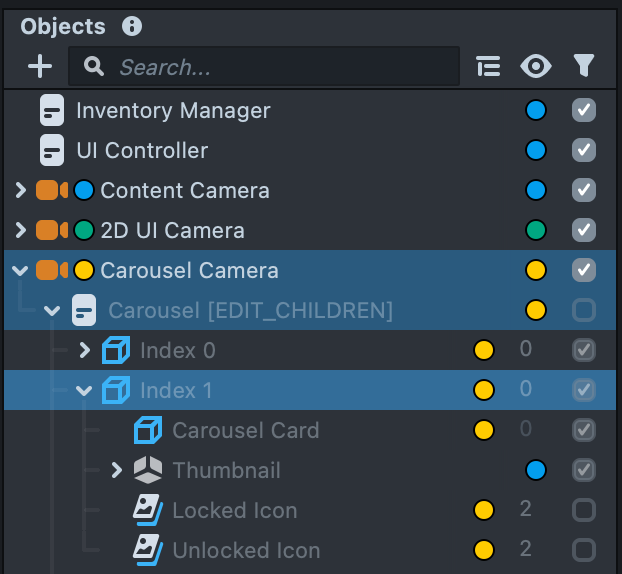
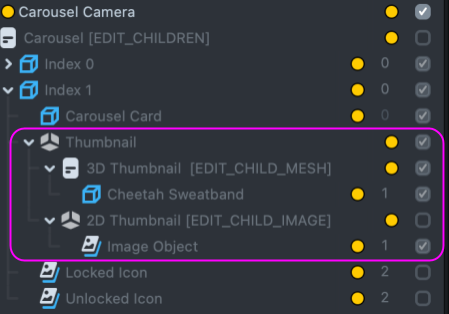
In the carousel UI, you can represent each item with either a 2D image thumbnail or 3D mesh thumbnail. This thumbnail will appear within the Carousel Card for each index.
In this example project, each sweatband is represented by a 3D thumbnail, which contains the sweatband mesh.
Add your own thumbnail for each of your carousel Index objects. Expand each Index object under the Carousel scene object. Under Thumbnail, enable either the 3D Thumbnail [EDIT_CHILD_MESH] or 2D Thumbnail [EDIT_CHILD_IMAGE] scene object and disable the other. Replace its child scene object with your own asset. Refresh the preview panel.
Once your thumbnails are populated, you may need to adjust their transforms to make sure each thumbnail fits within its respective Carousel Card.
Add UI Items to the UI Controller input
The UI Controller scene object includes a UIController script component that manages all of the UI elements. It also includes an input for UI Items. Check that there is a Value for each carousel index and populate each value with the corresponding Index UIItem script component (e.g., Value 0 = Index 0.Script - UIItem). If needed, add or delete values to match the number of indices in the carousel.
Make sure UIItem script components are added to the UI Controller in the order they appear in the carousel index hierarchy, i.e., Index 0, Index 1, Index 2, etc.
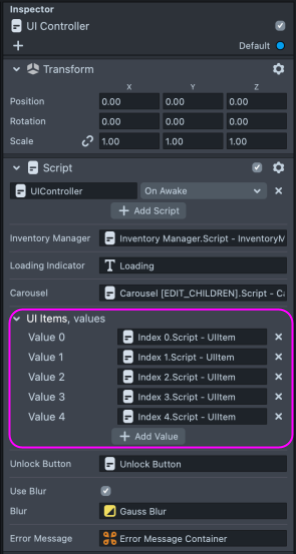
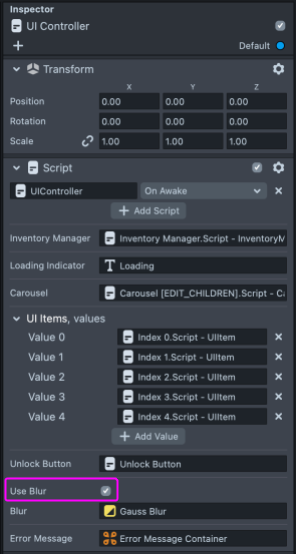
Enable or disable blur in the UI Controller
In this example project, a blur is enabled on locked sweatbands to protect their value. The blur is disabled while the purchase tray is open to let Snapchatters preview the sweatband. If you would like to use this blur behavior, keep Use Blur checked off in the UI Controller. If not, uncheck Use Blur.
Project Structure & Scripts
This section takes a closer look at how the carousel example project is structured, as illustrated in the diagram below. The left side is common to all Lenses with digital goods, using the provided universal scripts. The right side is Lens-specific.

Digital Goods Universal Scripts
DigitalGoodsAPIModule.js, EventModule.js, InventoryManager.js
Together, these scripts handle the digital goods logic common to all Lenses. They are responsible for making API calls, handling responses, and syncing inventory on Lens start. InventoryManager.js provides global functions and sync events that are used by UIController.js to update the UI based on inventory information.
Refer to the Digital Goods API documentation > Scripts section for more details.
Project-Specific Scripts
The following scripts are specific to this carousel example project. They Integrate digital goods logic with UI elements.
UIController.js
This script displays UI based on information from the InventoryManager. First, it listens for sync events from the InventoryManager. If inventory syncs successfully on Lens start, UIController.js enables the carousel. It starts the carousel on the index for the last worn sweatband from the previous Lens session, which is stored in local storage. If inventory syncs unsuccessfully, UIController.js enables an error message. It also calls purchaseItem( ) from the InventoryManager global API when Unlock is pressed.
UIItem.js
This script links a digital good SKU with its carousel index and content. UIController.js takes an array of UIItem.js script components as an input. As the carousel is navigated by the Snapchatter, the UIController.js enables / disables UI based on the carousel index and UIItem array index. For example, if the carousel is on Index 2, UIController.js enables the content for the UIItems[2].
Generic UI Helper Scripts
The following scripts are not specific to digital goods Lenses.
Carousel3D.js
This script builds the carousel and handles touch input as the carousel is swiped..
UIButton.js
This script is attached to the Unlock Button scene object under the 2D UI Camera. It controls the appearance of the button and triggers responses when the button is pressed. In this example Lens, the script calls onButtonPressUp from UIController.js when the Unlock button is pressed and released.
UIPanel.js
This script is attached to Button Container, which is the parent of the Unlock Button. It handles touch events for child objects, like the Unlock Button.
AlignChildrenMeshes.js
This script is used in the carousel to align children objects of a parent object. In this Lens, the script aligns each sweatband thumbnail to its carousel card.
MakeMaterialInvisible.js
This script makes the carousel item box material visible in the Lens Studio Scene for debugging purposes but invisible in the actual Lens.
ButtonPosition.js
This script sets the position of the 2D “Unlock” button relative to the 3D carousel so that they aren’t too far apart or overlapping on devices of different screen resolutions.