Tracking Scope
Introduction
What is "Tracking Scope"? Think of it as a capability that lets you specify where your effect should look for objects to track.
By default, effects typically track objects (like a Body, Head, or Face Mesh) using the live feed from the device's camera (often referred to as the Device Camera Texture).
But what if you want to apply an effect to a person in a photo or video from your Camera Roll, or perhaps use input from a Dual Camera feature? This is where Tracking Scope is essential. It allows you to direct the effect to track objects within these alternative image or video sources instead of the live camera feed.
You can add Tracking Scope as an asset via the Assets Browser, making it available for various components and other assets.
...and others!
Let's see how you can use it!
Using Tracking Scope with Face Inset
![]()
Let's take the Face Inset and enhance it by enabling it to work with photos and videos selected from the Camera Roll!
Our goal is to adjust the Face Inset so it tracks a mouth within a photo or video chosen by the user (via Media Picker Texture), instead of tracking from the live camera feed (Device Camera Texture).
To do this requires just three main actions:
-
On the
Face Insetcomponent, set itsTextureproperty to use your Media Picker Texture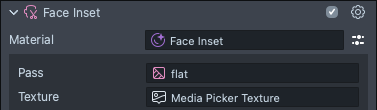
-
Select the
Tracking Scopefield of sameFace Insetcomponent. In the asset selector, press the+button to add theTracking Scope Asset. -
Finally, Within the Tracking Scope's properties, set its
Textureproperty to use the sameMedia Picker Textureas in step 1.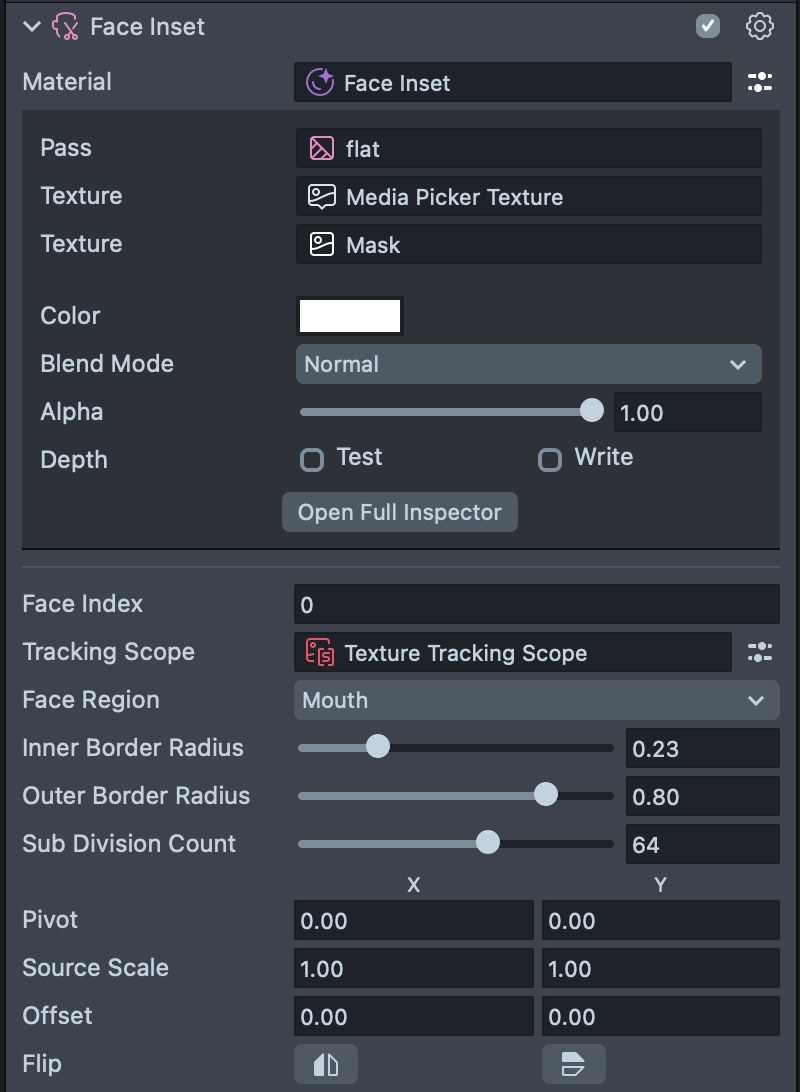
Now, the Face Inset effect will track the mouth from the photo or video you select from your Camera Roll via the Media Picker Texture!
Adding Tracking Scope to Media Picker Texture
In other cases, you may want to apply the AR effect on the Media Picker Texture itself. For example, you might want to add a Face Mask on the user's camera roll.
-
Like before, you can add the Face Mask and change its
Tracking Scopeto use theMedia Picker Texture.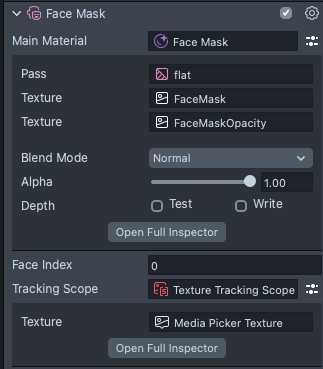
-
Next, we will display the
Media Picker Texturefor the Face Mask to be applied on top of. In theScene Hierarchypanel, press+, and selectScreen Image.
-
Finally, we will display the Face Mask after the Screen Image. To do this, in the
Asset Browserpanel, selectSceneand in theInspectorpanel: drag theOrthographic Camera(which is displaying the Screen Image) above theCamera Object(which is displaying the Face Mask) in theRender Order Config.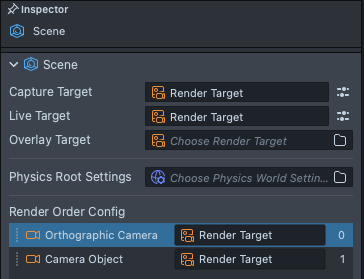
Using Cameras for More Control
Since Tracking Scopes' data are relative to the texture, if you start moving the texture around, the Tracking Scope won't know that the underlying texture has moved.
To solve this, you can render the face effects on a separate camera (so the source texture and the tracking data are relative), then display the result of that camera anywhere you want!
This is similar to how if you move the Device Camera Texture on the screen, the AR effects won't line up to it.
![]()
Setting up a Separate Camera
First let's set up a seperate camera that will render the effects on our media picker texture.
-
In the
Objectspanel, press+, and add a newCamerato your Lens.
-
With the
Cameraobject selected, in theInspectorpanel, set the camera to be on, and view a differentRender Layerso our AR effects won't be seen by multiple cameras simultaenously.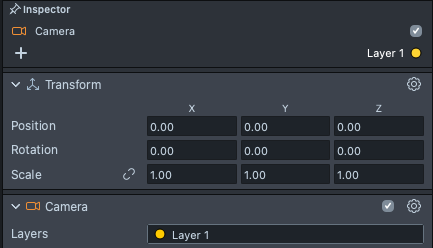
-
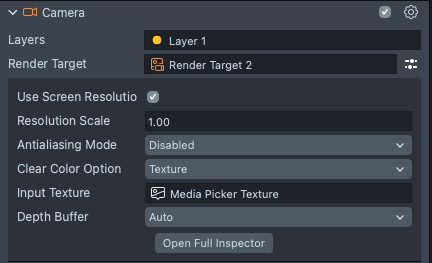
Set the camera to target its result to a seperate Render Target--in other words target its result to different texture which we can display in our final Lens. Select the
Render Targetfield, and in the pop-up, press+>Render Target.
-
Next, we can set the newly added
Render Targetto display the selectedMedia Picker Texture. Open the inline inspector next to theRender Targetfield:- Set the
Clear Color Optiondrop down toTexture. - In the
Input Texturefield selectMedia Picker Texture. - Make sure
Use Screen Resolutionis enabled to ensure that tracking aligns properly.
- Set the
You can make this Camera into a prefab (Right-click > Save as Prefab) so that you can edit this setup as a separate scene (double-click on the prefab in the Asset Browser panel, to modify only the prefab).
![]()
Displaying the Separate camera
Now, we can display the result of this camera into our final Lens.
-
Create a
Screen Imageto display the Render Target we created earlier. To do this, in theScene Hierarchypanel, press the+and chooseScreen Image.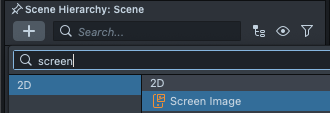
-
With the newly added
Screen Image, in theInspectorpanel set theTexturefield to be the Render Target we created earlier.
You should now see a media picker selector in the Preview panel. You can select any image, and it should display in your Lens!
You can double-click on the Screen Image object to open the 2D Editor panel, and move your texture around.
![]()
Adding Effects to the Separate Camera.
Finally, we can apply our affects separately in this camera.
-
Like before, we can add a
Face Maskand set itsTracking Scopeto point to theMedia Picker Texture.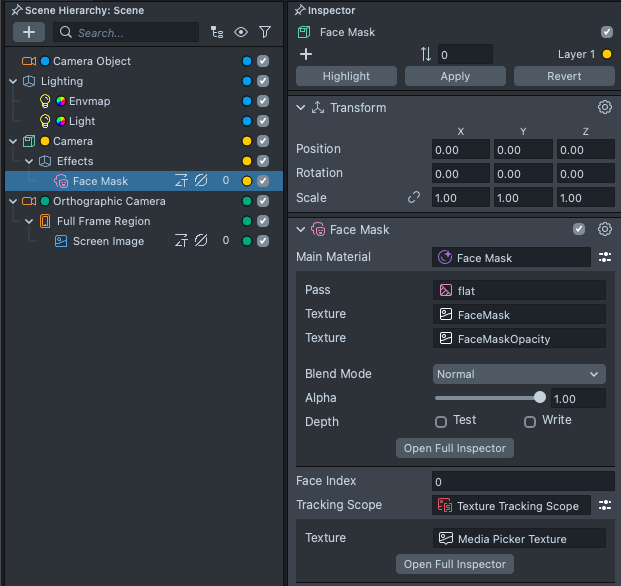
-
Since our camera is rendering a different layer, make sure to set your
Face Maskis on the same layer. In other words, the colored dots in theScene Hierarchypanel matches.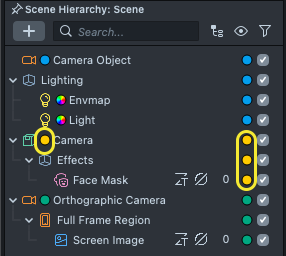
Changing the Separate Camera's characteristic
In some AR effects, the camera's characteristics need to be changed to match the texture that it's rendering on top off.
For example: Since Face Mesh is a 3D effect, the camera needs to have the same FOV as the input texture.
To do this: select the camera, and in the Device Properties Source field, select the same Tracking Scope as the one that you used in your effect.
![]()
Next Steps
The Tracking Scope can also be applied to other textures. Here are some ideas you can try exploring:
- Use the
Tracking Scopeon a video texture - Use the
Tracking Scopeon theReverse Camera Textureto apply different face effects on the front and back camera simultaenously. - You can use multiple
Tracking Scopesimultaenously. For example: you can apply different effects simultaenously on the front camera, rear camera, and a media picker texture.
Beyond using Tracking Scope to track different sources, you can also use Tracking Scope to point multiple trackers to the same context. For example to ensure that an affect is applied to the same person (same face and body). Take a look at the Person Tracking Scope Guide to learn more!