Style Generator
Take your Lens visuals to the next level with Style Generator - the ultimate tool for full-screen stylization. It works across the entire frame, transforming people, objects, pets, and backgrounds into stunning new styles.
Style Generator gives creators full control to reimagine their visual world and achieve high-quality, diverse effects with ease. Create anything from realistic looks—with refined textures, colors, and lighting—to bold artistic transformations, including 2D/3D graphics, vector styles, anime, pop art, and more.
Getting Started
Launching Style Generator
-
Navigate to the
Lens Studio AIoption in the top right corner of the Lens Studio. Then, click on theGenAI Home Pagetab in the sidebar.
-
On the
GenAI Home Pagetab, you may need to scroll down to find Style Generator.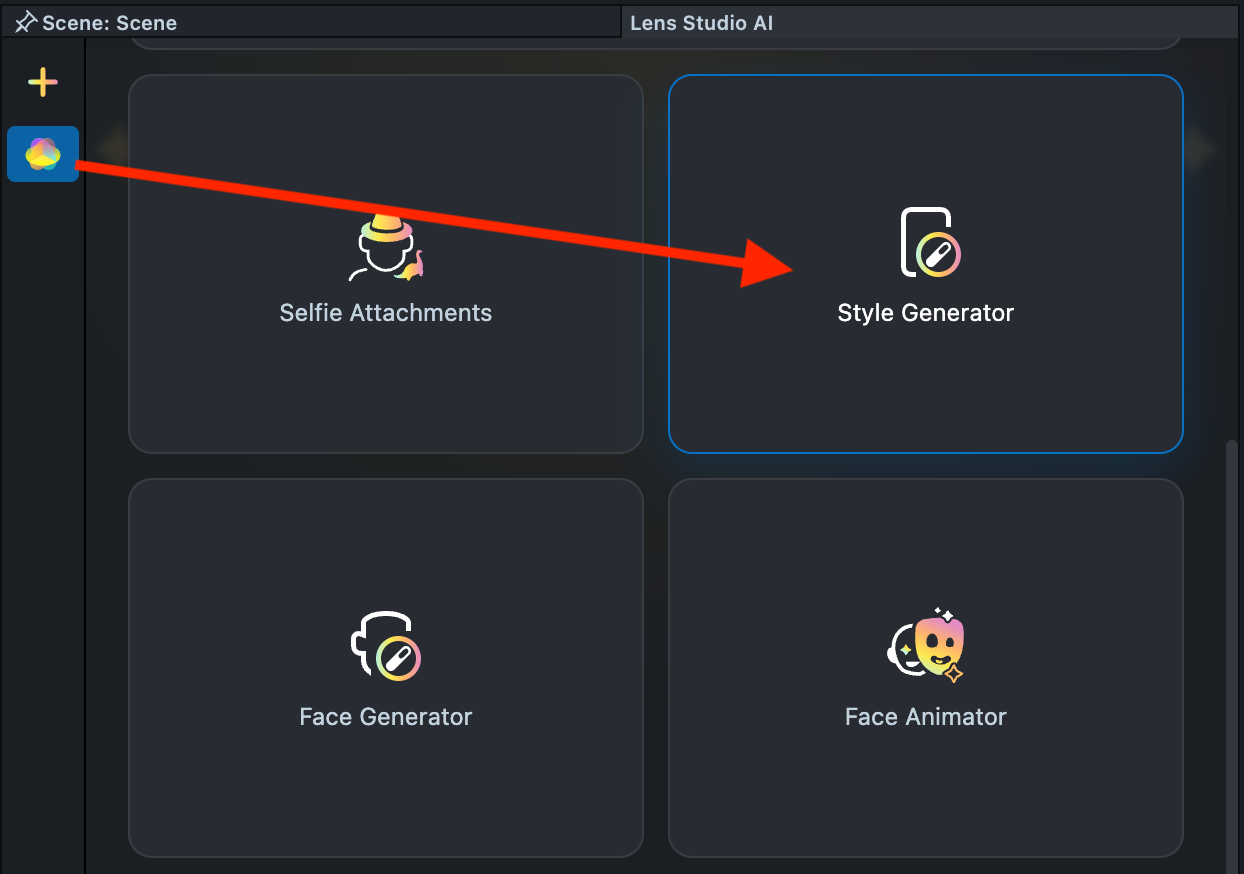
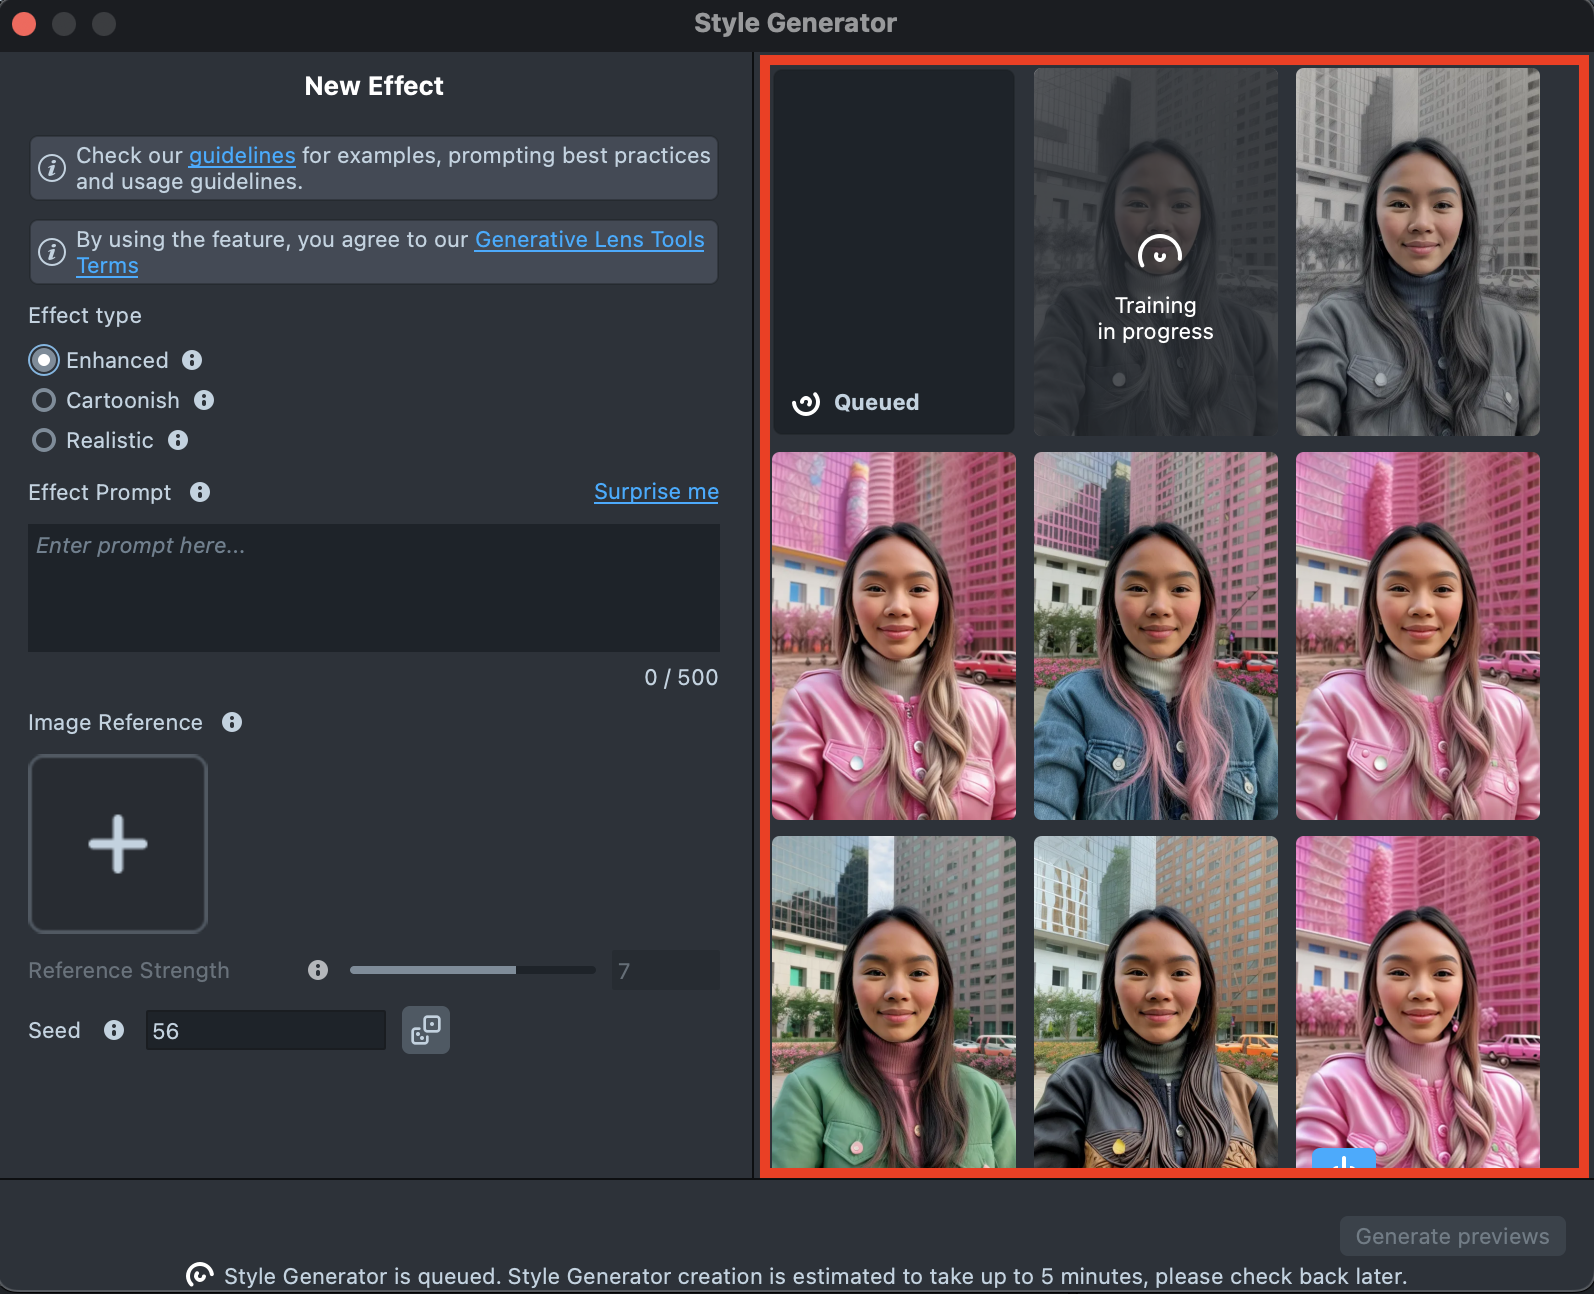
User Interface Overview
- Creation Panel: Provides tools for creating and editing effects.
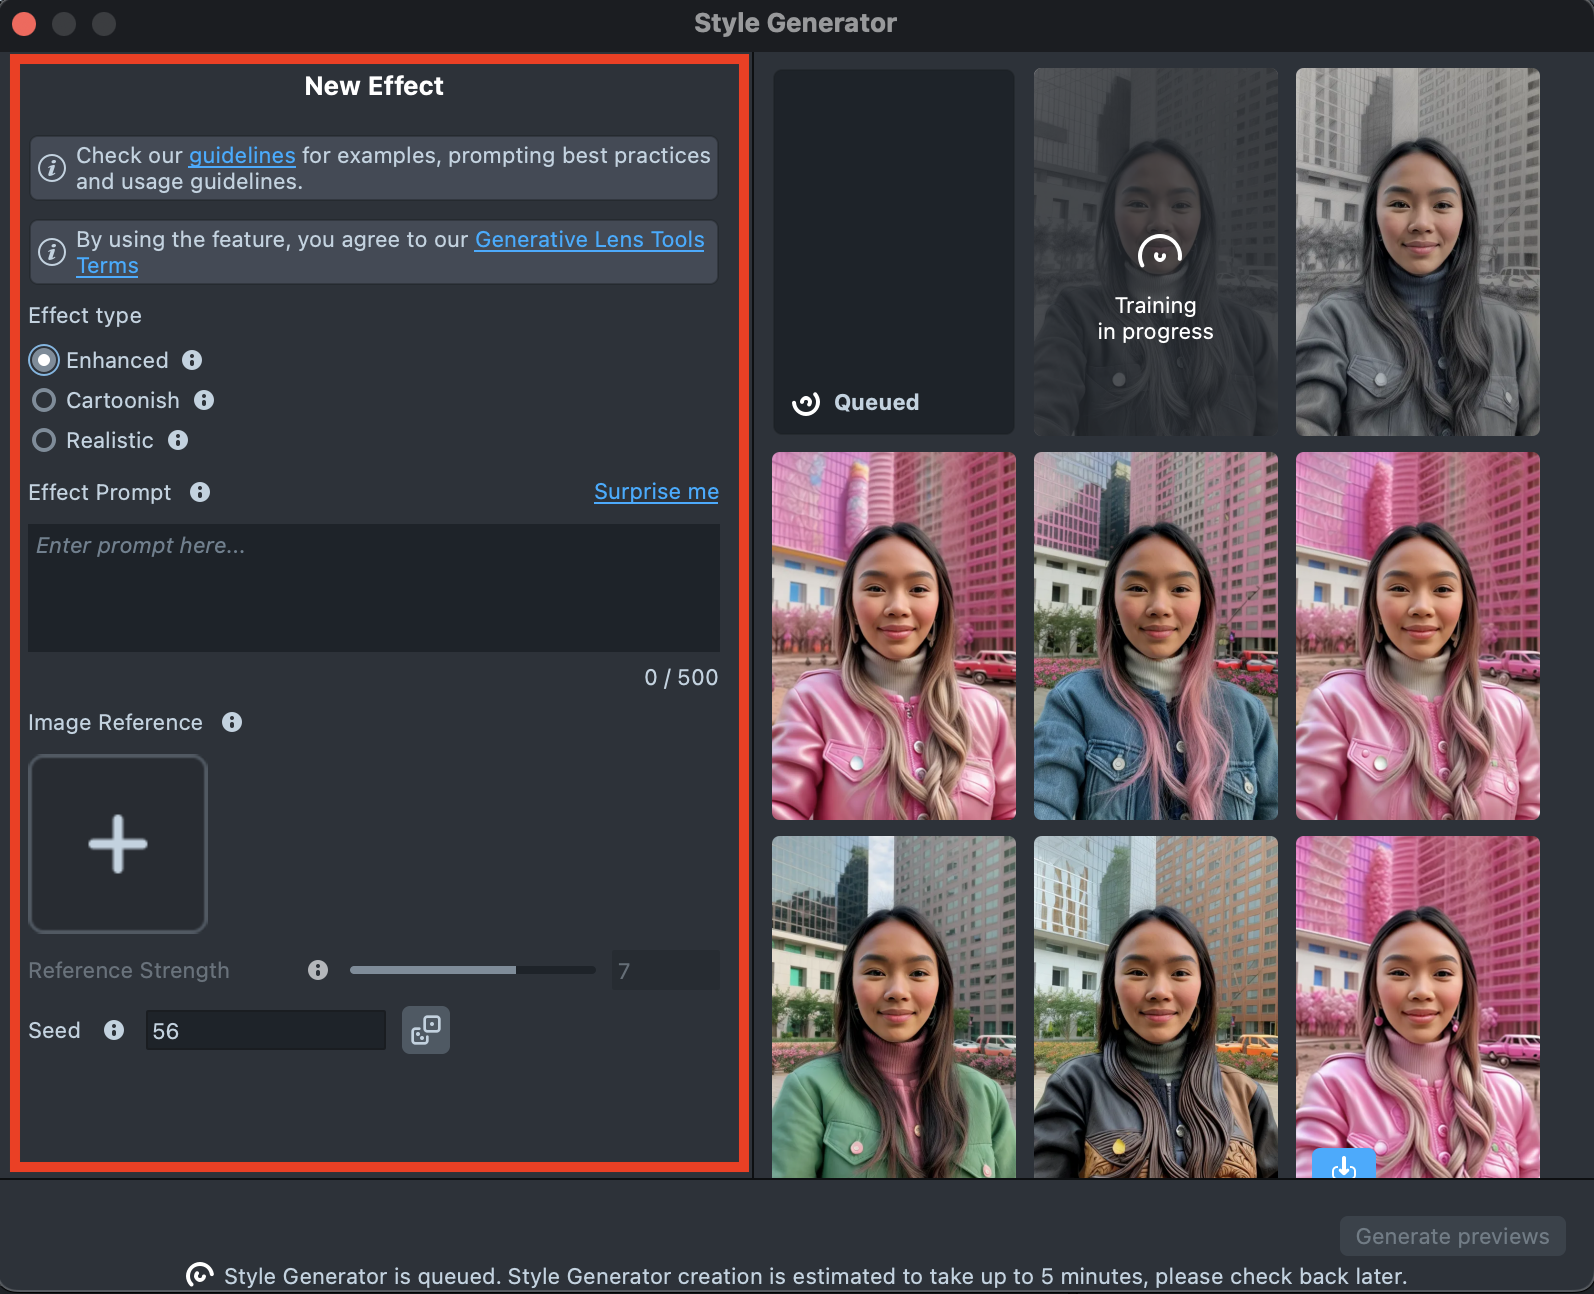
- Gallery: Shows all the effects you’ve created along with their statuses.
Effect Type
Style Generator currently provides three effect types:
-
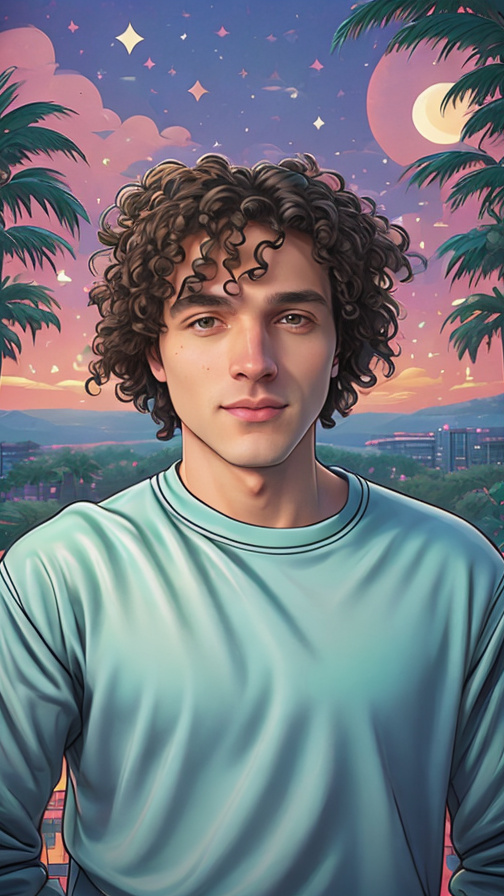
Enhanced is ideal for a wide range of cartoon and artistic styles while preserving identity. It offers greater flexibility through additional customization options, delivering immersive and visually striking results. Depending on the settings and prompts used, the output can range from realistic to highly stylized—from lifelike renderings to bold, graphic illustrations and cartoons.
-
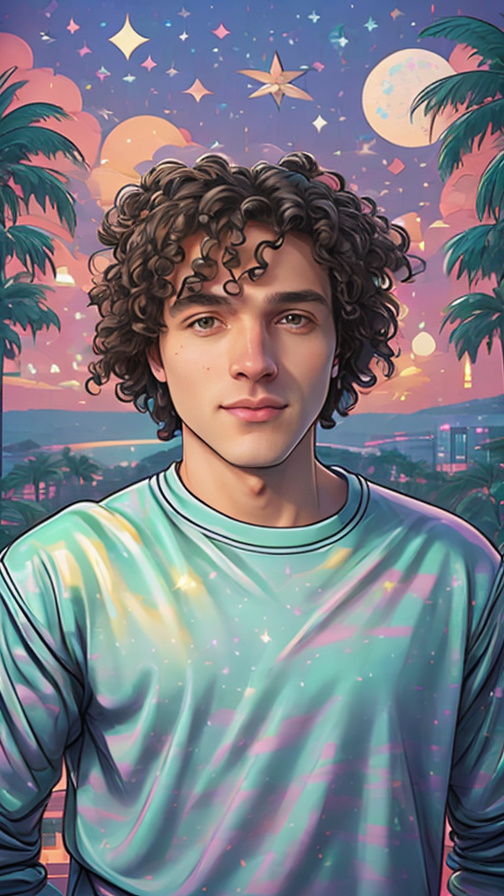
Cartoonish transforms the user into a character that looks like they came from an animated movie, comic book or piece of art. See the Cartoonish Effect Examples section for examples of effects this model can create.
-
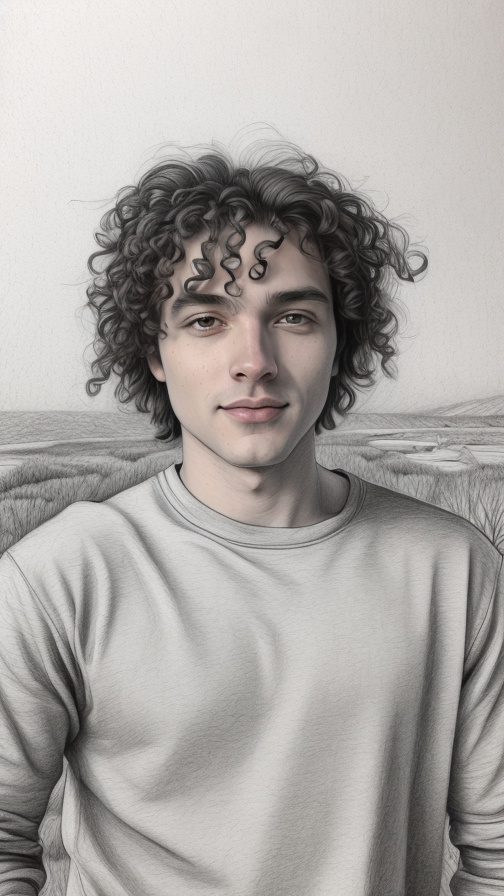
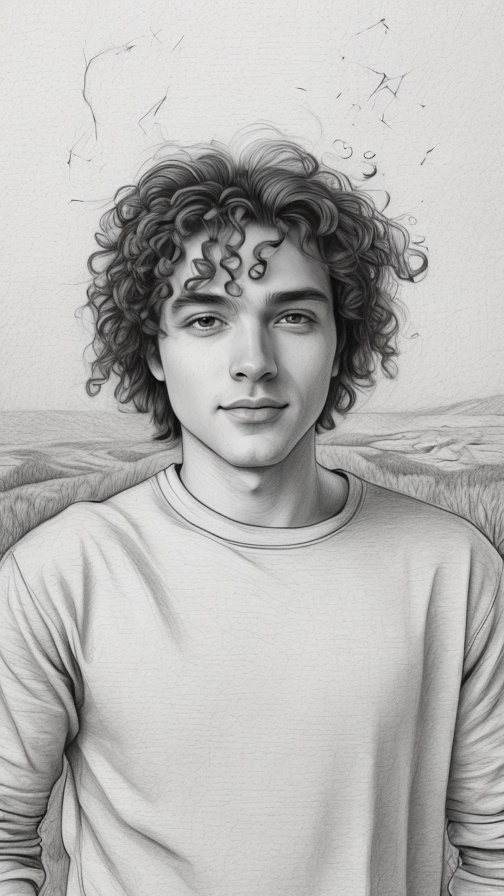
Realistic applies transformations while preserving a natural, lifelike appearance.
Enhanced Cartoonish Realistic
Effect Creation flow
Overall, the effect creation process is the same across all effect types. The main difference is that Enhanced offers additional settings and supports using Effect Prompt and Image Reference together, while Cartoonish, for example, allows only one input type at a time - either a Text prompt or an Image prompt.
Let’s go through the creation process using the Enhanced Effect type as an example.
-
Click the
Surprise mebutton to try one of the default prompts and get familiar with the model.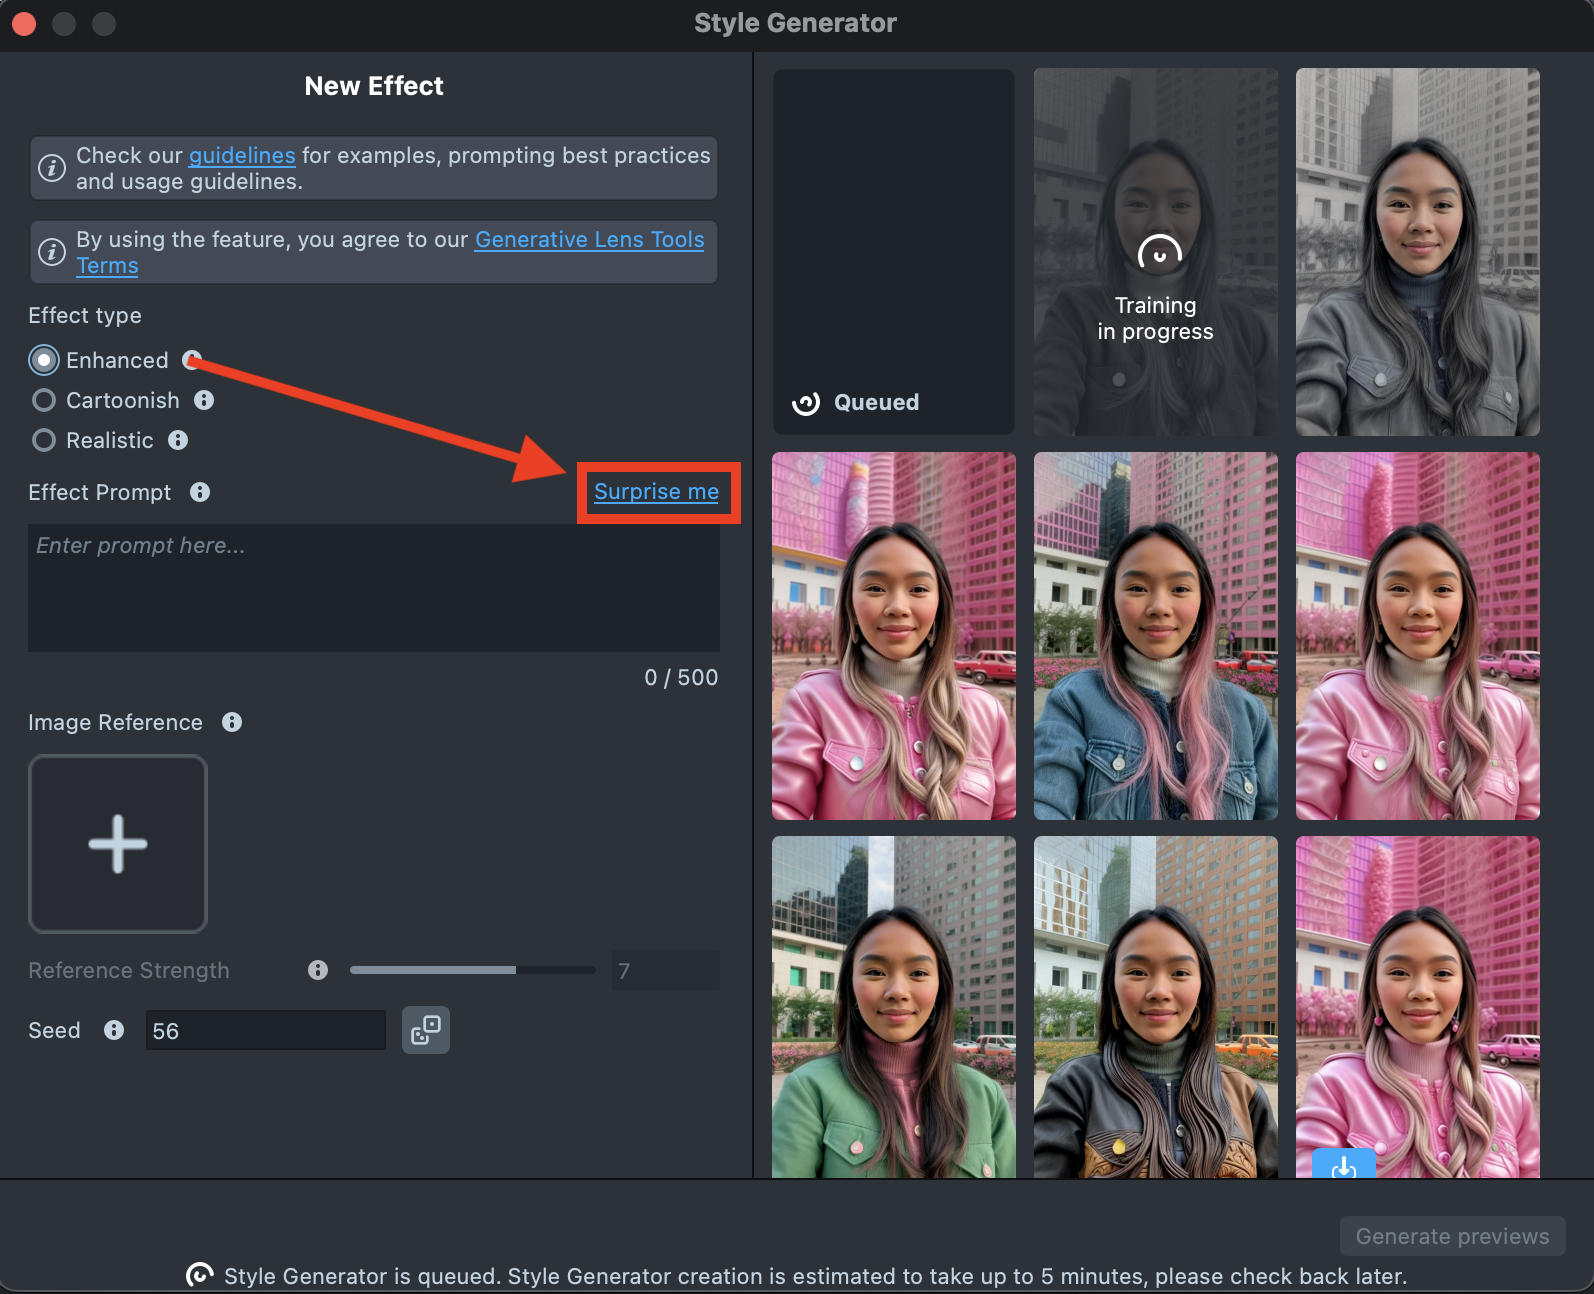
-
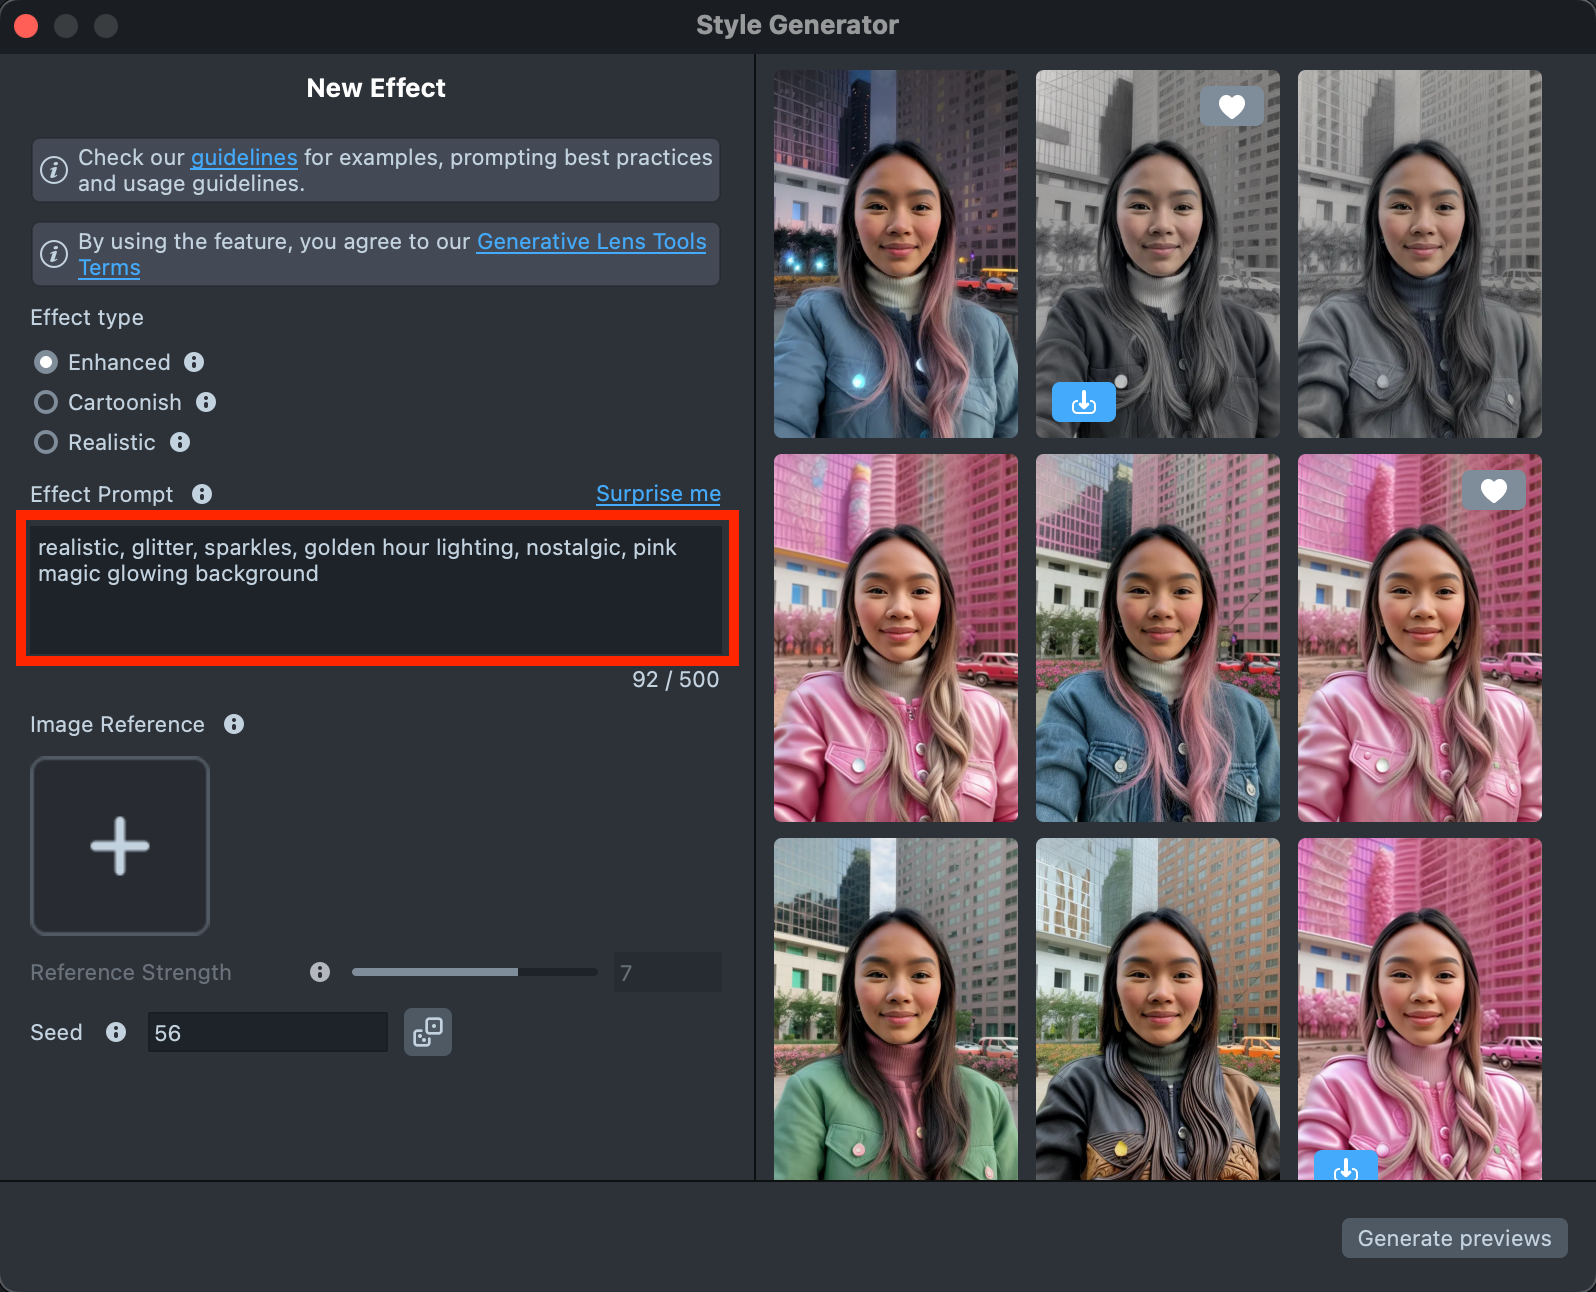
If you are ready to use your own prompt, enter a description of the Effect you’d like to generate in the
Effect Prompttext field (up to 500 characters).See the Best Practices guide to learn how to achieve the best results.
-
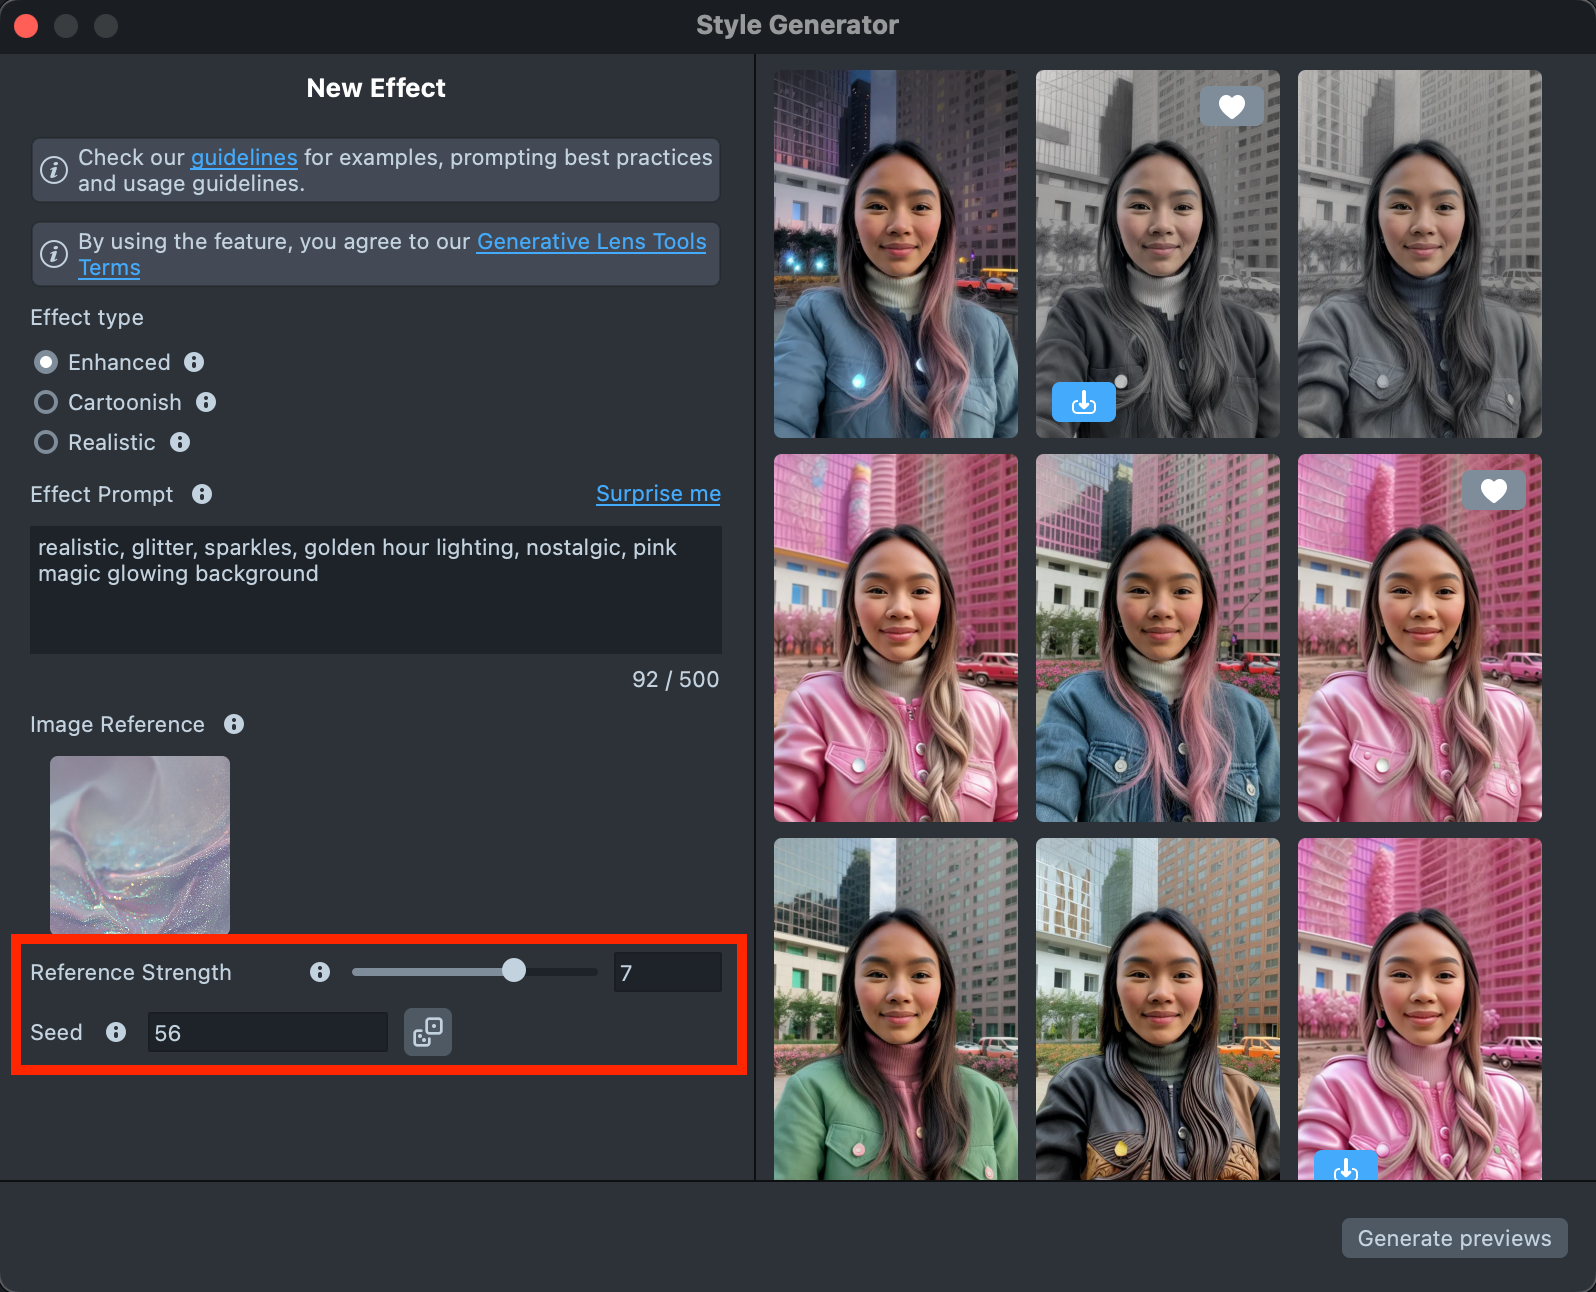
You can add an Image Reference to guide the generation and make the result closer to your vision.
You can use
Effect Prompt,Image Reference, or a combination of both - whichever works best for your case.See the Best Practices guide to learn how to achieve the best results.

-
The settings can significantly affect the final result, helping you achieve the best match for your vision:
- Reference strength - Controls how strongly the effect follows the Image Reference. A higher value makes the result closer to the Image Reference, but reduces similarity to the original user photo.
- Seed - Control randomness. Use the same number to recreate the same look, or try different ones for new variations.
See the Settings section to learn more.
-
When your prompt is ready, press the
Generate previewsbutton to generate the previews.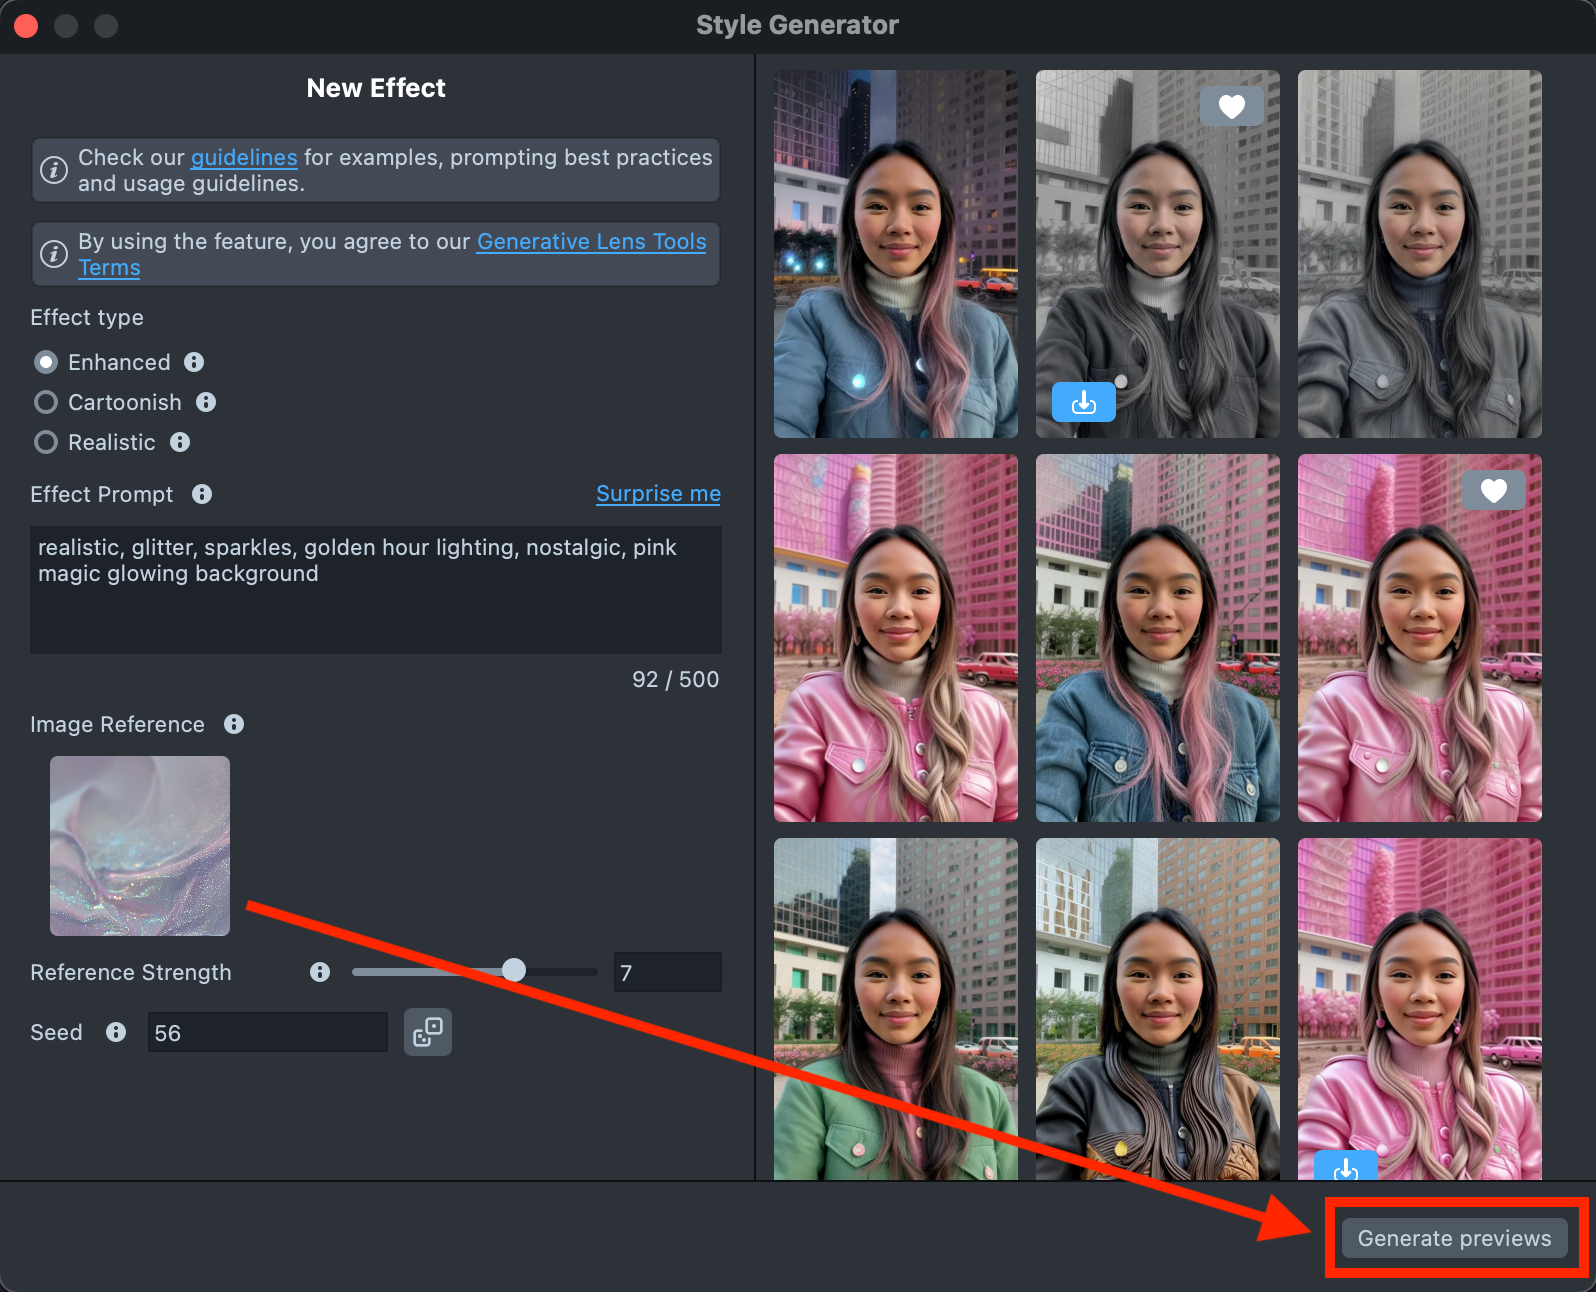
-
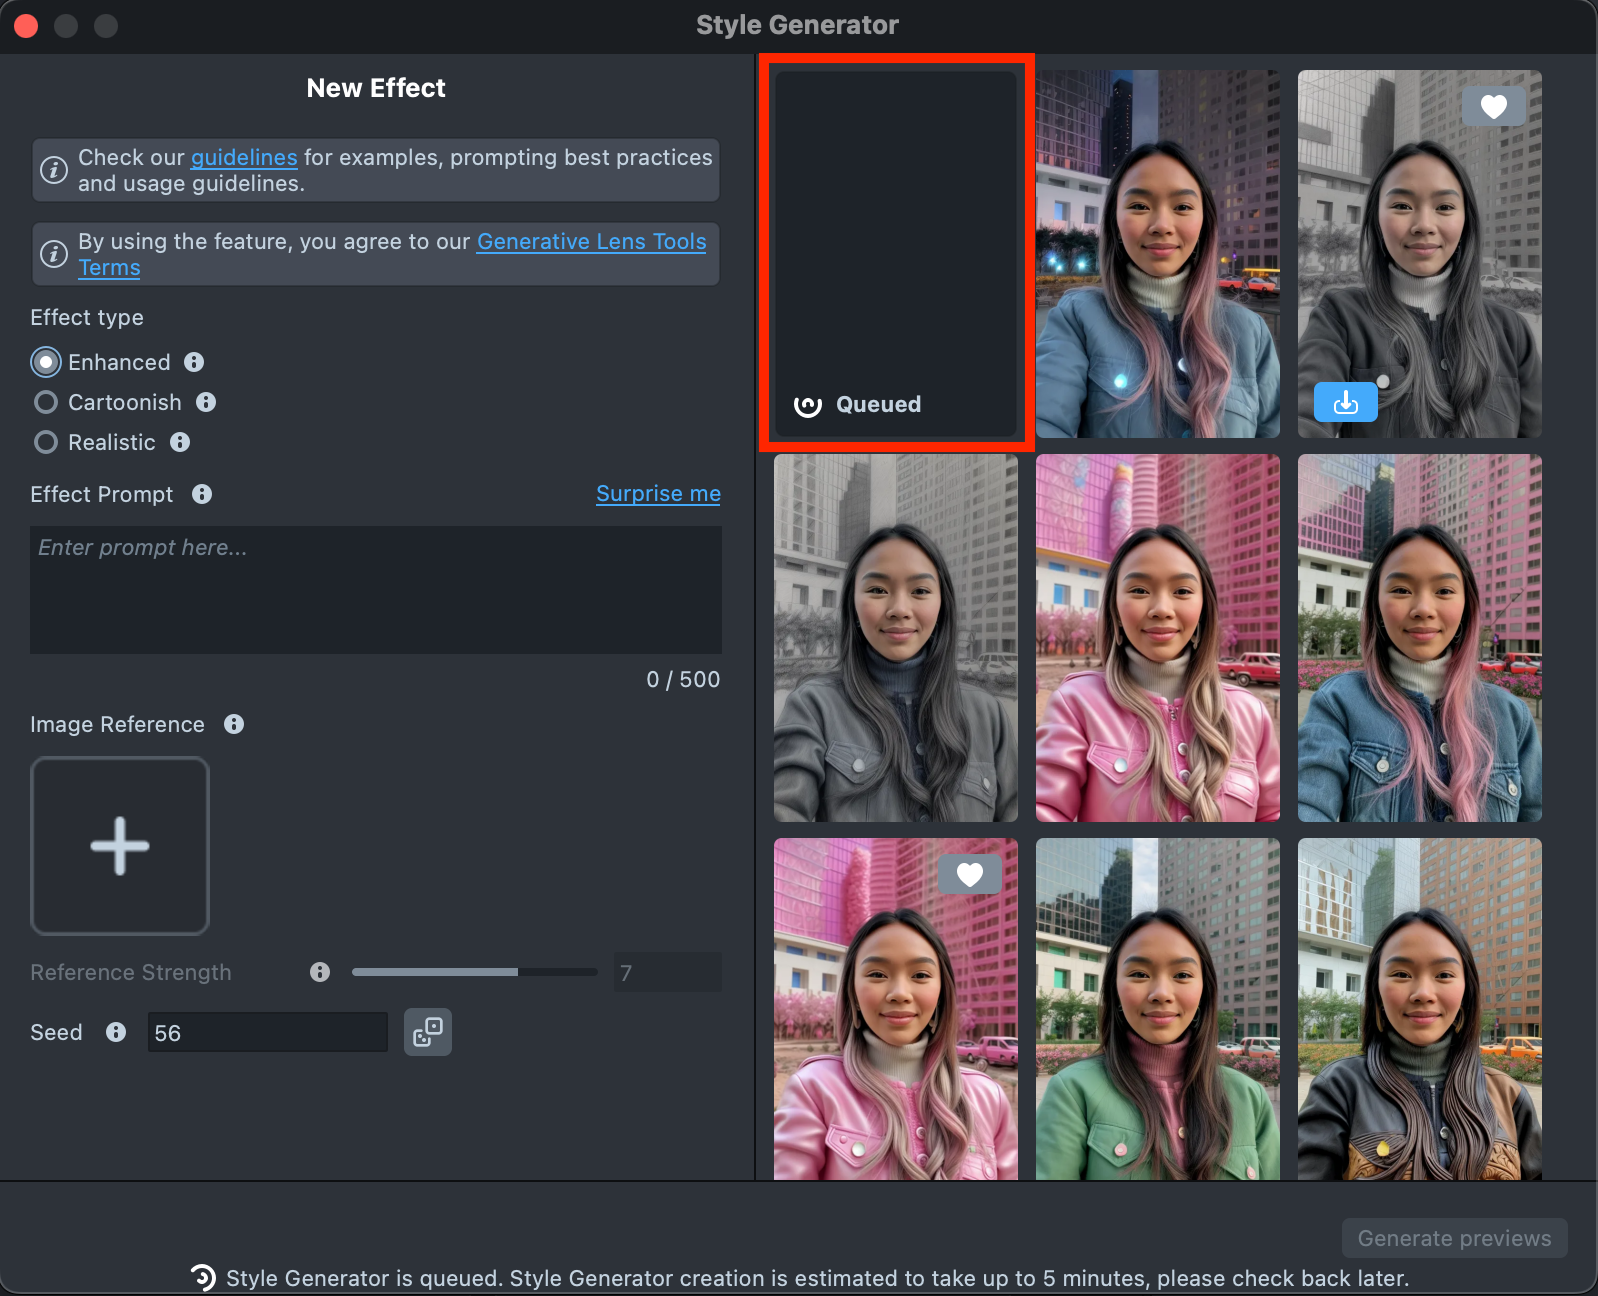
A new tile will appear in the Gallery with a loading indicator in the corner, showing the progress.
Generating the preview may take up to 5 minutes, but you can close the plugin and come back later.
-
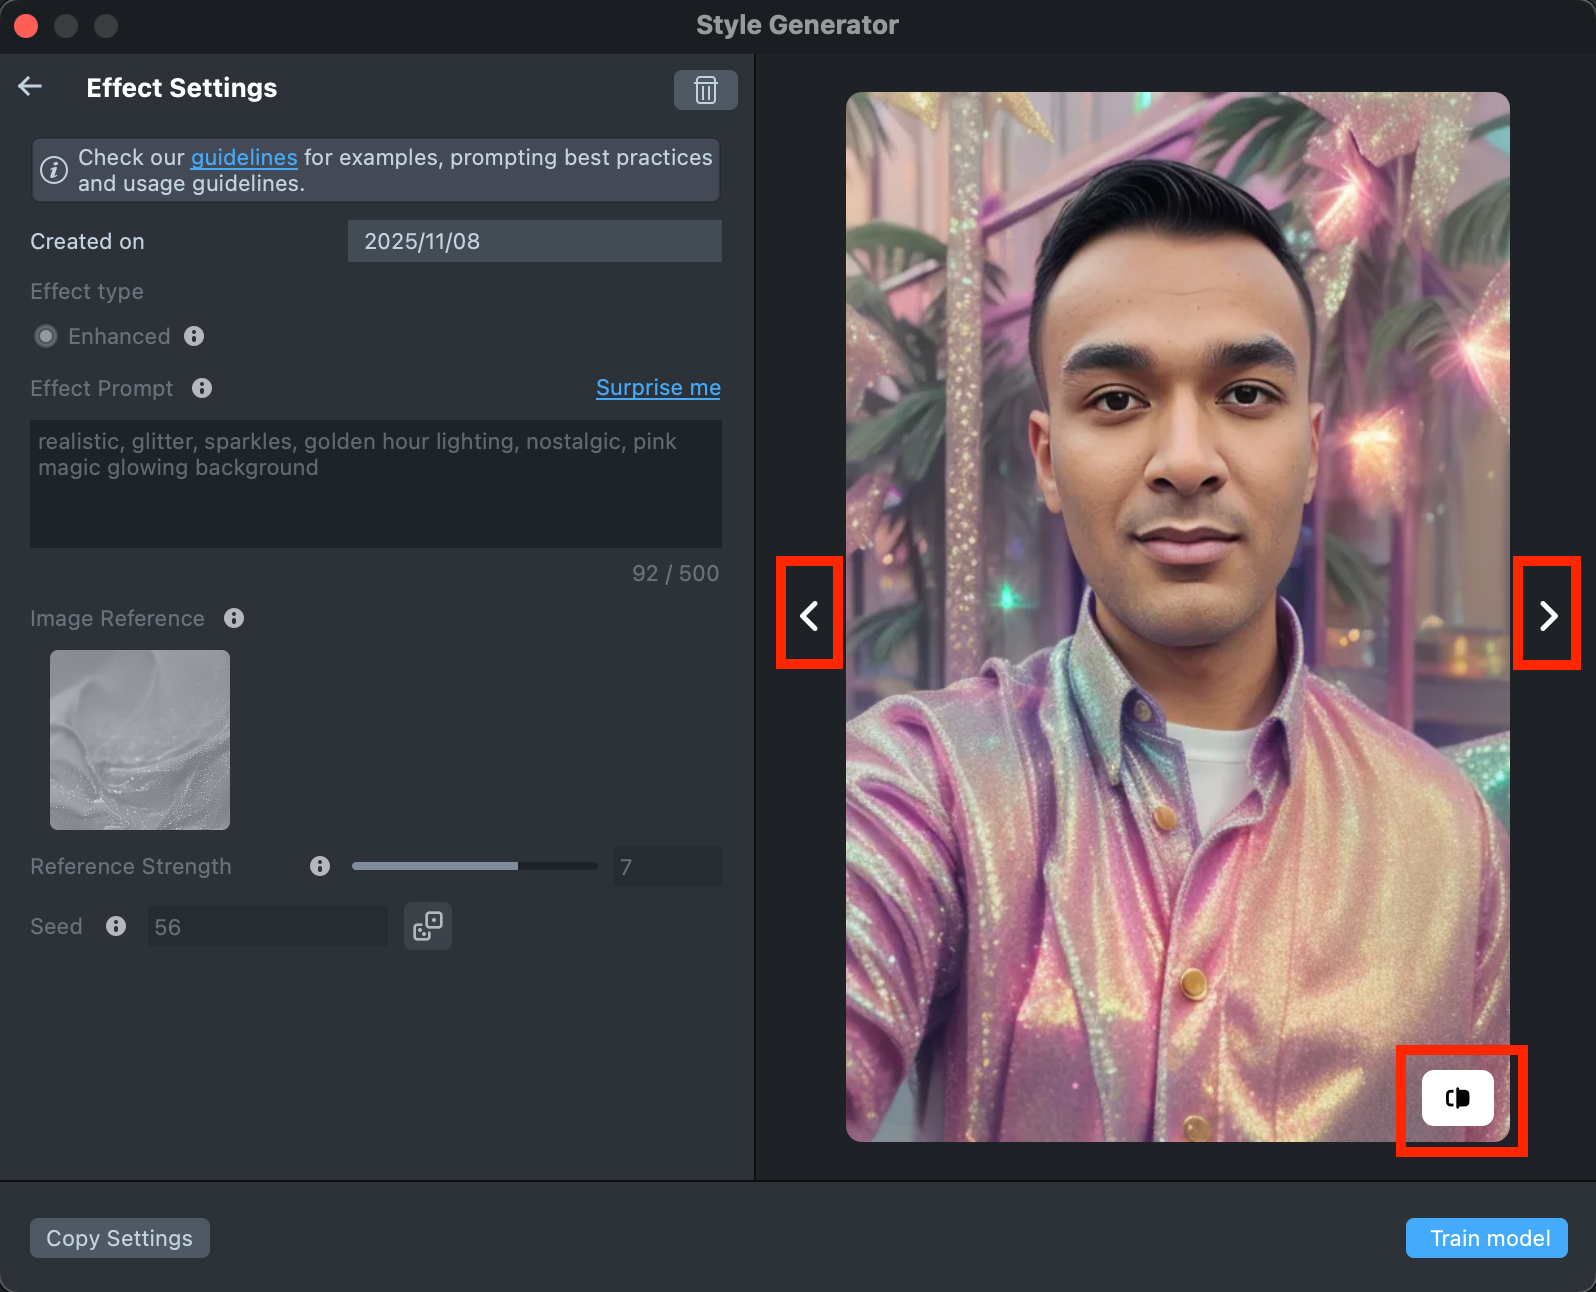
Once the preview has been generated, you can click its tile in the Gallery to open the details page. Here, you can use the arrows on the sides to preview the effect on different models. Additionally, you can click the button in the bottom-right corner to view the original image the effect was applied to.
-
If the preview doesn’t match your expectations, click
Copy Settingsto adjust your prompts or seed.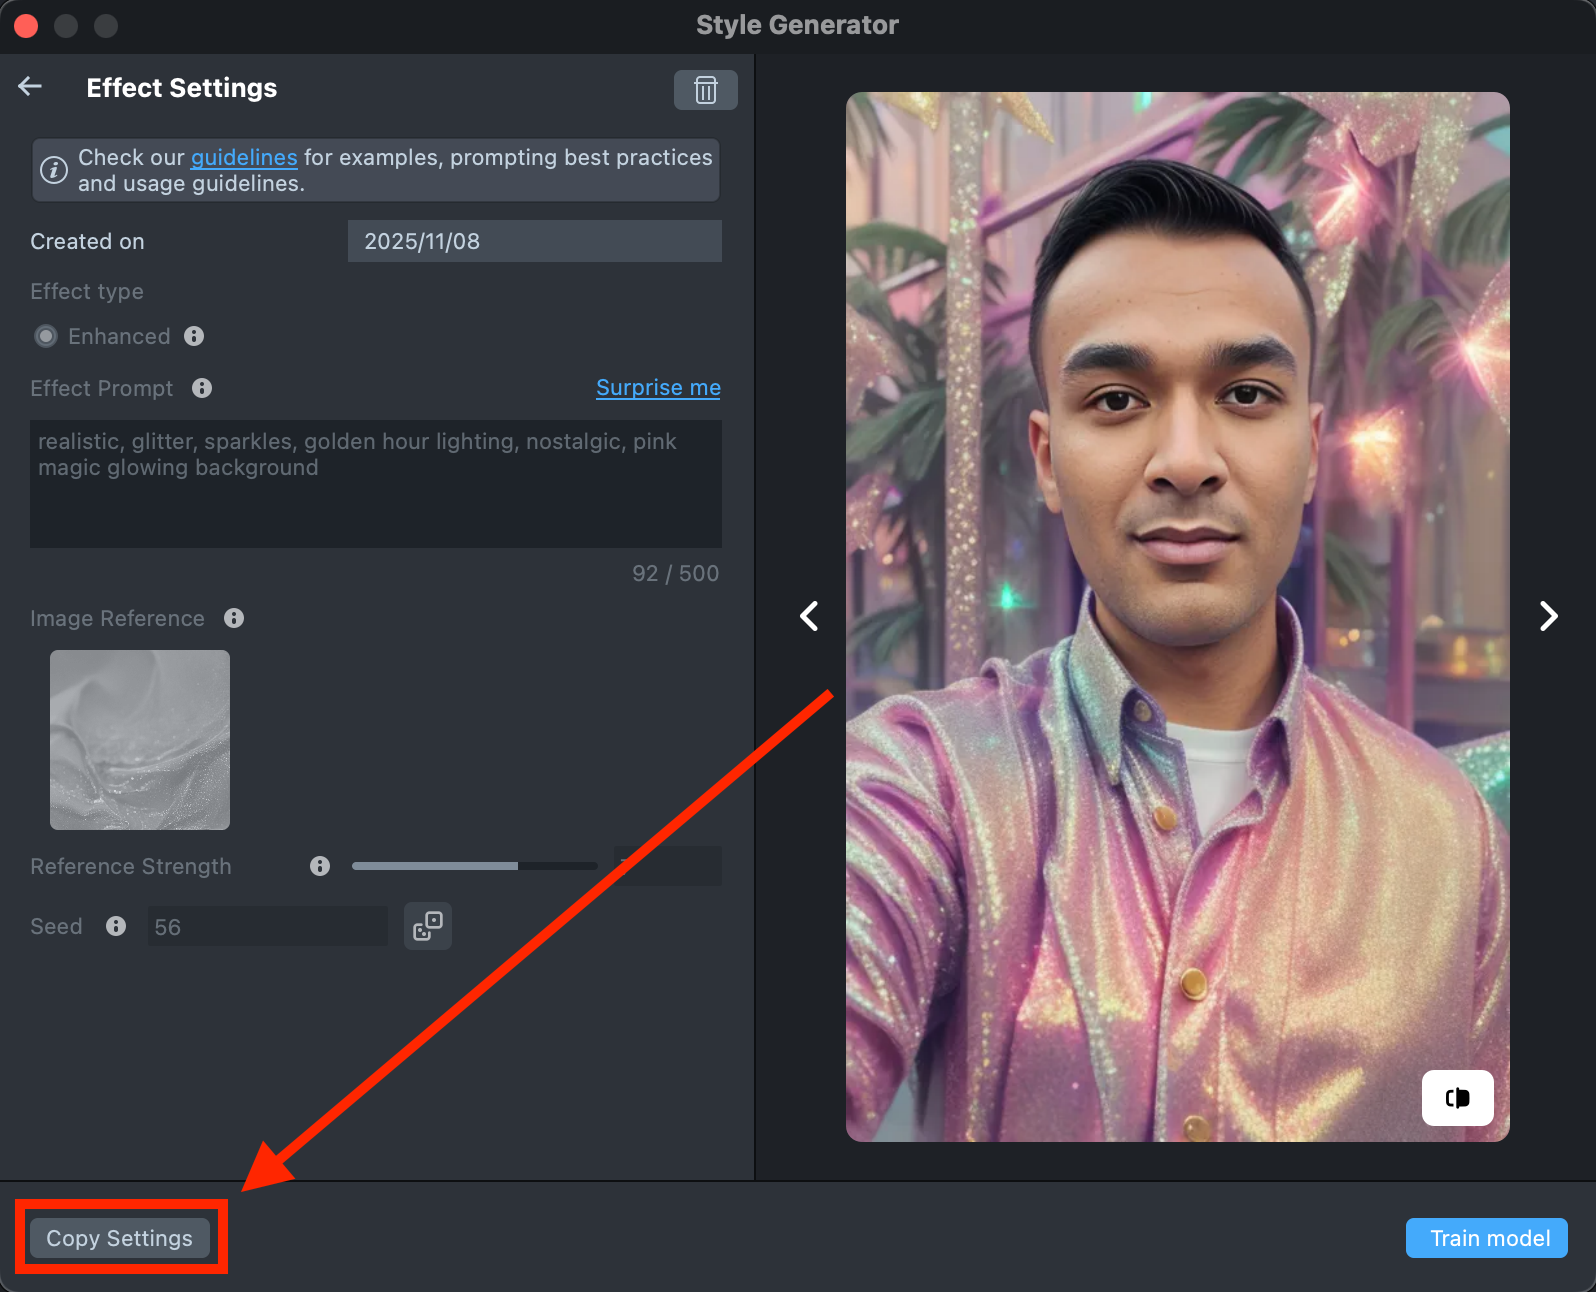
-
You can make as many tweaks as needed until the result feels right - all changes will appear in the Gallery as a new effect, without altering the current one. This way, you can always go back and compare whether the updated effect looks better than the original.
-
Happy with the preview? Click
Train modelto start training your model. You’ll be able to track the training status directly in the Gallery.Training the model may take 3–5 hours, but you can close the plugin and come back later.

-
Once training is complete, you can import the effect directly from the Gallery by clicking the
Importbutton, or clickImport to projecton the details page to add it to your project.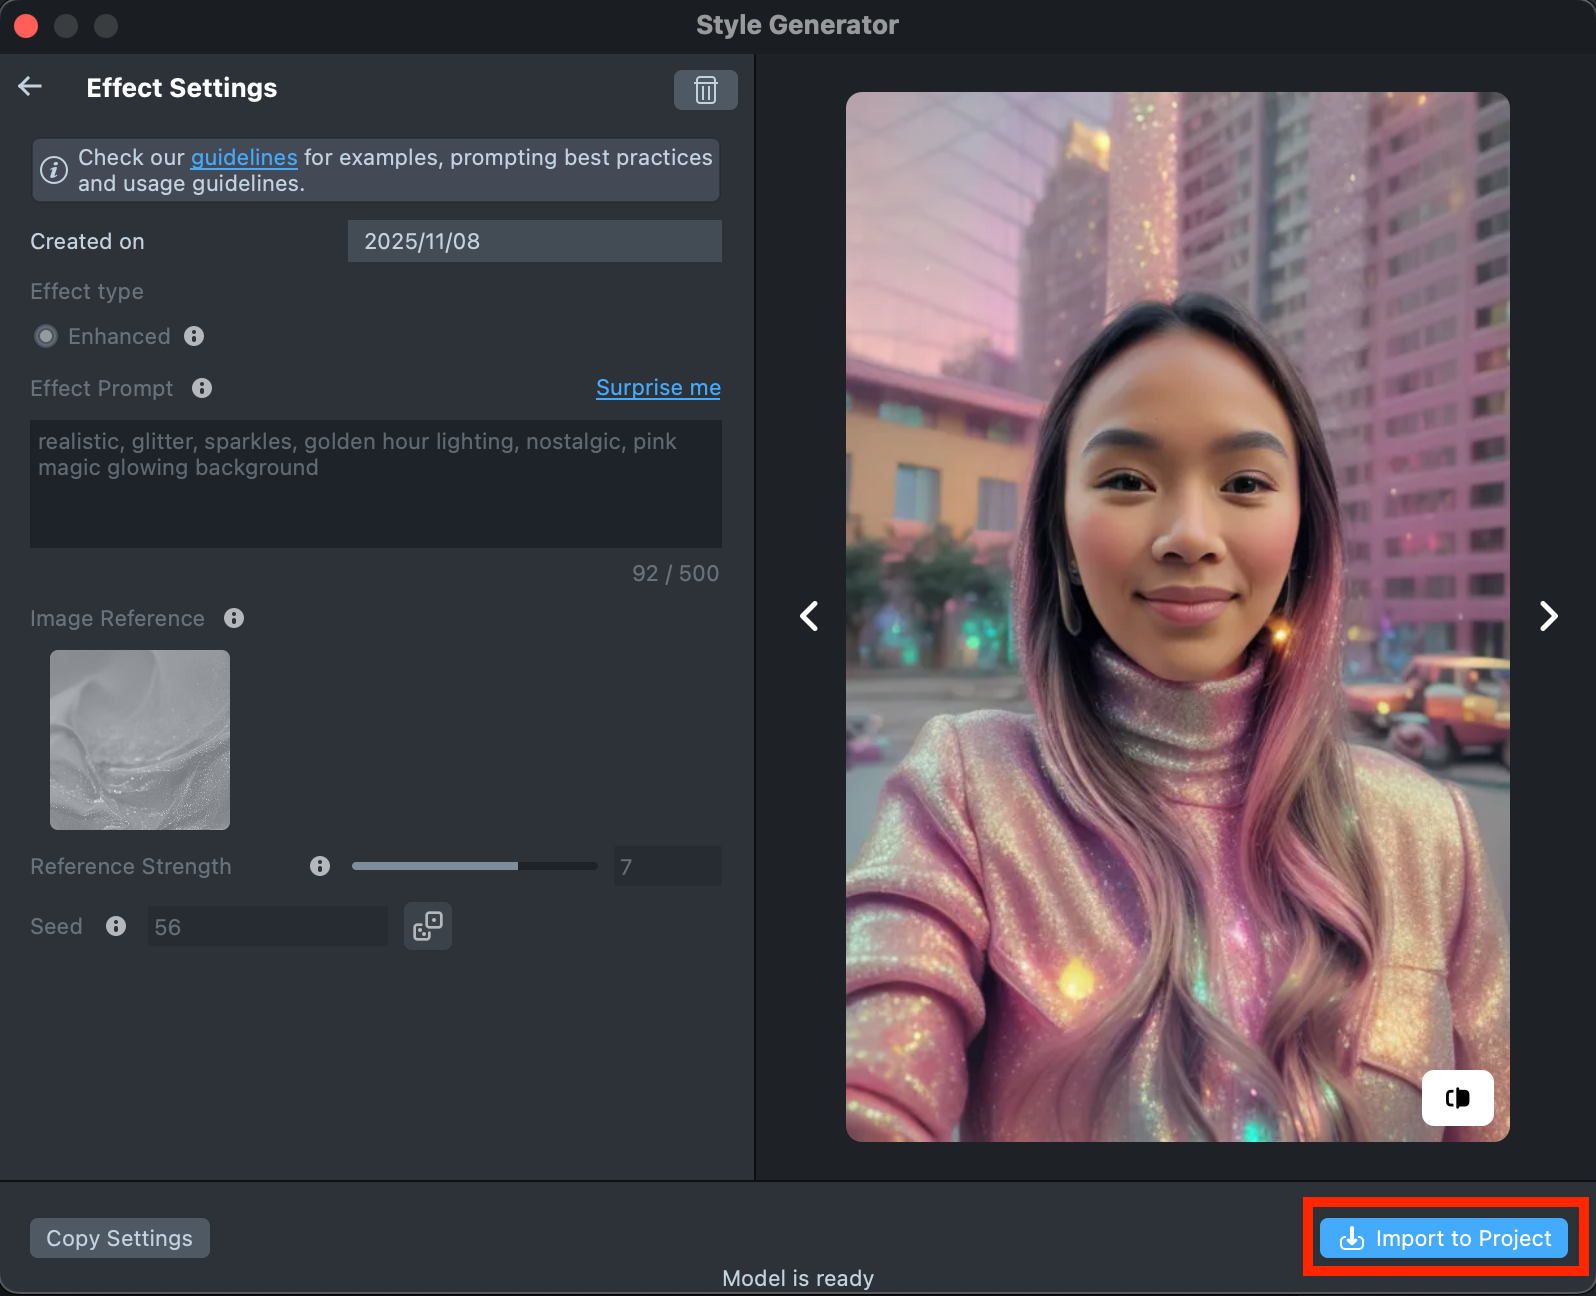
-
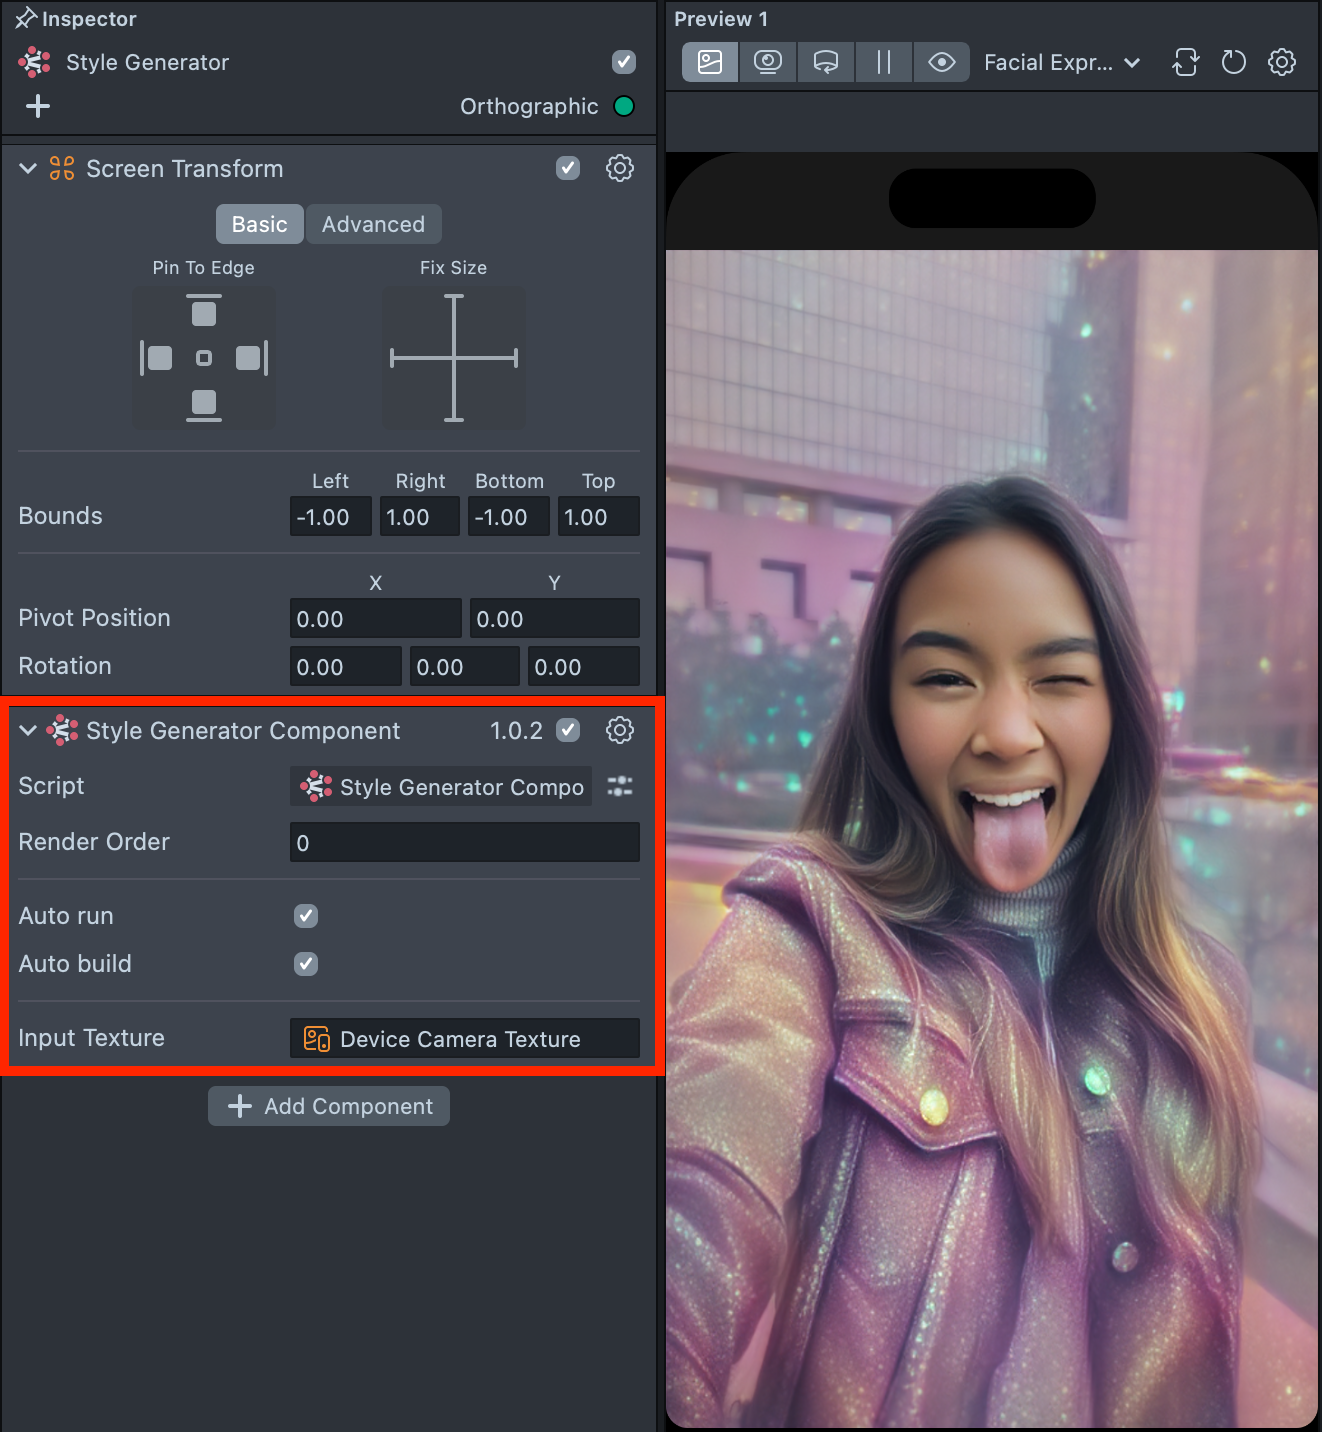
Preview the result in the preview panel and continue building your Lens. When you’re satisfied with the result, save your project and push the Lens for testing on Snapchat. See the Pairing to Snapchat guide to test your Lens on a device, and the Publishing guide to learn more about sharing your creation.
-
Follow this guide to learn how to combine Style Generator with Animated Selfie Attachments, Head Generator and Zoom Component, or refer to this guide to learn how to combine Style Generator with Face Generator, Face Animator and Garment.
Best Practices
For optimal results, we recommend combining the Image Reference with the Effect Prompt.
Effect Prompt
You can use different types of prompts—both short and long—to guide the generation process. It’s usually best to start with a short prompt and refine it as you go. Add adjectives, specific details, or extra descriptions to bring the result closer to your desired look. Keep in mind that the tool interprets your prompt literally.
- Focus on the essentials. Describe only the changes you want to make, and avoid unnecessary or generic details.
- Skip background descriptions. There’s no need to mention the background unless it’s part of your design.
- Use descriptive words. Adjectives like hand-drawn, 2D, 3D, cartoon, or realistic can help you control the style of the generated image.
- Long prompts. More detailed prompts can help you create stronger and more distinctive designs. Combine them with fine-tuned settings to achieve precise, unique results.
- Comma Separation. For the best results, divide long prompt descriptions into short, context-specific phrases separated by commas (cute cartoon anime, kawaii romantic colors, immersive, photorealism).
- Prompt Weighting. You can use special symbols in your Effect Prompt to control how much influence specific words or phrases have on the final result - emphasizing or reducing their impact as needed.
Descriptors
- Style: Describe the style you want to achieve.
- Example: oil painting portrait, stoic, oil texture, pixel style, game consoles, graphic design, retrofuturistic, vintage style, vector art, detailed outlined minimalism, comic art, hand drawn illustration, poster,flat illustration, children’s picture book illustration, 3D papercuts, surrealistic cartoons, inspired by paper cut-outs art and paper sculptures, punk illustration, nightcore, flat outlined illustration, dnd art style, digital illustration, CG, risography effect, charcoal courtroom sketch
- Colors: Play with colors and palettes you want to emphasize.
- Example: dark sepia color pallet, illustration in bright colors, style in full pastel colors, realistic usage of light and color, pastel color palette theme, nightcore, magical pink, soft colors
- Patterns: Adding pattern descriptors can create a sense of texture and depth, making flat surfaces appear more dynamic and interesting.
- Example: heavy thick brush strokes, thatch textures, geometric patterns, floral patterns, herringbone patterns, chevron patterns, polka dots, stripes, plaid, houndstooth, animal prints, paisley, abstract patterns, crosshatch, swirls, damask, zigzag, checkerboard, gradient, lattice, argyle, marble, wave patterns, brick patterns, mesh, hexagonal patterns, brocade, tartan, quilted patterns, leaf patterns
- Light and Shades lines: Include descriptors for special lighting and shading details if needed.
- Example: realistic usage of light, natural light, soft focus, blur, detailed shading, soft flush, flat shading, precise lines, with clear lines, anti-form, flat outlined illustration
- Mood: Mention mood if needed.
- Example: happy, cheerful, calm, relaxed, mysterious, intriguing, energetic, excited, sad, melancholic, romantic, dreamy, tense, suspenseful, playful, fun, warm, cozy, lonely, isolated, adventurous, bold, reflective, thoughtful, angry, intense, joyful, celebratory, peaceful, harmonious
Special words
- Close-up: Ensures the image is tightly framed around the subject, highlighting specific features and details.
- High quality: Emphasizes that the generated image is clear, sharp, and visually appealing.
- Detailed: Stresses the importance of including a lot of small, intricate elements.
- Flat shading: Instructs the AI to use a shading technique that lacks gradients, giving the image a more stylized and simplistic look.
- HD: Combines high resolution and extreme detail for a highly realistic and visually impressive output.
- Maximalistic: Indicates a style that is rich in detail and complexity, often with elaborate and decorative elements.
- High definition: Ensures the image is created in high resolution, enhancing clarity and detail.
- Fine luster: Adds a touch of shine or gloss to the image, giving it a polished and refined look.
Image Reference
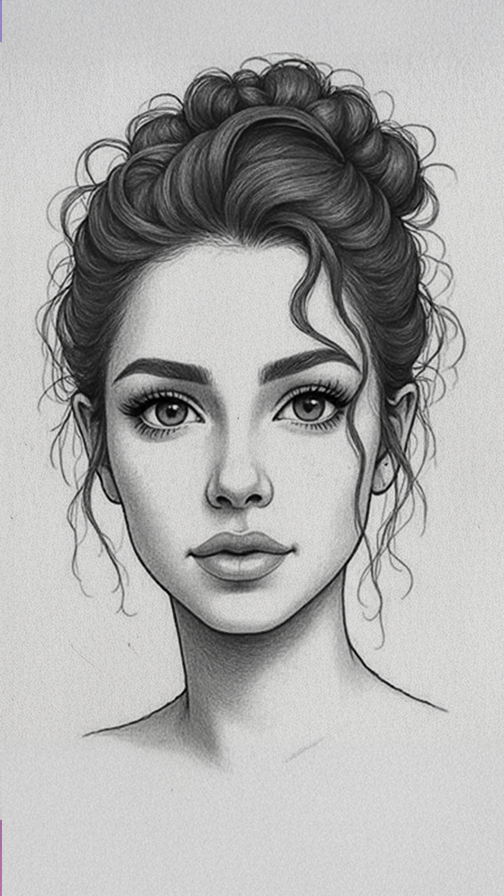
For optimal results, it is recommended to utilize high-quality reference images, ideally depicting a human or character with refined textures. The quality of the reference image, including its overall aesthetics and the subject depicted, directly correlates with the beauty of the outcome. Combine image reference with the prompt, specifying elements you want to transfer from the image to the final effect.
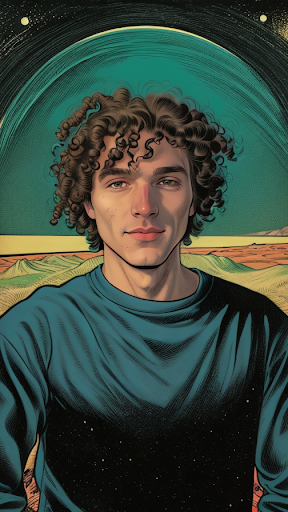
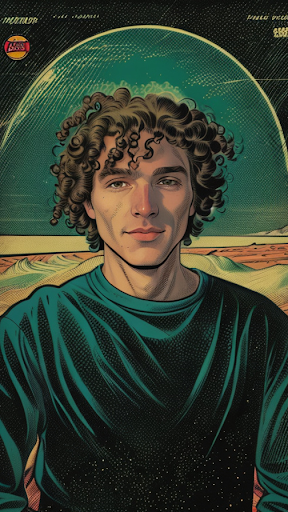
Examples of good image references:
Effect Prompt + Image Reference
Combine an Image Reference with an Effect Prompt to expand your design possibilities and explore different styles - even if they differ from the original image. If you want to recolor the outfit or add more details, try entering a custom Effect Prompt in the corresponding field.
Comparison of Prompt Combinations
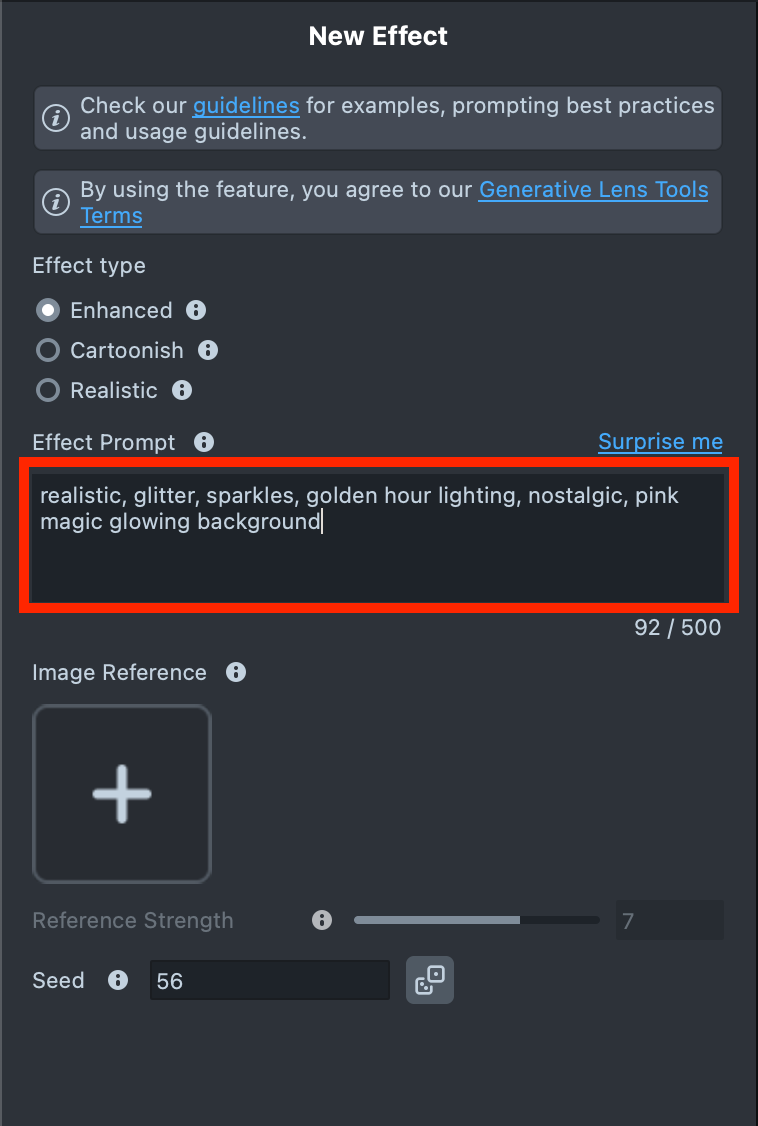
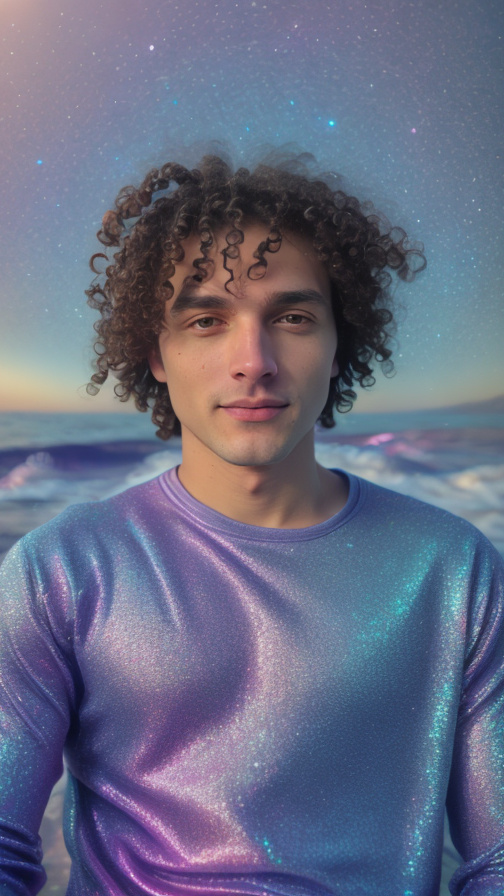
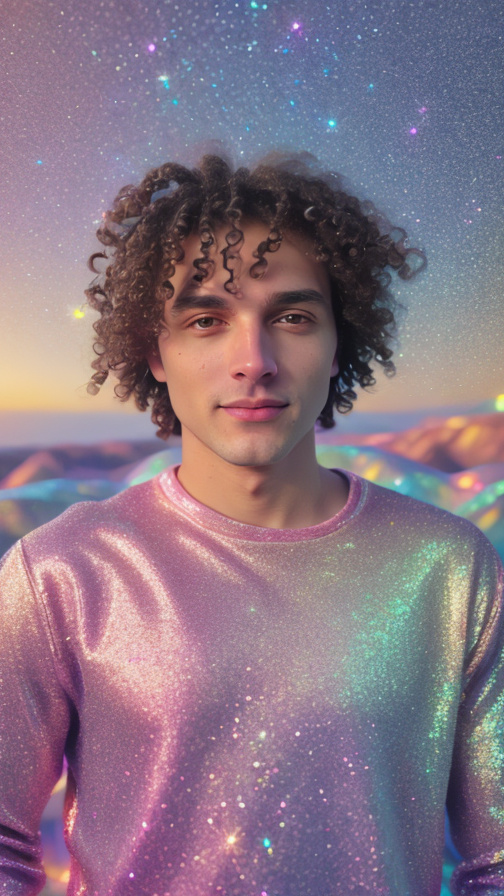
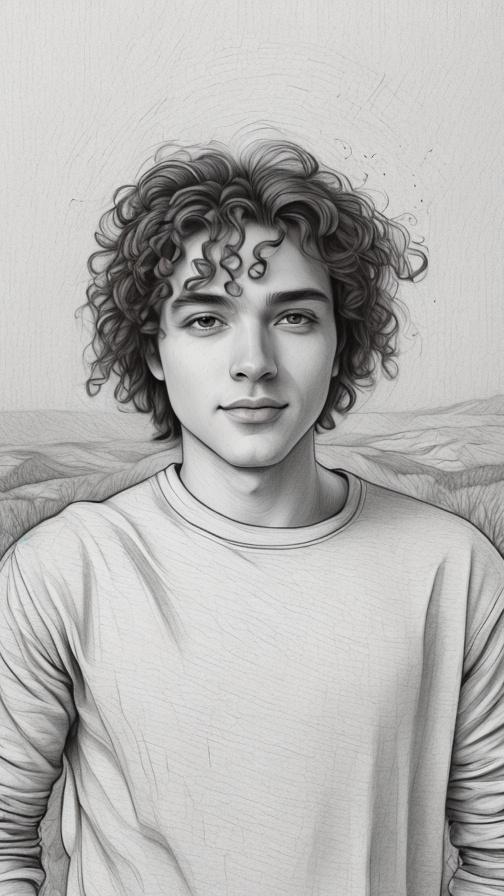
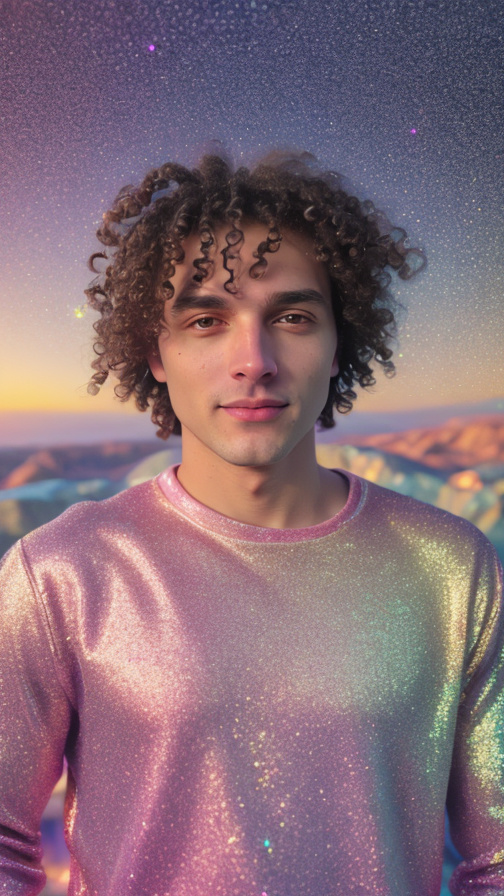
Let’s take a look at how the generation results change depending on the combination of prompts. For example, we’ll use the following Effect Prompt:
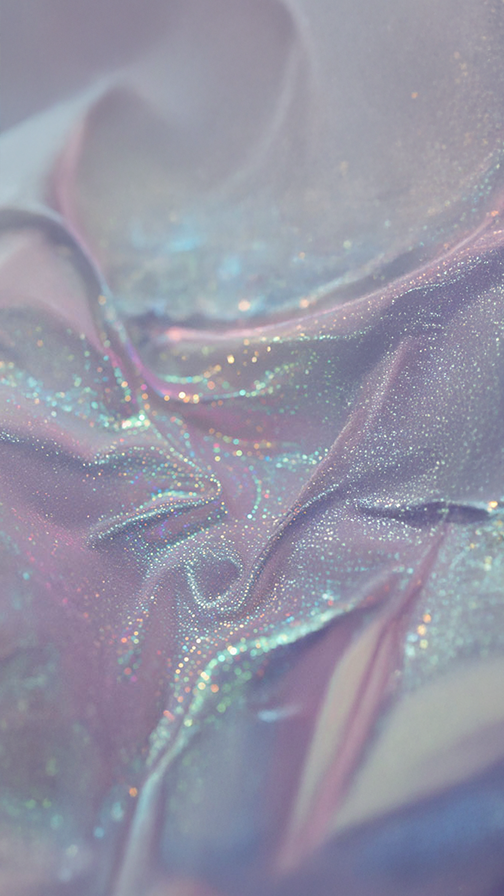
realistic, glitter, sparkles, golden hour lighting, nostalgic, pink magic glowing background
-
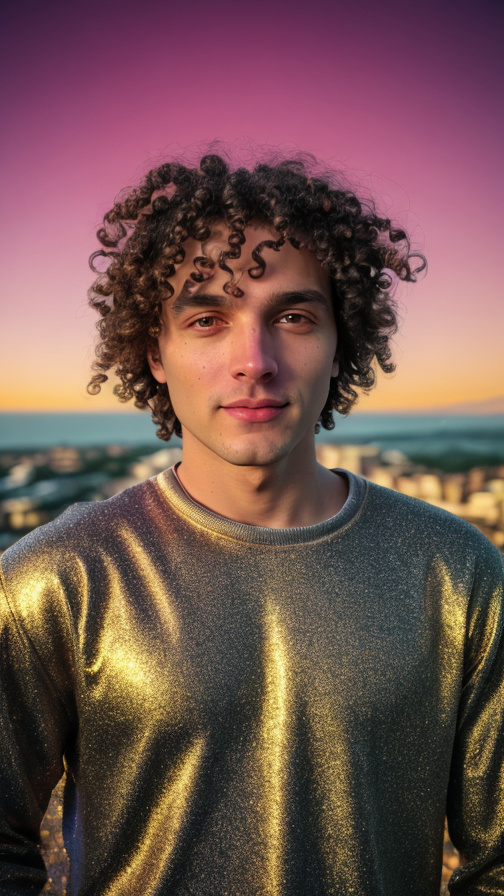
Effect Prompt only:
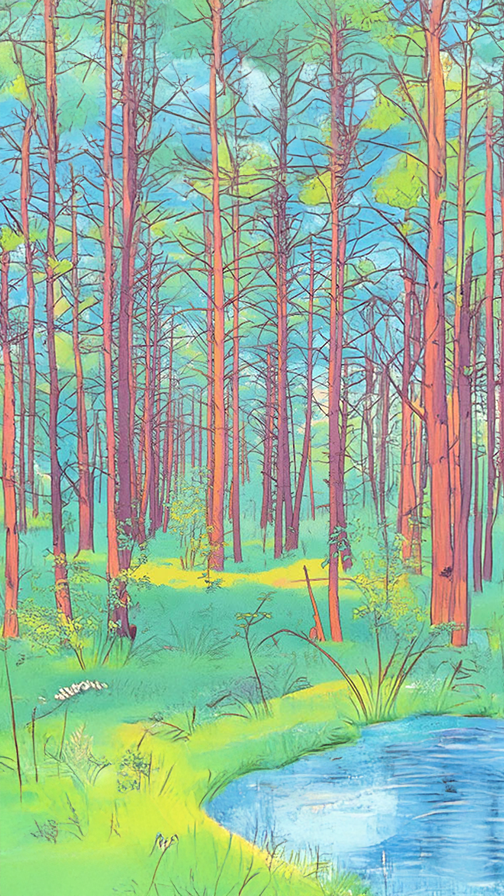
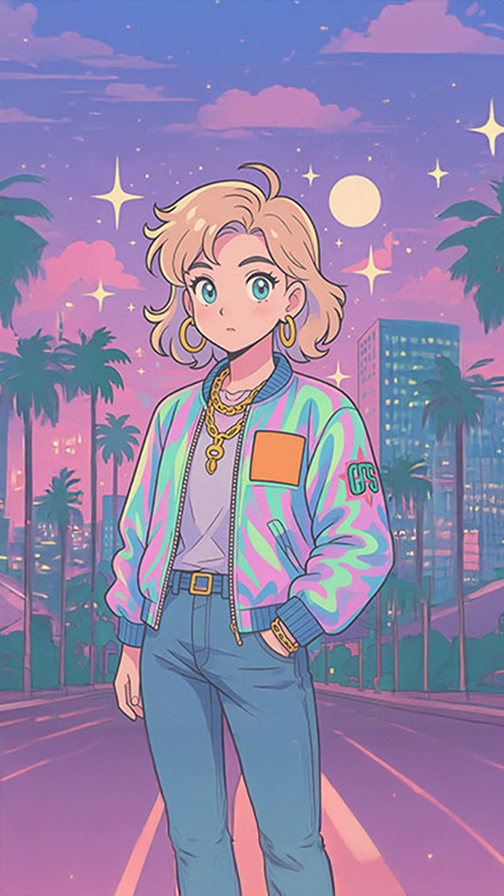
Original user image Effect Prompt Processed user image 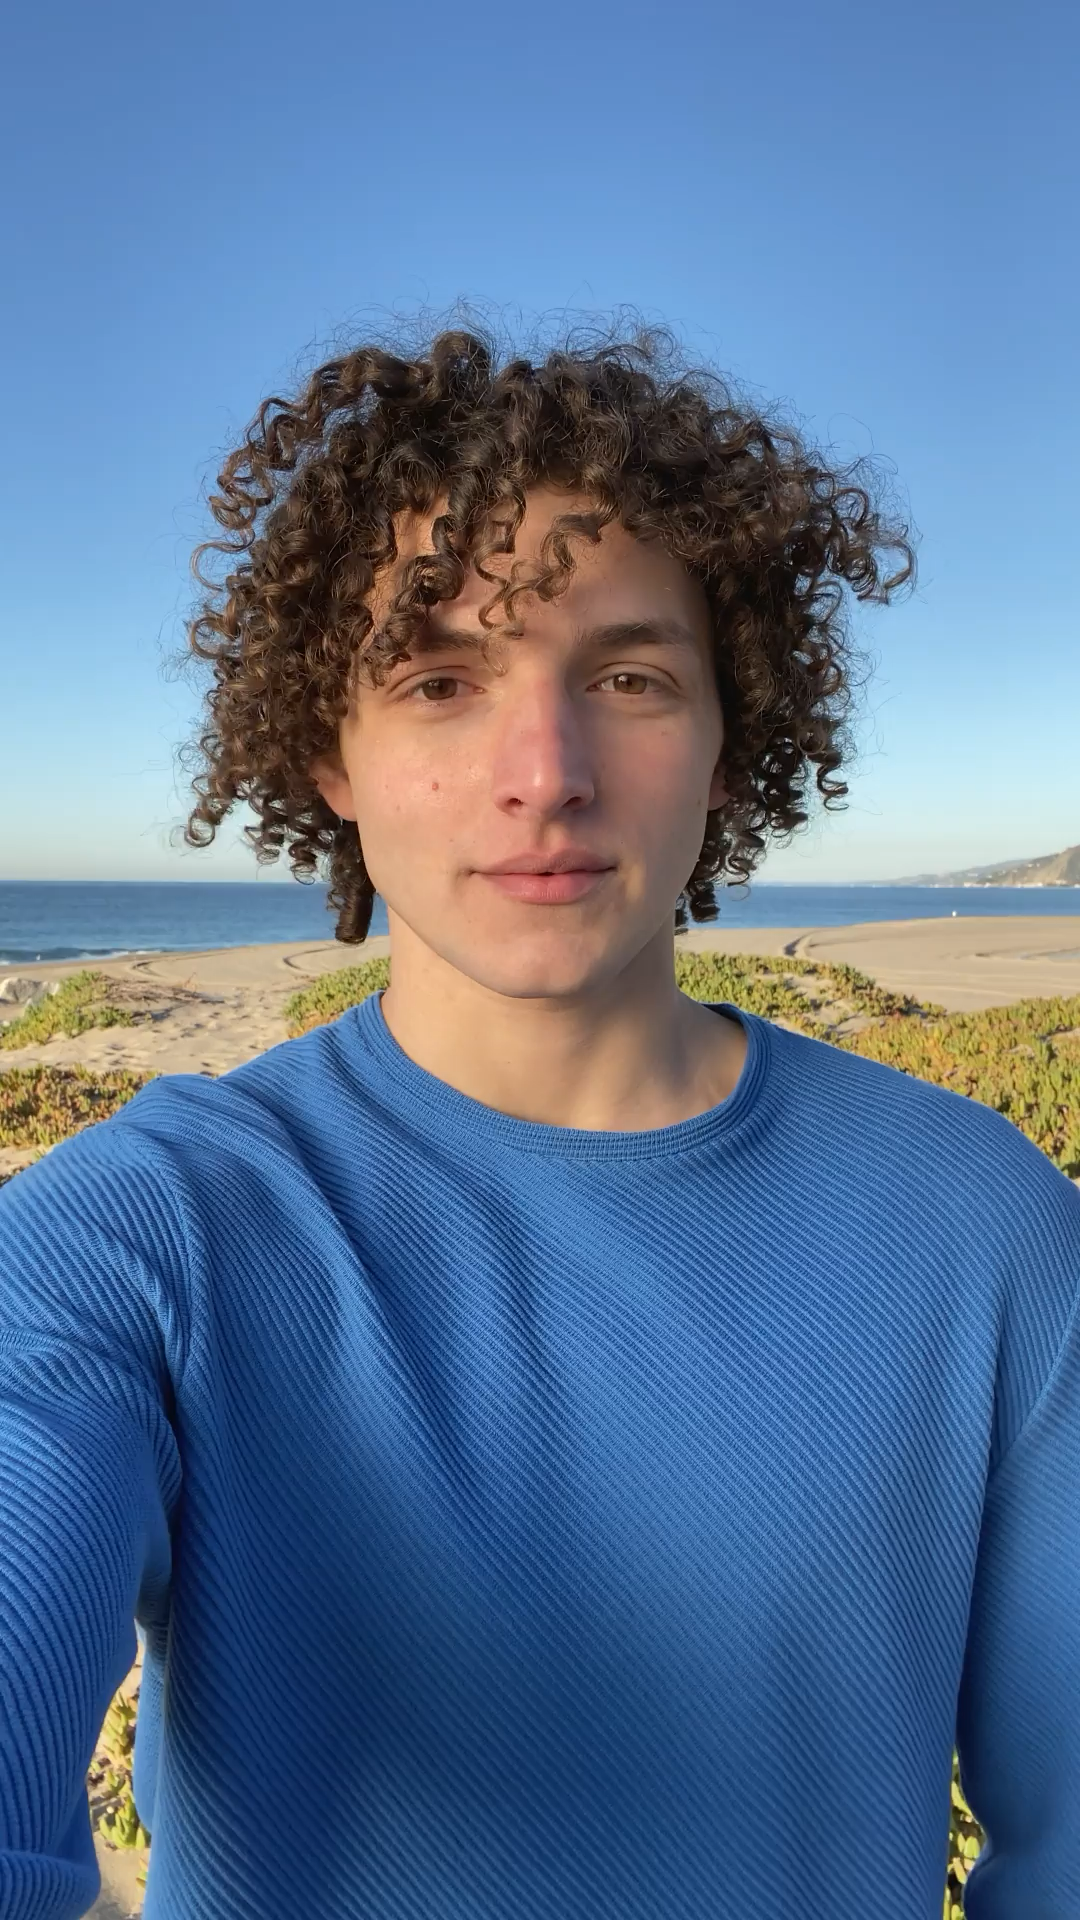
-
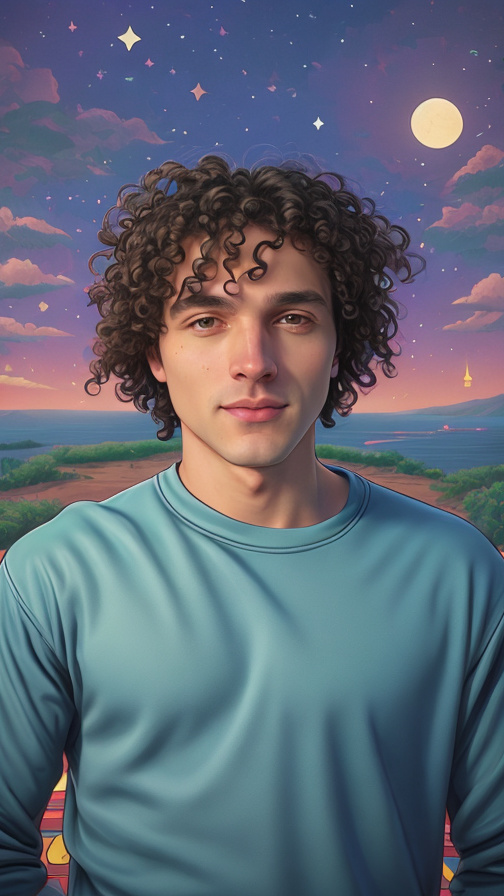
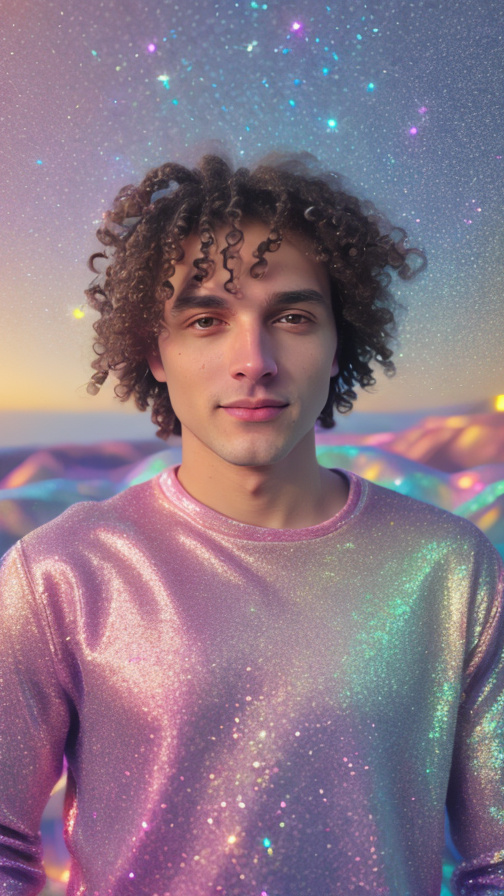
Image Reference only:
Original user image Image Reference Processed user image 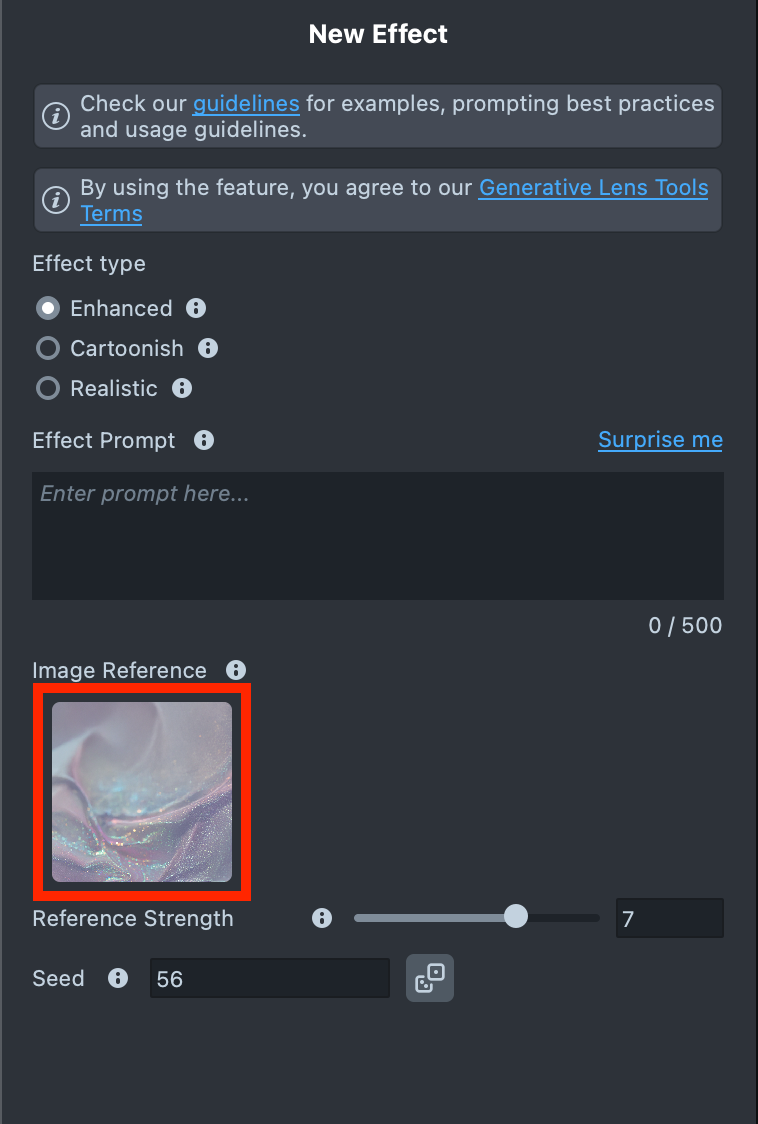
-
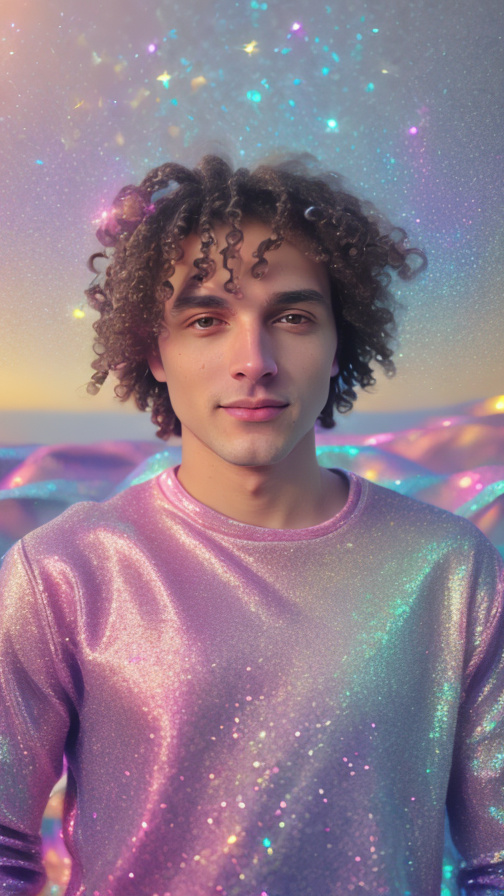
Effect Prompt + Image Reference:
Original user image Effect Prompt + Image Reference Processed user image 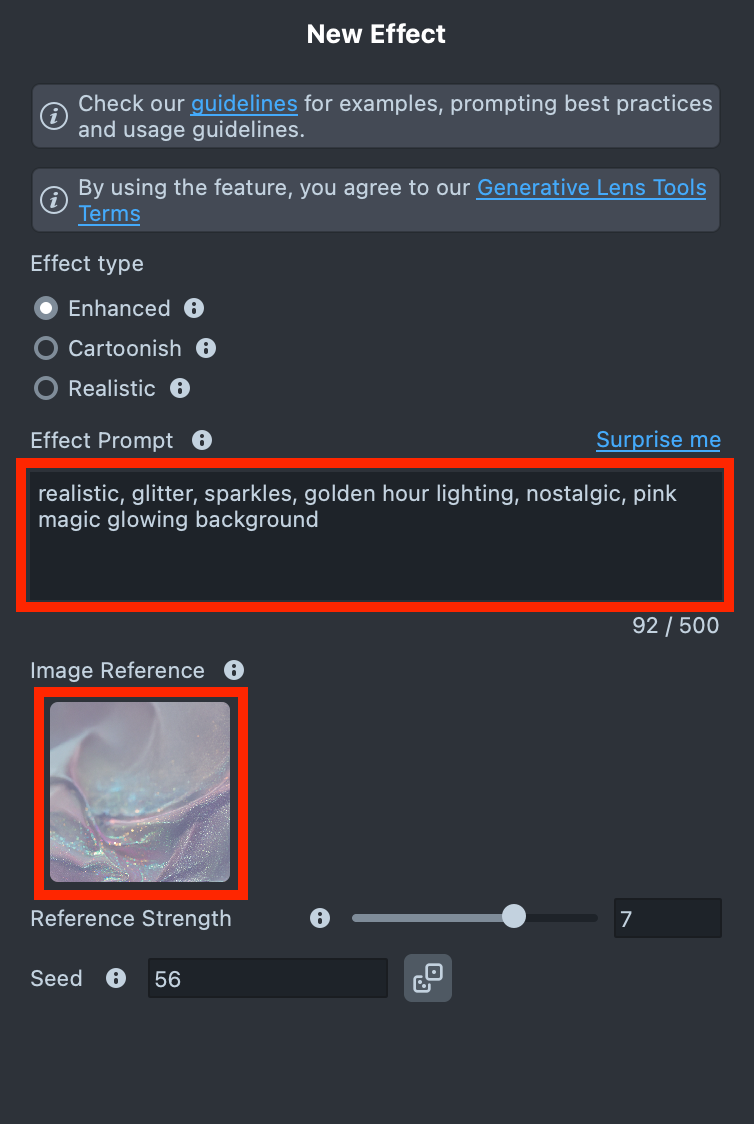
Settings
Reference Strength
Controls how strongly the effect follows the Image Reference. A higher value makes the result closer to the Image Reference.
| Image Reference | Ref. Strength = 4.0 | Ref. Strength = 7.0 | Ref. Strength = 9.0 |
|---|---|---|---|
|  |  |  |
| Image Reference | Ref. Strength = 4.0 | Ref. Strength = 7.0 | Ref. Strength = 9.0 |
|---|---|---|---|
|  |  |  |
| Image Reference | Ref. Strength = 4.0 | Ref. Strength = 7.0 | Ref. Strength = 9.0 |
|---|---|---|---|
|  |  |  |
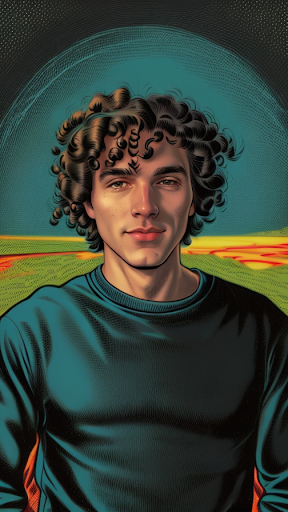
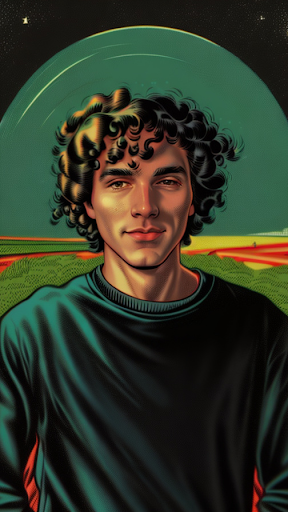
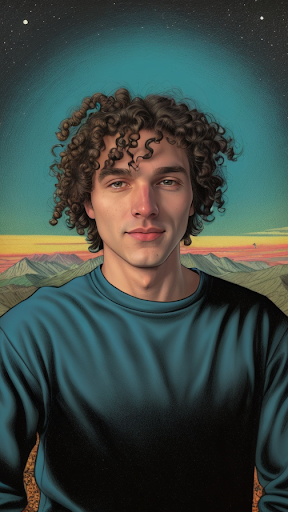
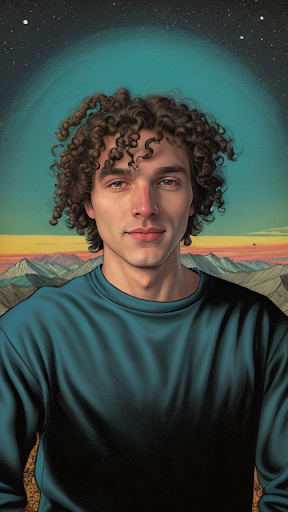
Seed
Control randomness with a seed. For optimal results, selecting the appropriate seed is often crucial. Use the same number to recreate the same look, or try different ones for new variations.
Let’s take a look at how the generation results change depending on the selected seed for the following prompt combination.
Effect Prompt: 2d art, detailed illustration, cute, soft colors, blush, shadows, ginger, sunset
Image Reference:
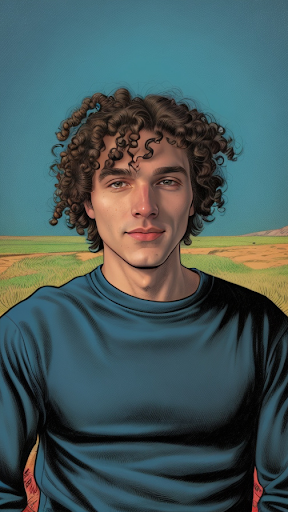
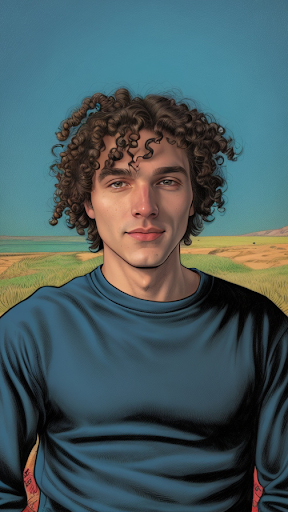
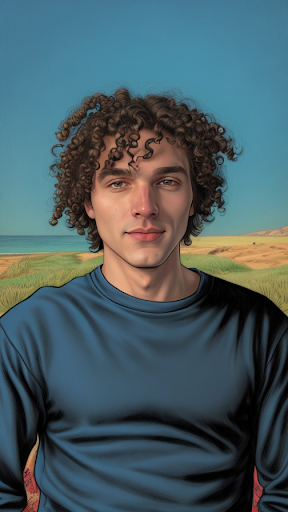
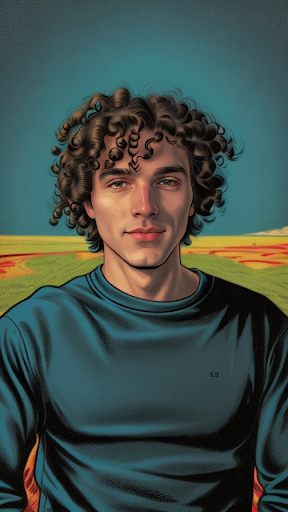
| Seed: 2570 | Seed: 32213 | Seed: 3904 | Seed: 40907 |
|---|---|---|---|
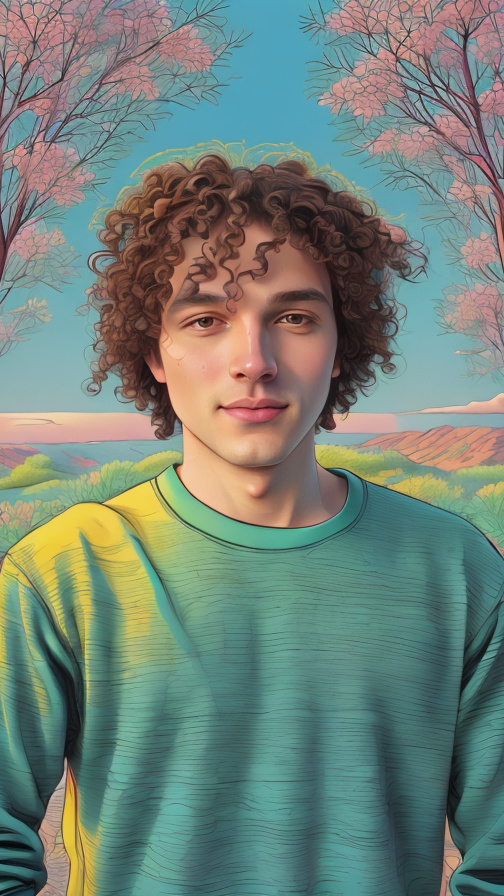 | 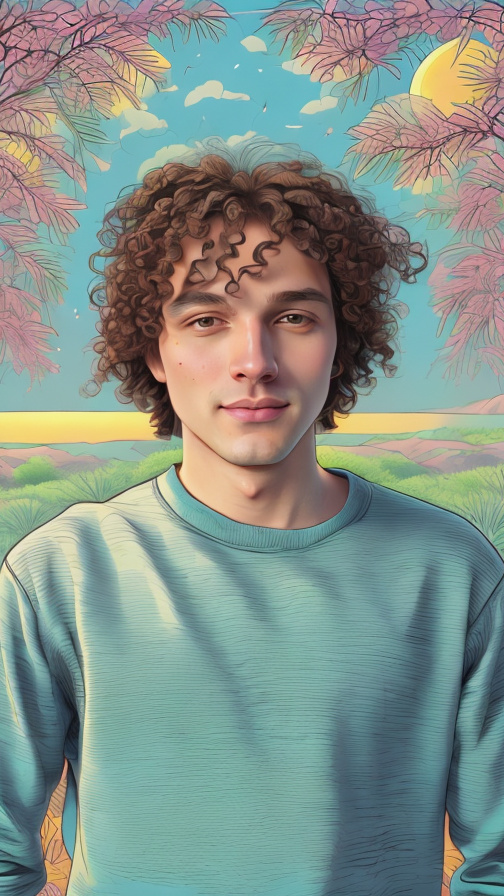 | 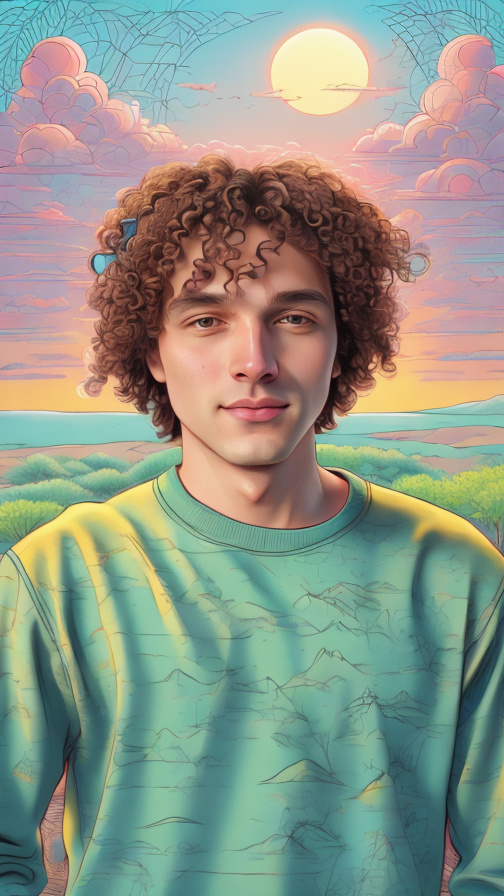 | 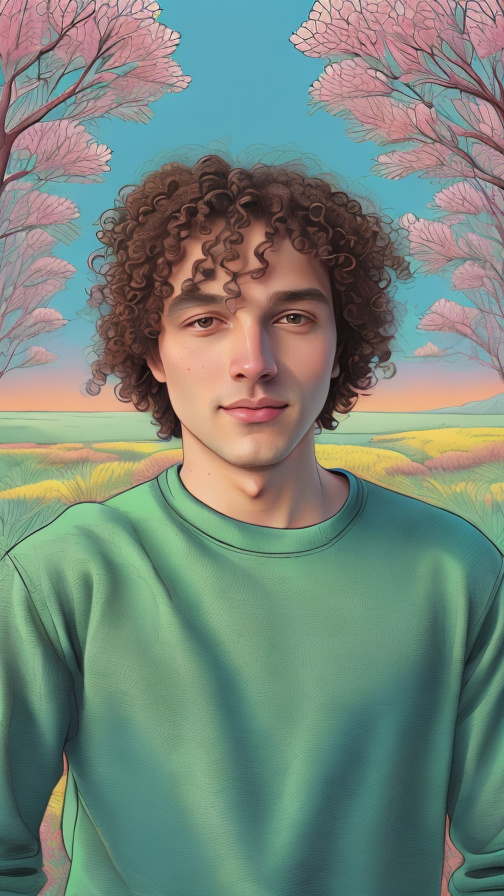 |
Cartoonish Effect Examples
| Prompt: wooden dummy doll in a cardboard box city | Prompt: black and white chalk drawing |
|---|---|
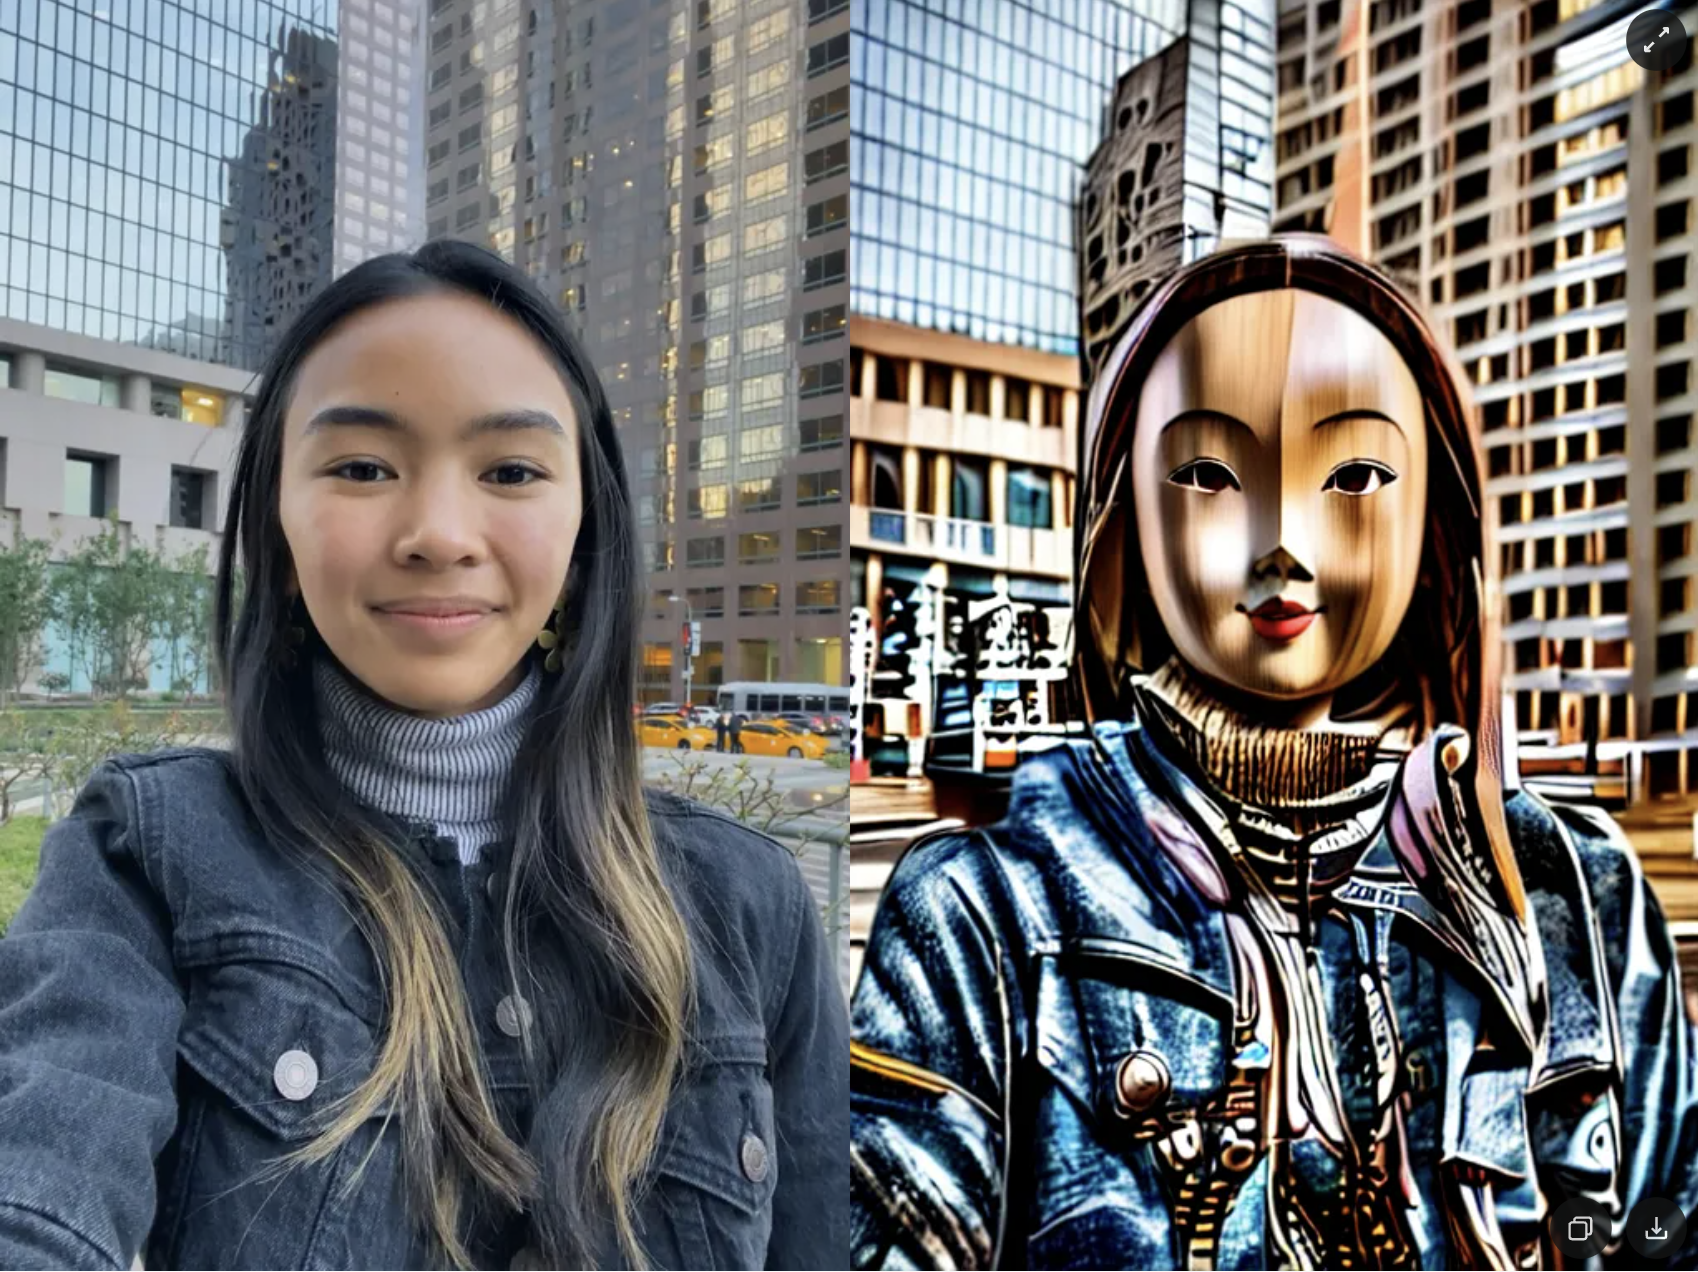 | 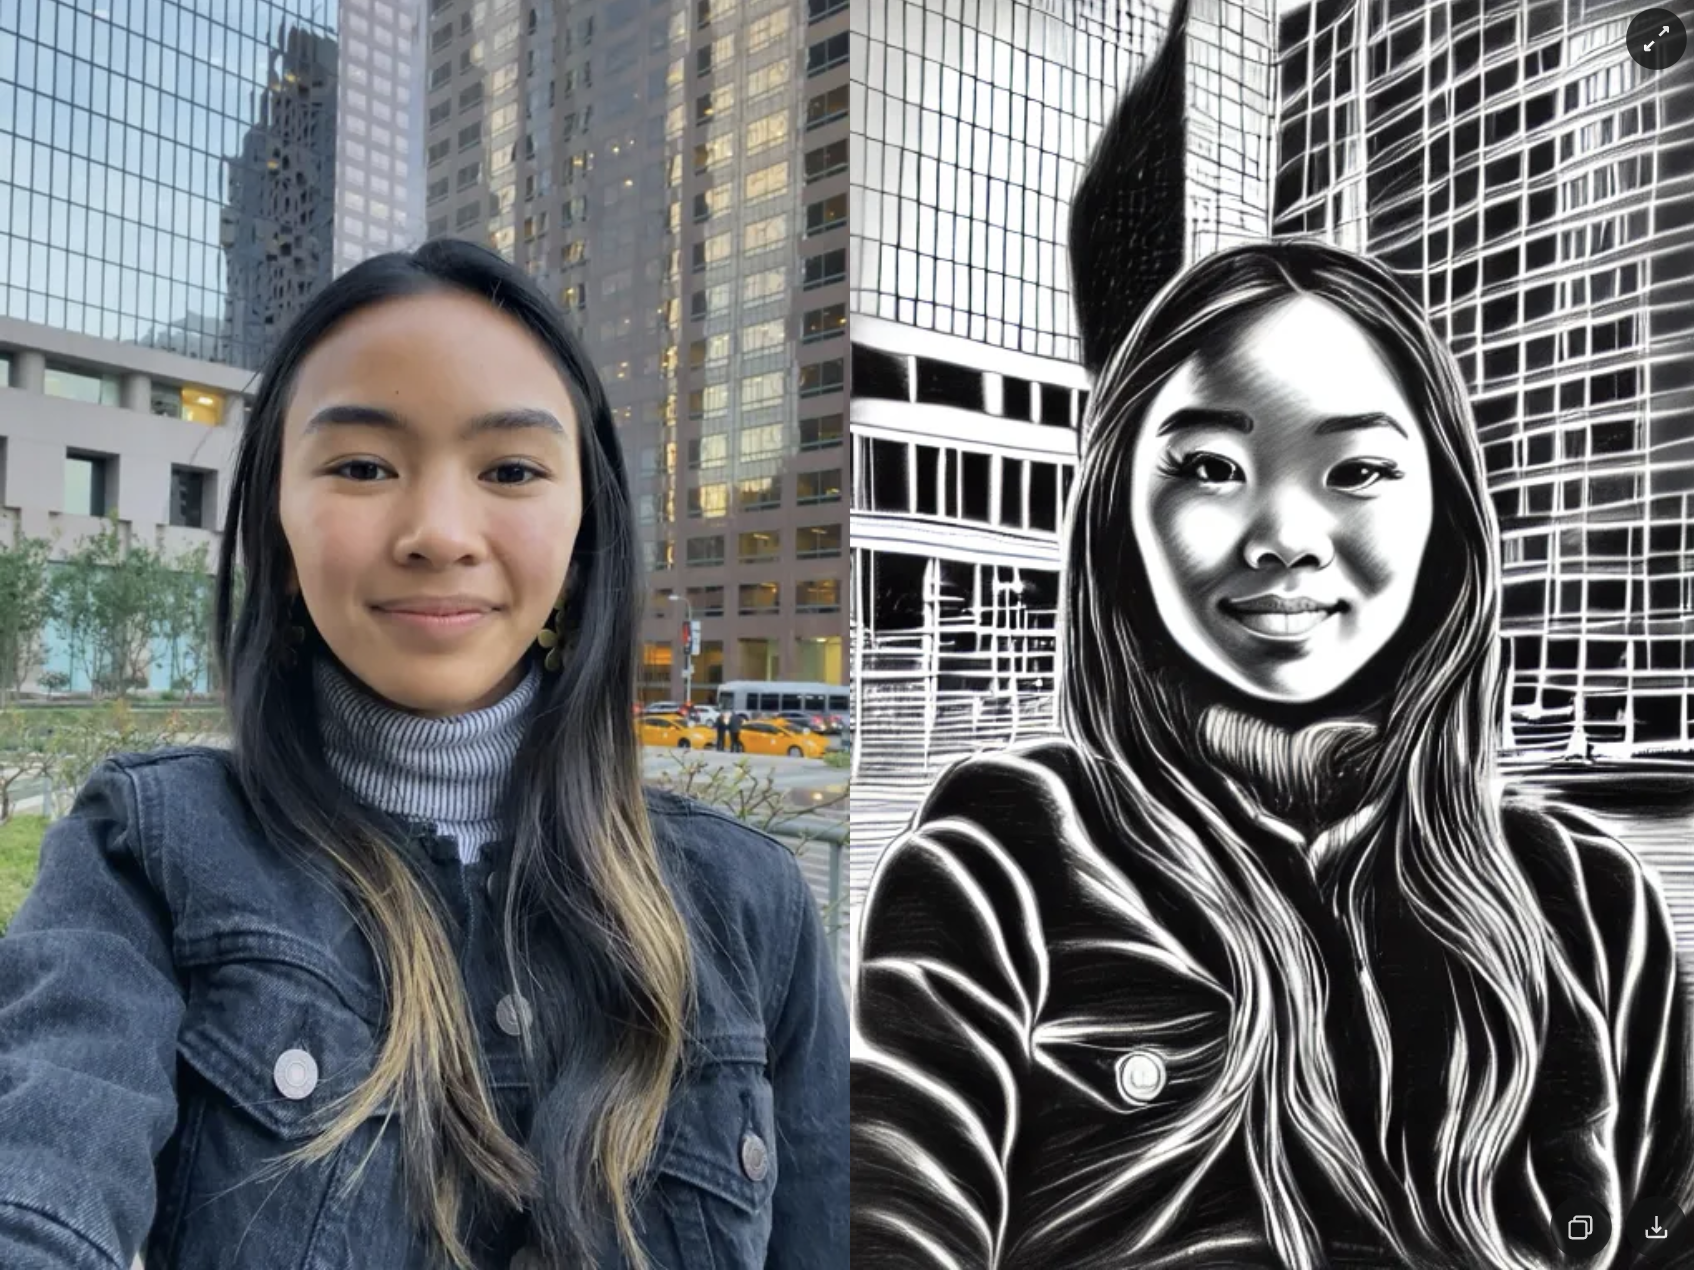 |
| Prompt: knotted handmade doll out of fabric and yarn | Prompt: curly hair, volume, curls, waves, hairdo, tiny look |
|---|---|
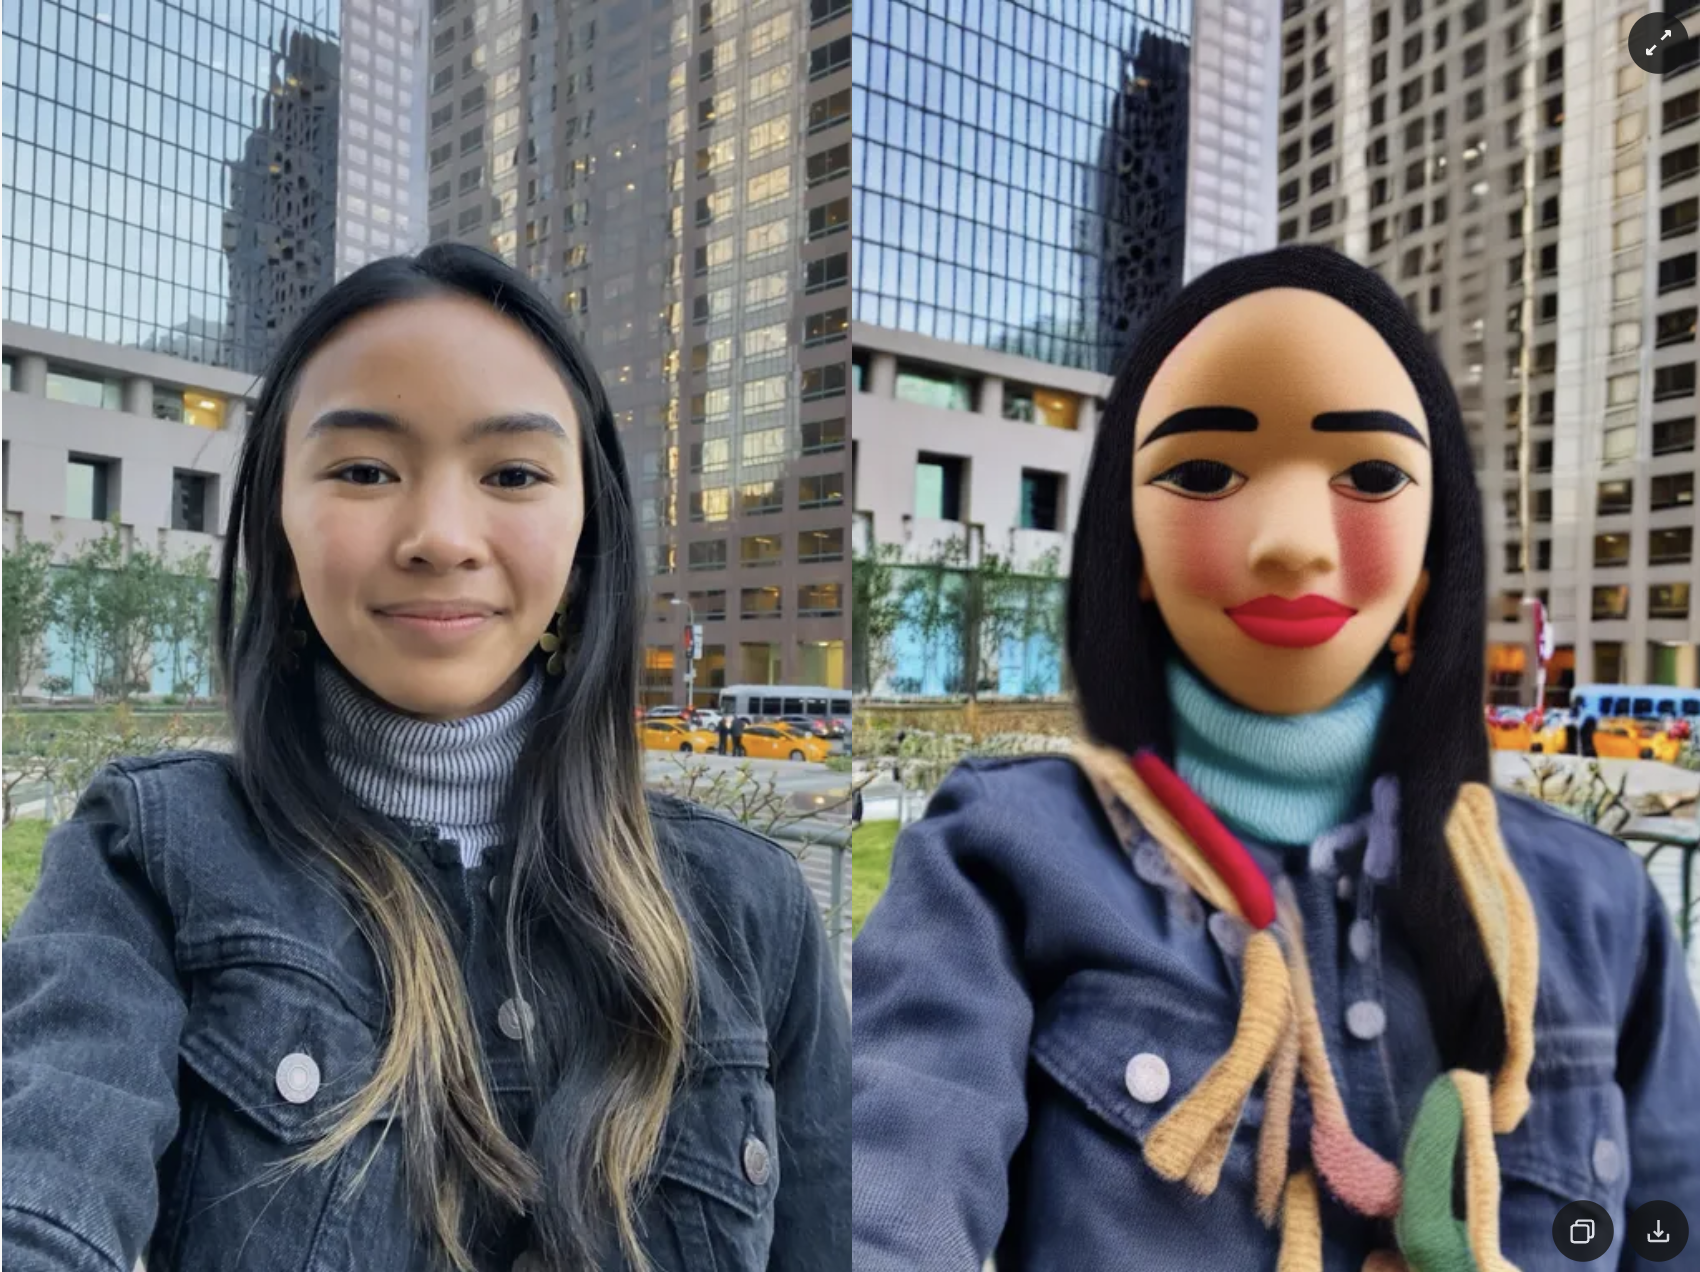 | 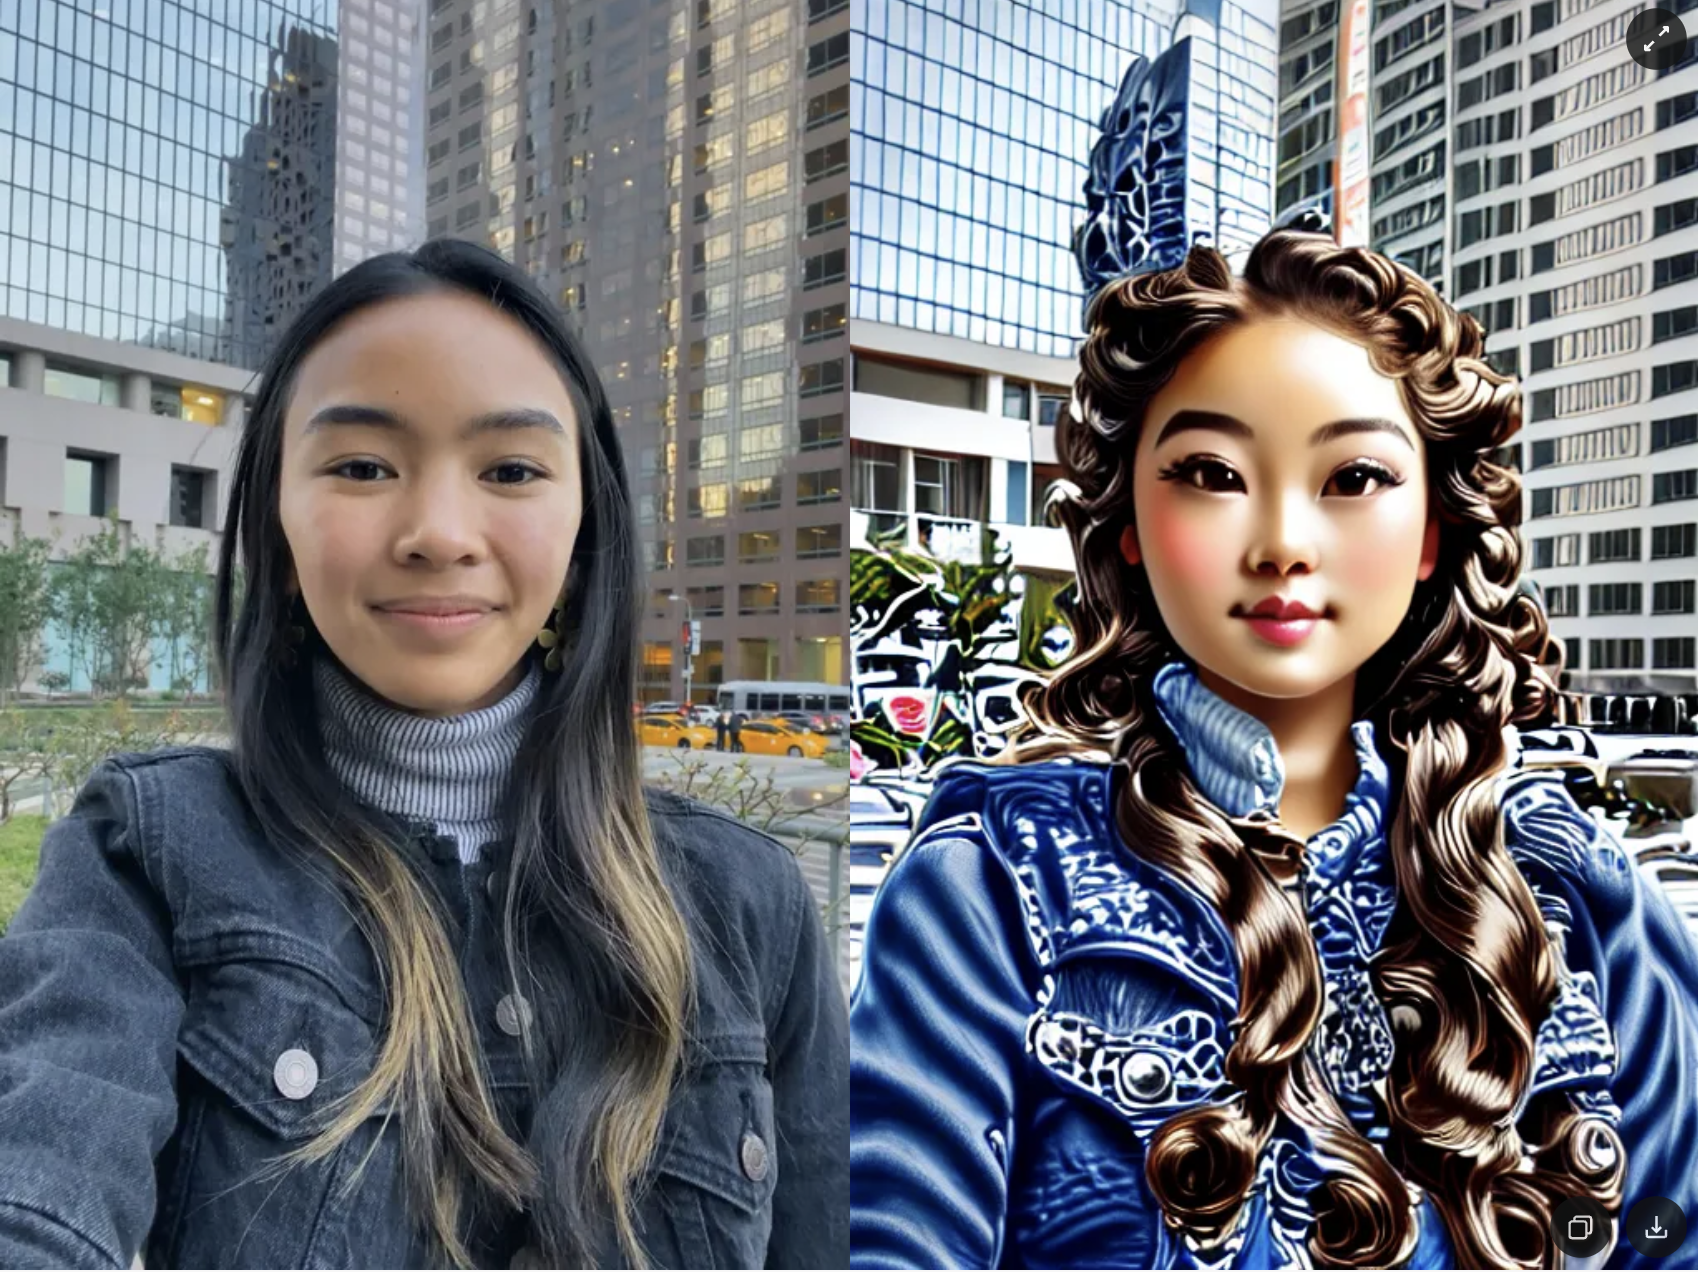 |
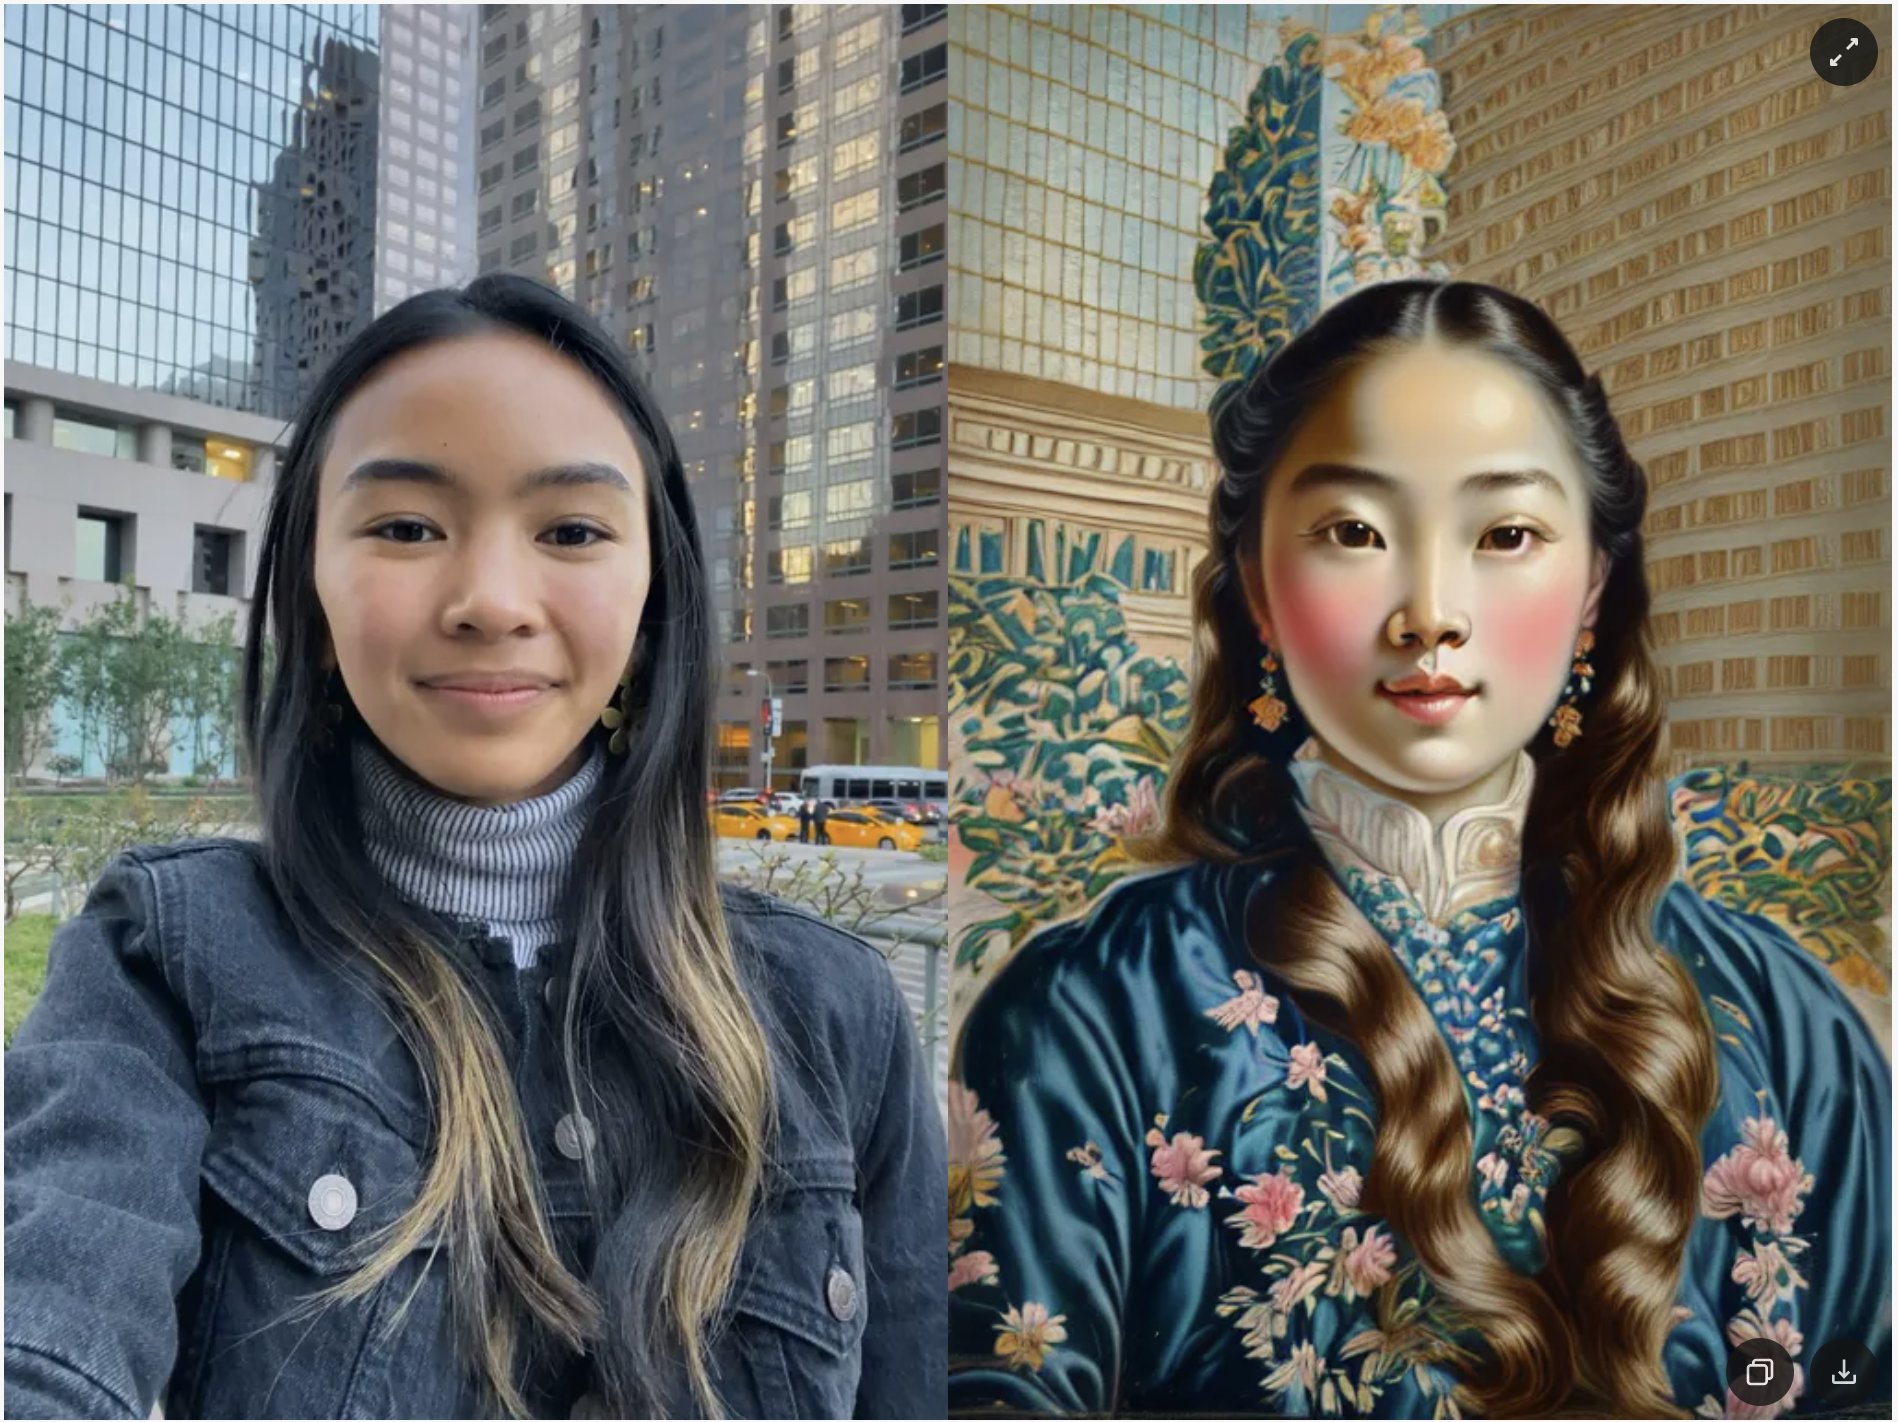
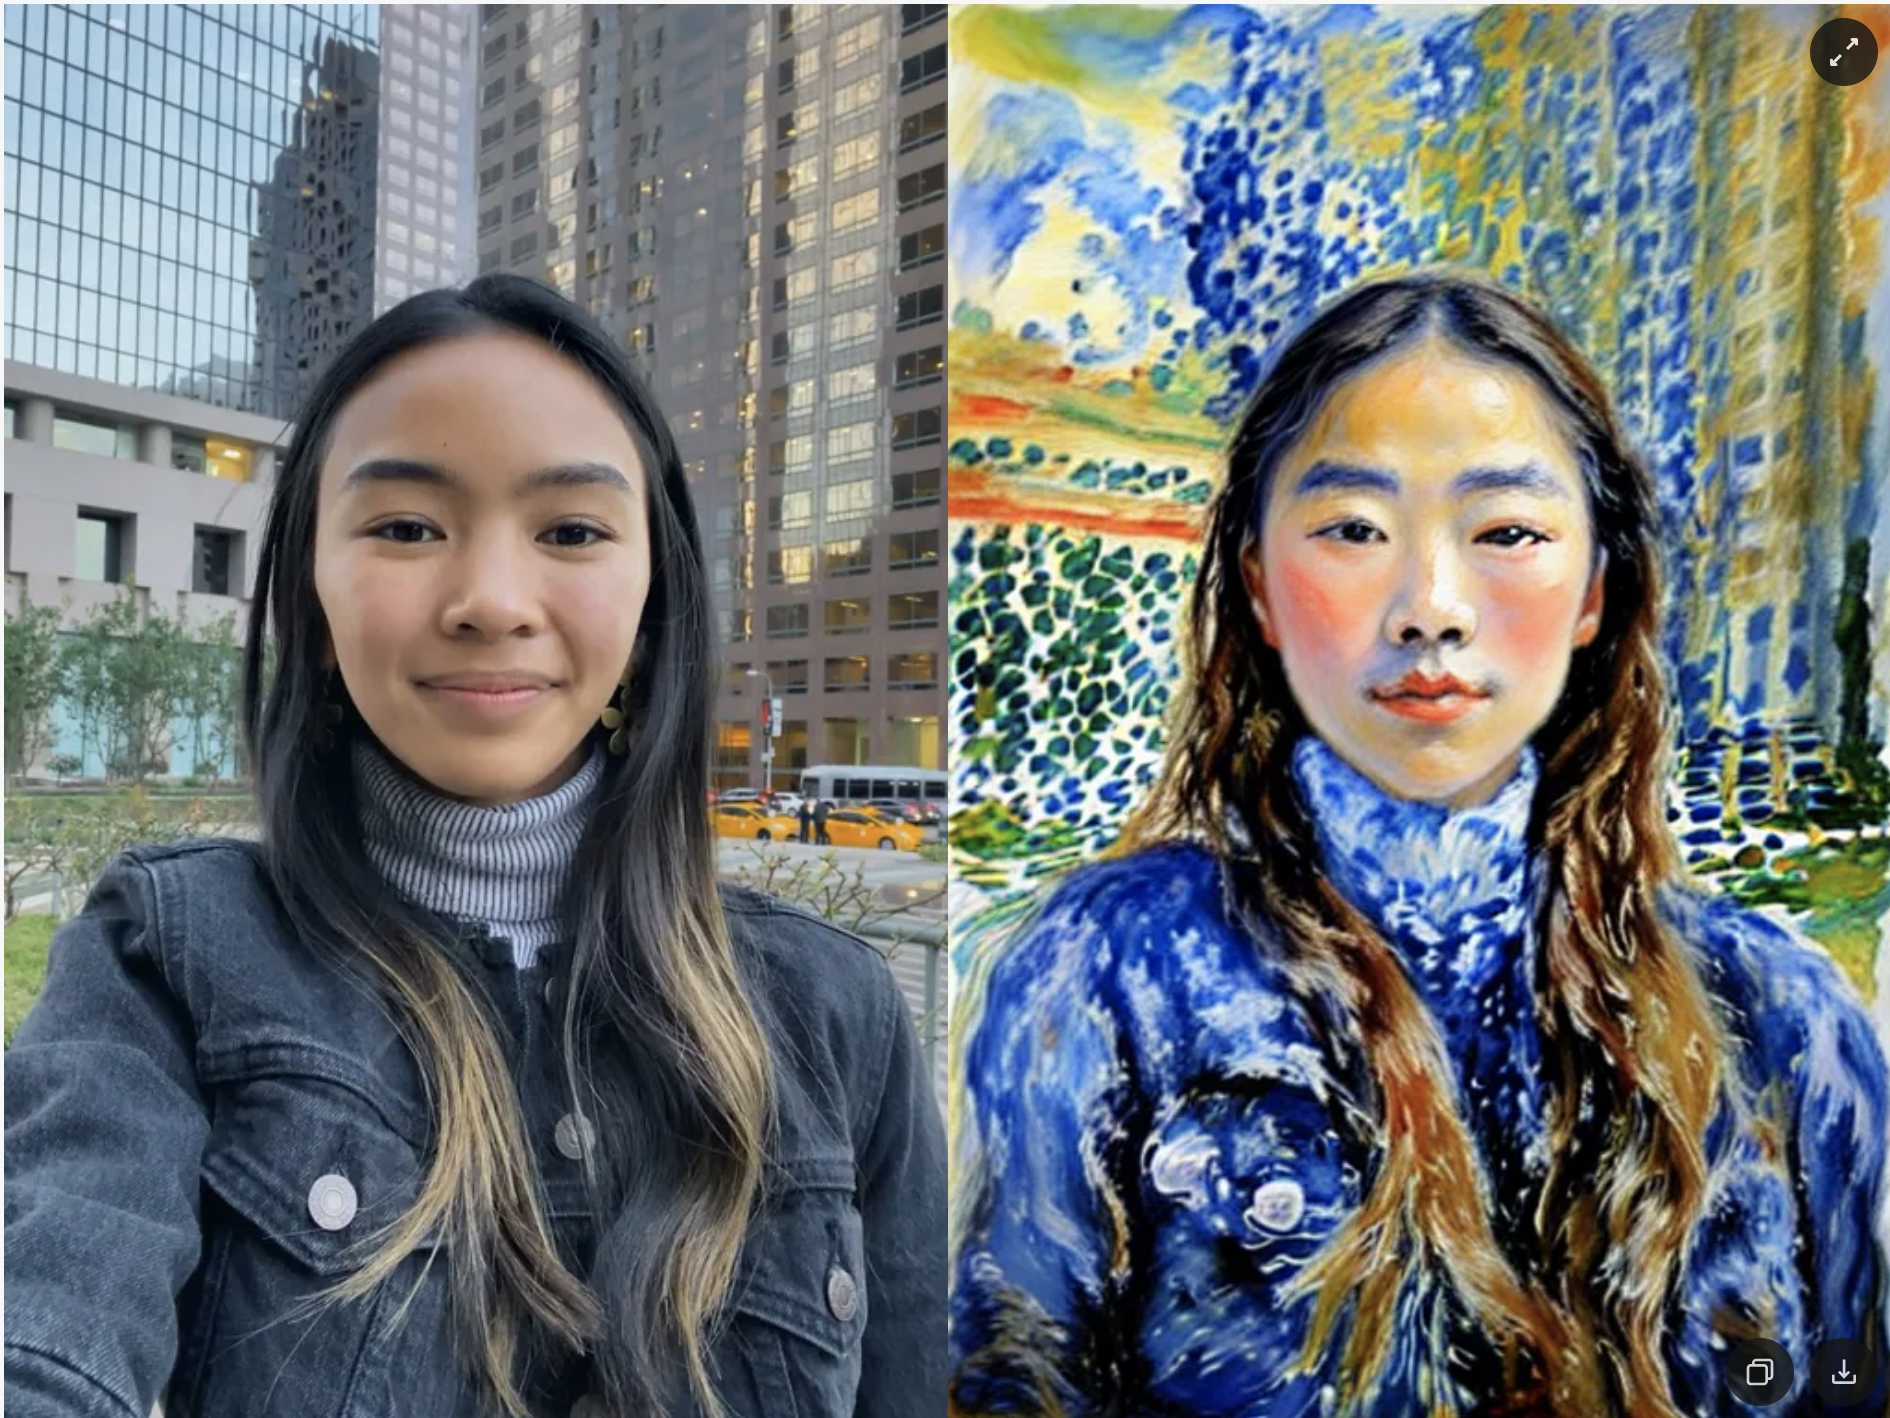
| Prompt: fine art portrait from 18 century, museum masterpiece, floral background, pastel colors | Prompt: masterpiece, face portrait painting, impressionism, watercolor, in the style of Claude Monet |
|---|---|
 |  |
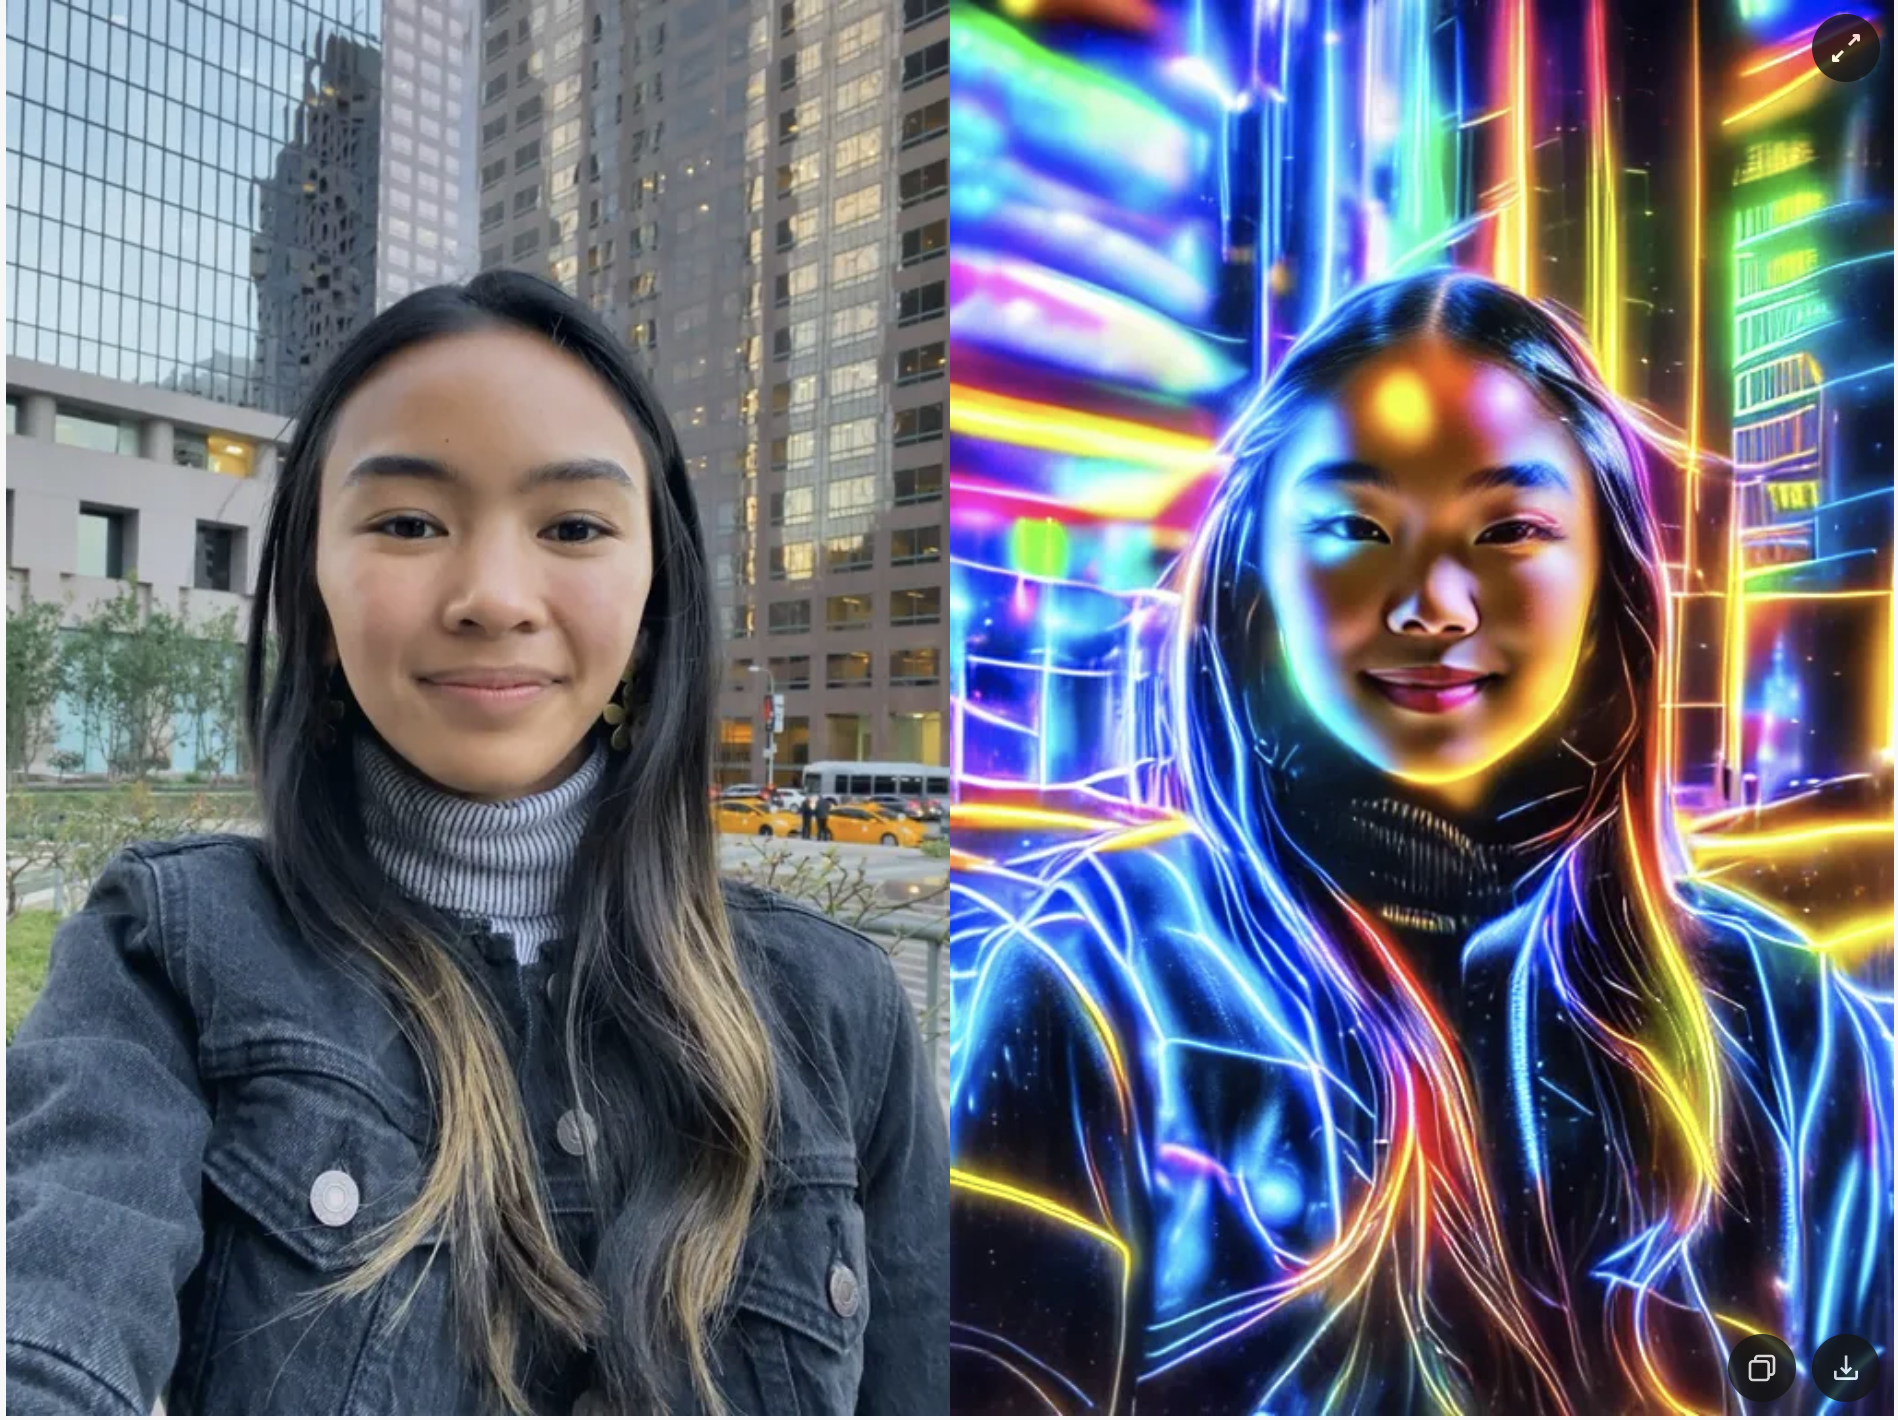
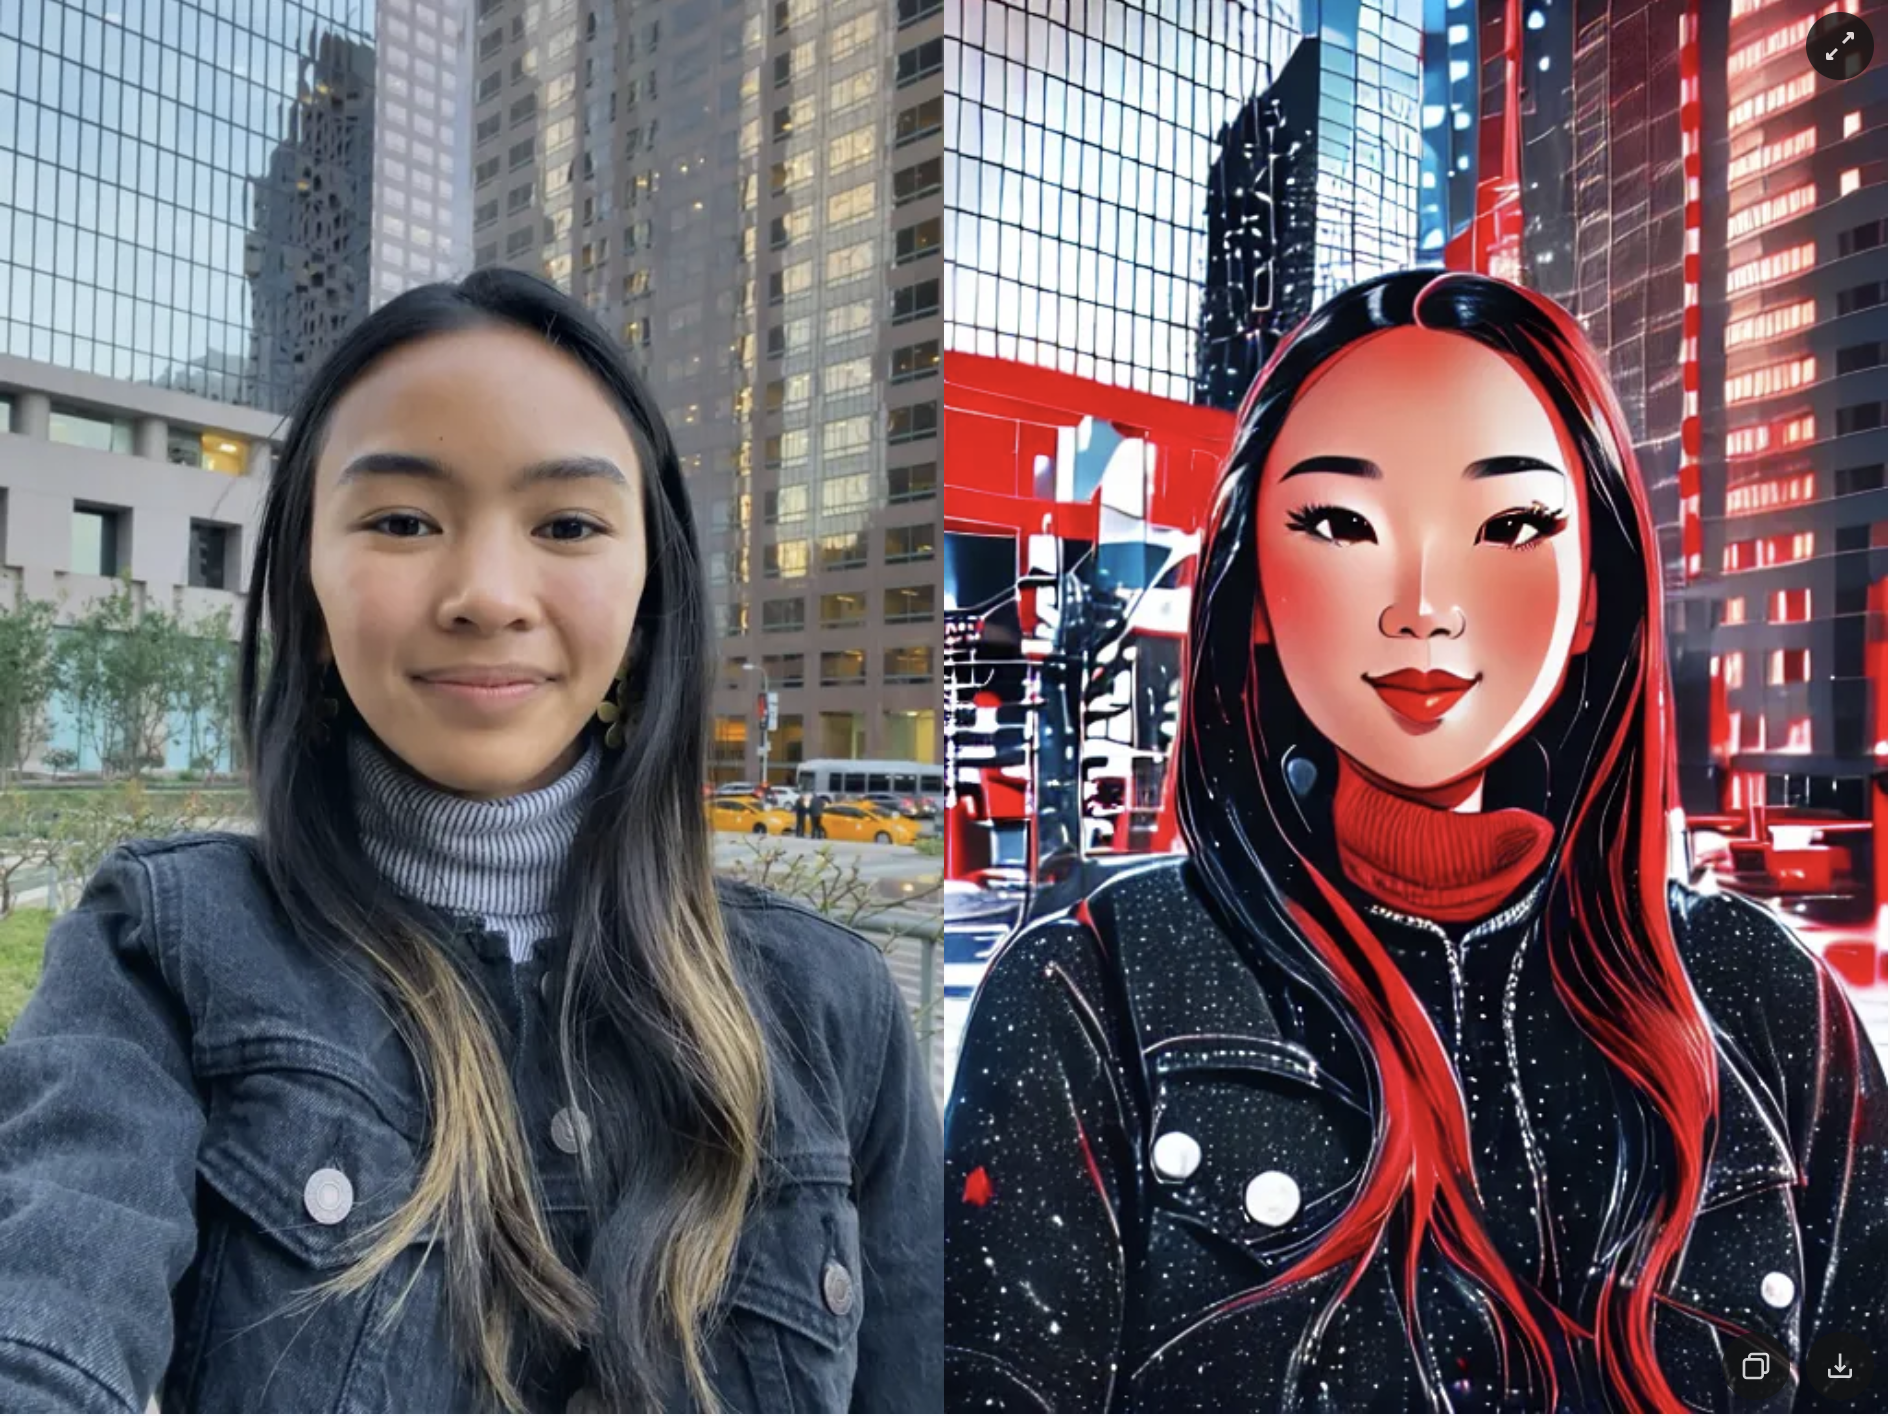
| Prompt: neon lights, long exposure of light, luminous, radiant | Prompt: cinematic red light, bokeh, cartoon face, white particles in background |
|---|---|
 |  |
Prompt Weighting
You can use special symbols in your Effect Prompt to control how much influence specific words or phrases have on the final result - emphasizing or reducing their impact as needed.
Append a word or phrase with +, -, or a weight value between 0 and 2 (1 = default) to increase or decrease its attention during generation. The following syntax is supported:
- Single words (no parentheses):
retro comic art+ - Single or multiple words (with parentheses):
retro comic (art)+,retro comic (art)-,retro (comic art)+,retro (comic art)- - Stronger emphasis with additional symbols:
retro comic (art)++ - Nested weighting:
retro (comic art+)++→ ("art" effectively receives "+++") - Explicit numeric weights:
retro (comic art)1.1,retro (comic art)1.3)1.1
Weight equivalents:
+= 1.1++= 1.1²+++= 1.1³-= 0.9--= 0.9²
For example, starting with the prompt retro comic art, let’s see how the result changes when we increase or decrease the model’s attention to the word retro.
Using - to reduce retroness:
| retro comic art | retro- comic art | retro-- comic art | retro--- comic art |
|---|---|---|---|
 |  |  |  |
Using + to increase retroness:
It’s not recommended to use more than three plus signs, as this may produce broken visuals.
| retro+ comic art | retro+++ comic art | retro++++ comic art | retro+++++ comic art |
|---|---|---|---|
 |  |  |  |
You can also change the balance between different parts of a prompt:
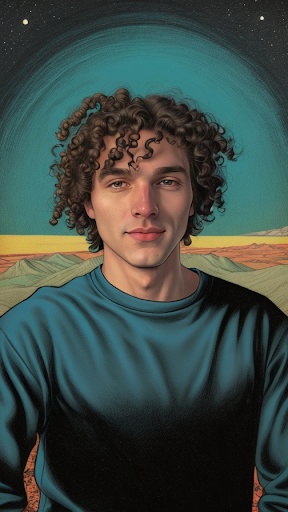
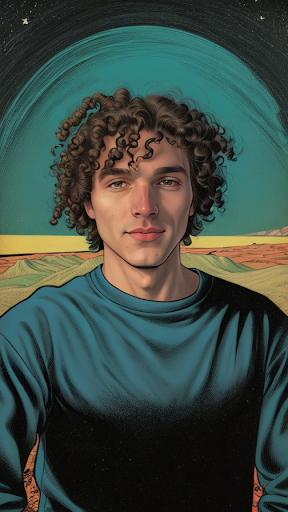
| retro comic art, mountains | retro comic art, mountains+ | retro comic art, mountains++ | retro comic art, mountains+++ |
|---|---|---|---|
 |  | 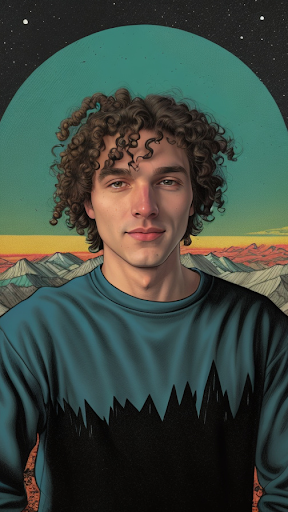 | 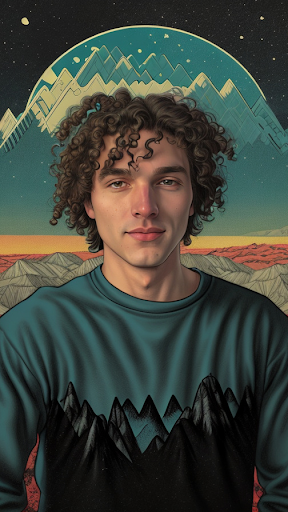 |
Or, alternatively, with more art:
| retro comic art+, mountains | retro comic art++, mountains | retro comic art+++, mountains | retro comic art++++, mountains |
|---|---|---|---|
 |  |  |  |
Single or multiple words with parentheses:
| retro comic (art)+ | retro comic (art)++ | retro (comic art)+ | retro (comic art)- |
|---|---|---|---|
+.png) | ++.png) | +.png) | -.png) |
Nesting:
| retro (comic art+)++ | (retro)+ comic art++ | (retro+ comic)+++ art |
|---|---|---|
++.png) | +_comic_art++.png) | +++_art.png) |
With explicit numbers:
| retro (comic art)1.1 | retro (comic (art)1.3)1.1 |
|---|---|
1.1.png) | 1.3)1.1.png) |
| retro (comic (art)1.3)1.1, mountains, (clouds)1.3 | (no explicit numbers): retro comic art, mountains, clouds |
|---|---|
1.3)1.1_mountains_(clouds)1.3.png) | 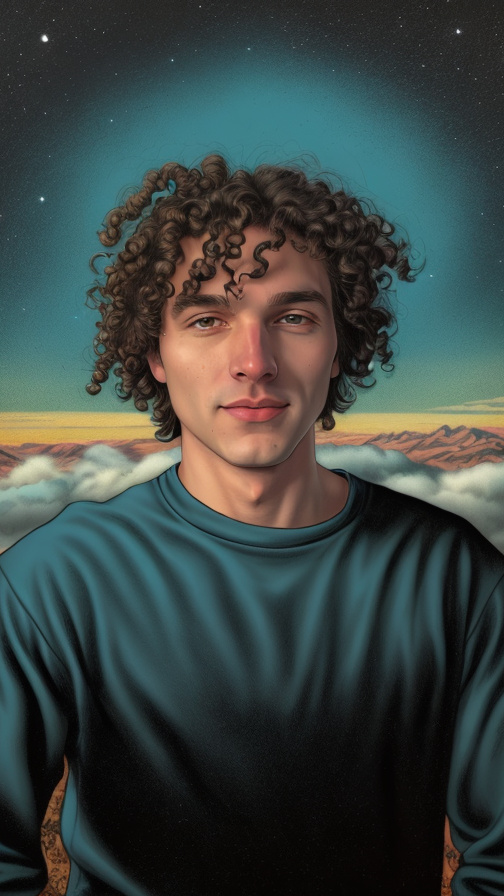 |