Turn Based Player Info
Turn Based Player Info is a component that helps display a specific player in a multiplayer Turn Based Lens session. It can be used to load a player's 3D Bitmoji, show their Bitmoji sticker texture, and render their display name.
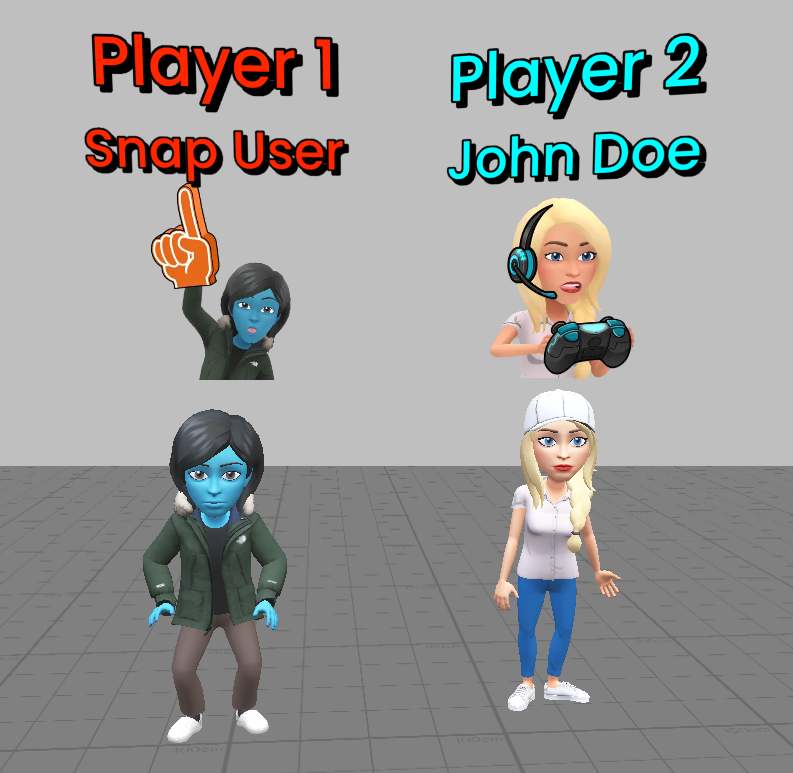
Each Turn Based Player Info component is meant to represent a single player in the turn based session. For example, you might want to display the Bitmoji for the current player in one place, and the other player's Bitmoji in another. Or, your design could call for the first player always being in one spot, while the second player is in another. This component lets you choose a type of player to target and easily visualize them in your lens without writing any code.
Setup
-
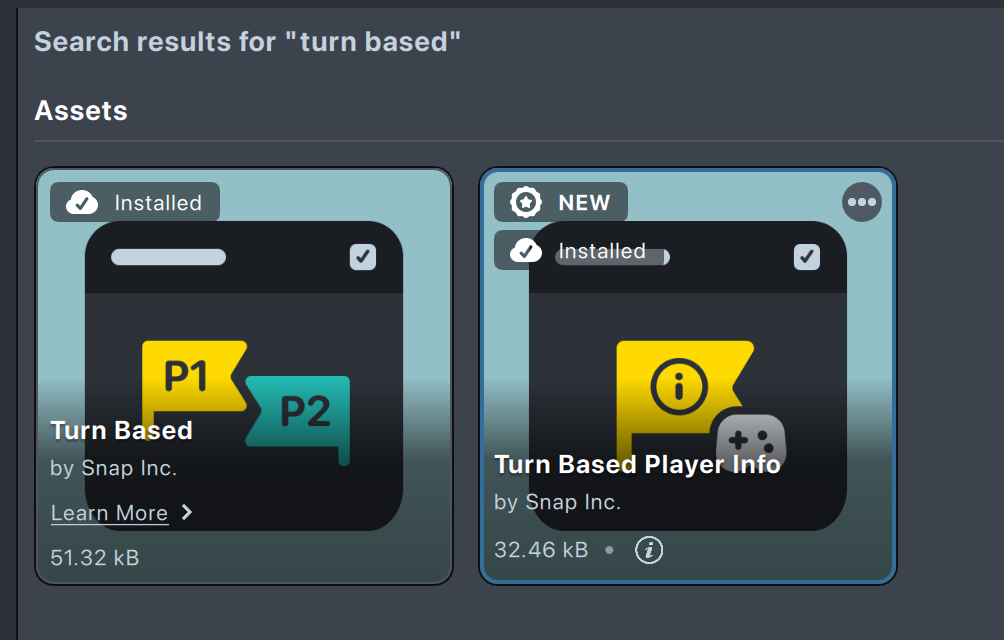
Make sure that Turn Based Player Info component is installed. You can find it in the Asset Library by searching for "Turn Based Player Info".
-
Once Turn Based Player Info component is installed, make sure it's in your project. If you don't see it present in the Asset Browser, click on the
+button, search for "Turn Based Player Info", and click to add it to your project.
Make sure that Turn Based component is present in the project. See Adding Turn Based component to your Lens for instructions on how to add it.
Configuring Turn Based Player Info
-
Add a
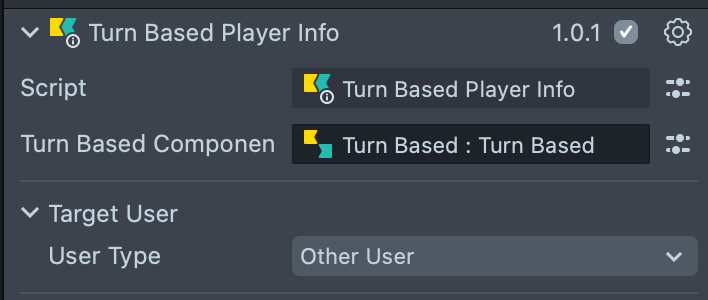
Turn Based Player Infocomponent to your scene. -
Set the
Turn Based Componentfield to the Turn Based component in your scene. See Adding Turn Based component to your Lens for help. -
Under
Target User, select the type of user to target. This is the user that will be rendered by this component.
| User Type | Description |
|---|---|
| Current User | Represents the current user of the lens. |
| Other User | Represents the other user in the turn based session. |
| User 1 | Represents the user who originally created the turn based session. This may or may not be the current user. |
| User 2 | Represents the user who joined the turn based session which was sent by User 1. This may or may not be the current user. |
| None | No user. This is useful if you will interact with the component exclusively through the scripting API, and don't want any user to be rendered by default. |
Using Bitmoji 3D
-
Check that
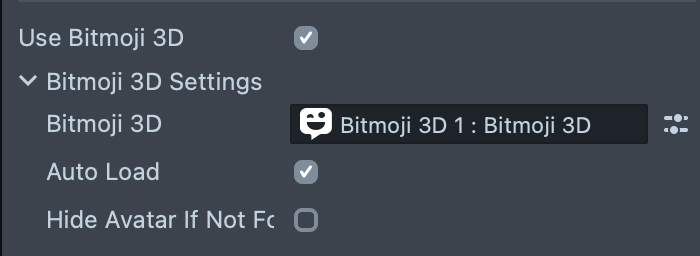
Use Bitmoji 3Dis enabled on theTurn Based Player Infocomponent. If you don't want to use Bitmoji 3D, you should disable this option. -
Make sure that a Bitmoji 3D component is present in the lens. See Adding Bitmoji 3D component to your Lens for instructions on how to add it.
-
In the
Bitmoji 3Dfield of theTurn Based Player Infocomponent, select the Bitmoji 3D component that you want to use. This will be the component that renders the Bitmoji 3D avatar for the user. If this is left empty, the component will attempt to find a Bitmoji 3D component on the same SceneObject.
Make sure that on the Bitmoji 3D component, Bitmoji Type is set to None, or Auto Download is disabled. Otherwise, the Bitmoji 3D component will try to download its own avatar, which will conflict with the Turn Based Player Info component.
Auto Load can be enabled to automatically load the Bitmoji 3D avatar when the component is initialized. If you want to manually control when the avatar is loaded, you can disable this option and manually load it through the component's scripting API instead.
Hide Avatar If Not Found can be enabled to disable the Bitmoji 3D's Scene Object if the target user doesn't exist (e.g. trying to display the second user on the first turn of the game, before they have joined).
Using Bitmoji Sticker
-
Check that
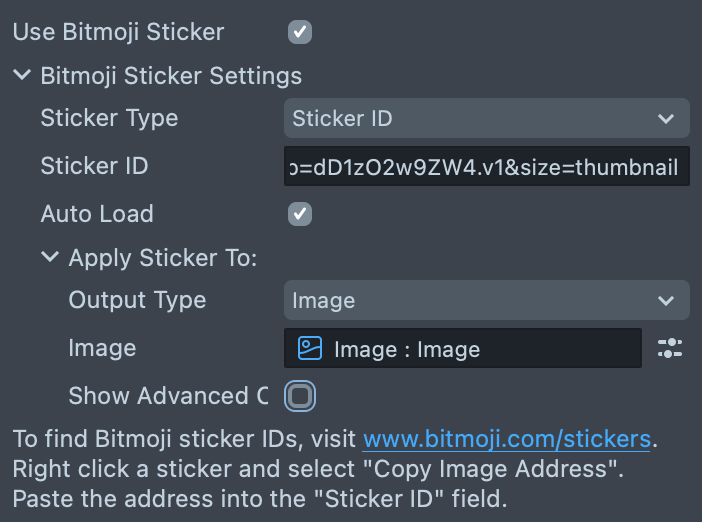
Use Bitmoji Stickeris enabled on theTurn Based Player Infocomponent. If you don't want to use Bitmoji Sticker, you should disable this option. -
Set
Sticker Typeto the desired sticker type.
| Sticker Type | Description |
|---|---|
| Selfie | The default selfie sticker will be used for the user's Bitmoji. |
| Sticker ID | A custom Bitmoji sticker id can be entered to specify the exact sticker to use. |
-
If you selected
Sticker ID, enter the desired sticker id in theSticker IDfield. This will be the id of the Bitmoji sticker that will be rendered for the user. See Finding Bitmoji Sticker IDs for instructions on how to find Bitmoji sticker IDs. If this is left blank, the default selfie sticker will be used. -
Choose an
Output Typeto apply the sticker texture to.
| Output Type | Description |
|---|---|
| Image | The texture will be applied to an Image component. |
| MeshVisual | The texture will be applied to a MaterialMeshVisual component. |
| Material | The texture will be applied to a Material asset. |
| None | No action will be taken. |
- Based on the selected output type, you will need to configure the corresponding component or asset in the next field.
Using Display Name Text
-
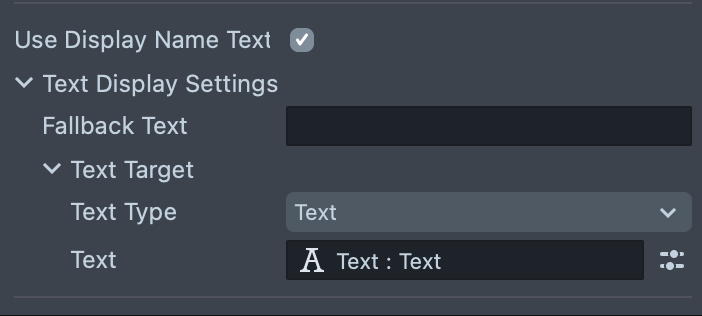
Check that
Use Display Name Textis enabled on theTurn Based Player Infocomponent. If you don't want to use display name text, you should disable this option. -
In the
Text Typedropdown, select the type of text component you want to use for the display name.
| Text Type | Description |
|---|---|
| Text | A Text component will be used. |
| Text3D | A Text3D component will be used. |
-
Based on the selected text type, you will need to configure the corresponding component in the next field. If this is left blank, the component will attempt to find a Text or Text3D component on the same SceneObject.
-
Optionally, you can enter some text in the
Fallback Textfield. This string will be displayed if the target user is not available.
Component Scripting API
TurnBasedPlayerInfo Component
| Method | Description |
|---|---|
getTargetUser(): Promise<SnapchatUser | null | undefined> | Retrieves the target user configured in the inspector settings. May return null for current user, or undefined if a non-valid user is configured. |
loadUserFromSettings(): Promise<void> | Loads the user from the settings configured in the inspector, and updates visuals to match. |
setSnapchatUser(user: SnapchatUser | null | undefined): Promise<void> | Updates the target user to the specified Snapchat user, overriding the inspector setting. Updates visuals to match. |
loadSnapchatUser(user: SnapchatUser | null | undefined): Promise<void> | Loads the Snapchat user and updates Bitmoji and text display. Does not change the inspector setting. |
loadUserByIndex(index: number): Promise<void> | Loads a user by their index (0-based). |
loadUserByType(userType: TurnBasedUserType): Promise<void> | Loads a user by type. |
TurnBasedUserType Enum
| Name | Value | Description |
|---|---|---|
None | "None" | Represents no user. Used when no user is needed or available. |
Current | "Current" | The current user in the session. |
Other | "Other" | The other user in the turn-based session. |
User1 | "User1" | Represents the first user in the turn-based session (the user that originally started the session). |
User2 | "User2" | Represents the second user in the turn-based session (the user that responded to the first user's turn). |
Further Instructions
Adding Turn Based component to your Lens
-
Make sure that Turn Based component is installed. You can find it in the Asset Library by searching for "Turn Based".
-
Once Turn Based component is installed, make sure it's in your project. If you don't see it present in the Asset Browser, click on the
+button, search for "Turn Based", and click to add it to your project. -
Once Turn Based component is in your project, make sure it's added to the scene. You can click and drag the Turn Based component into your scene hierarchy to create one, or create a new SceneObject and add the Turn Based component to it.
Adding Bitmoji 3D Component to your Lens
-
Make sure that Bitmoji 3D component is installed. You can find it in the Asset Library by searching for "Bitmoji 3D".
-
Once Bitmoji 3D component is installed, make sure it's in your project. If you don't see it present in the Asset Browser, click on the
+button, search for "Bitmoji 3D", and click to add it to your project. -
Once Bitmoji 3D component is in your project, make sure it's added to the scene. You can click and drag the Bitmoji 3D component into your scene hierarchy to create one, or create a new SceneObject and add the Bitmoji 3D component to it.
Finding Bitmoji Sticker IDs
To find Bitmoji sticker IDs through the sticker website, visit www.bitmoji.com/stickers. Right click a sticker and select "Copy Image Address". Paste the address into the "Sticker ID" field.
You can also find Bitmoji sticker IDs through the Bitmoji extension for Chrome. Install the extension, open it, right click a sticker, and select "Copy Image Address". Paste the address into the "Sticker ID" field.